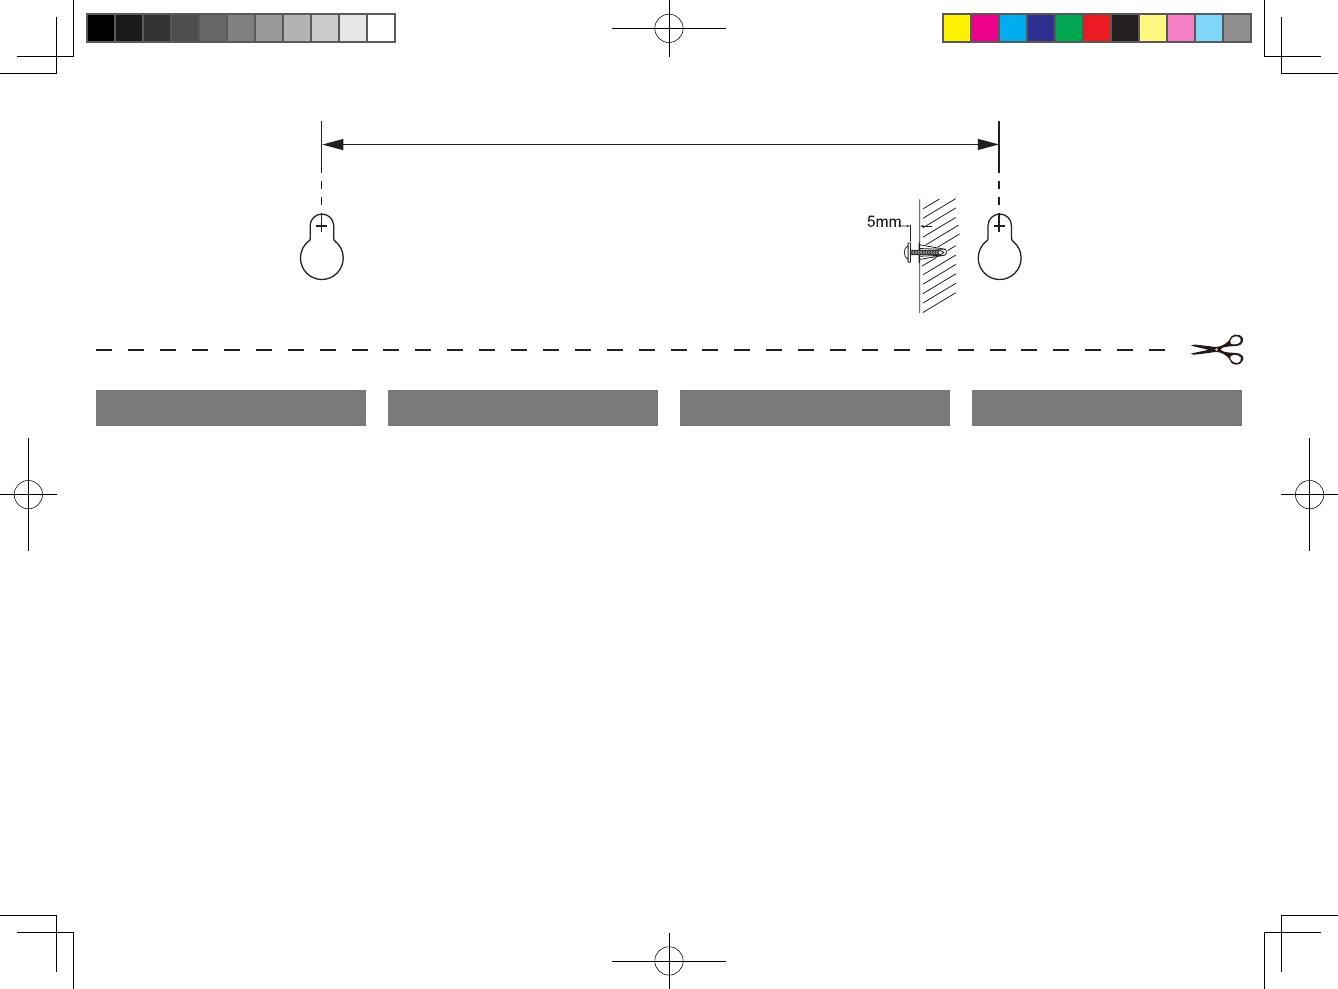
120
mm
Wall mounting instructions
Drill holes on wall at hole
positions marked.*
ENGLISH
Note for mounting
To secure the mounting on wall, concrete
wall is required.
Use screws to mount the main unit on
the wall
1. Use this sheet as a template. Mark the
position where you want to hang the
unit on the wall (as shown above) and
then drill two 6mm diameter holes.
2. Secure the 2 dowels and 2 screws
(both supplied) in the holes
respectively. Leave the screws 5mm
proud of the wall.
3. Hang the unit on the fastening screws.
DEUTSCH
Hinweis zur Montage
Um eine sichere Befestigung zu
gewährleisten, sollte das Gerät an einer
Betonwand angebracht werden.
Befestigen Sie die Haupteinheit mithilfe
von Schrauben an der Wand.
1. Verwenden Sie dieses Blatt als Vorlage.
Markieren Sie die Stelle, an der Sie
das Gerät an der Wand befestigen
möchten (wie oben abgebildet), und
bohren Sie anschließend zwei Löcher
mit einem Durchmesser von 6 mm.
2. Befestigen Sie jeweils einen Dübel und
eine Schraube (beide mitgeliefert)
in den beiden Löchern. Lassen Sie
die Schrauben 5 mm aus der Wand
hervorstehen.
3. Hängen Sie das Gerät mithilfe der
Befestigungsschrauben an die Wand.
* Anweisungen zur Wandmontage
Bohren Sie an den markierten Stellen
Löcher in die Wand.
ESPAÑOL
Nota para el montaje
Para garantizar un montaje seguro, la pared
debe ser de cemento.
Utilice tornillos para montar la unidad
principal en la pared
1. Utilice esta página como plantilla.
Marque la posición en la que desea
colgar la unidad en la pared (como
se muestra en la imagen anterior) y
perfore oricios de 6mm de diámetro.
2. Fije los 2 tacos y 2 tornillos (ambos
incluidos) respectivamente en los
agujeros. Los tornillos deben sobresalir
5mm de la pared.
3. Cuelgue la unidad en los tornillos de
sujeción.
* Instrucciones de montaje en pared
Perfore agujeros en la pared en la
posición deseada
SUOMI
Kiinnityshuomautus
Kiinnittäminen seinälle edellyttää
betoniseinää.
Kiinnitä päälaite seinään ruuveilla.
1. Käytä tätä sivua pohjana. Merkitse
seinään paikka, johon haluat laitteen
kiinnittää (ks. kuva), ja poraa sitten kaksi
halkaisijaltaan 6 mm:n reikää.
2. Kiinnitä 2 kiinnitystappia ja 2 ruuvia
(toimitetaan laitteen mukana) reikiin.
Ruuvien on oltava 5 mm koholla
seinästä.
3. Ripusta laite kiinnitysruuveihin.
* Seinäkiinnitysohjeet
Poraa seinään reiät merkittyihin kohtiin.
