Yamaha LS9 Ohjekirja

Tyyppi
Ohjekirja

Tämä käsikirja sopii myös

LS9 firmware V1.1 contains the following changes from V1.0.
The SCENE PLAYBACK LINK screen has been added.
This allows you to specify linking so that a specific
audio file from USB memory is played back when you
recall a certain scene. For details, refer to “Linking
scene recall with audio file playback.
DIRECT PLAY has been added as a function that can
be assigned to a user-defined key. When you press a
user-defined key to which this function is assigned, the
specified audio file will begin playing. The song will
play from the beginning each time you press the key.
The audio file to be played can be specified in the
PARAMETER 2 field of the USER DEFINED KEY
SETUP popup window.
•You can now switch between the song title and file
name in the TITLE LIST screen. Move the cursor to the
SONG TITLE/FILE NAME buttons and press the
[ENTER] key to switch the display.
LS9 V1.1 Supplementary Manual
Changes in V1.1
The audio file to be played must be saved in the SONGS folder
within the YPE folder. Please note that you won’t be able to specify
a file that is in the root directory or another folder. When you exe-
cute playback, the path in the TITLE LIST screen will change to
\YPE\SONGS\.
•You can’t play back during recording or in record-ready mode.
The specified audio file will be played only once, regardless of the
playback mode setting.
The specified file is distinguished by its eight-character file name +
three-character extension. If you change the file name after speci-
fying it, or if you repeatedly delete and copy the file, there may be
rare cases in which the specified file can no longer be recognized.
The PARAMETER 2 field of the USER DEFINED KEY SETUP
popup window will show the song title or the file name of the audio
file. Use the TITLE LIST screen’s SONG TITLE/FILE NAME but-
tons to specify which of these is shown.
NOTE
When you assign the DIRECT PLAY function, the song title or file
name is also displayed in the USER DEFINED KEYS popup win-
dow, as shown below. The file name is shown in black if the speci-
fied file no longer exists, and the song title or file name is shown in
yellow if the file can no longer be recognized.
NOTE
EN
•You can now display a comment for the scene in the
SCENE LIST screen. Use the COMMENT tab and the
TIME STAMP tab in the lower right of the screen to
switch the display. If an audio file is linked to the scene,
the STATUS field will now show a PLAY indicator.
You can make link settings so that a specific audio file from USB memory is played back when
you recall a certain scene. This is a convenient way to automatically play back a sound effect or
background music at a certain point in the performance.
To link scene recall with audio file playback, proceed as follows.
1
Connect the USB memory containing the
audio file to the USB connector.
2
In the DISPLAY ACCESS section, press the
[SCENE MEMORY] key repeatedly to
access the SCENE PLAYBACK LINK
screen.
1
Scene list
This is the list of scenes to which you can assign a
song (audio file). The line with the blue background in
the middle of the list is the scene that’s selected for
operation.
B
No. (scene number)
C
TITLE (scene title)
D
Protect
These respectively indicate the scene number, title,
and protect status.
E
Song list
This is the list of songs (audio files) that can be linked.
The line with the blue background in the middle of the
list is the file that’s selected for operation.
F
LINK
This indicates whether linking from the scene to an
audio file is enabled. The PLAY indicator is shown if
linking is enabled. If the PLAY indicator is off even
though a file is selected, the audio file will not play
when scene recall occurs.
Linking scene recall with audio file playback
2 3 4 7 81 5
9
6
J
G
SONG TITLE/FILE NAME field
This shows the title or file name of the audio file.
H
OFFSET (Offset time)
This shows the time from the recall operation until the
corresponding audio file will begin playing.
I
SONG TITLE/FILE NAME buttons
These buttons select the item that is shown in the
SONG TITLE/FILE NAME field.
J
JPN button
If this button is on, the song title will be displayed
using Shift-JIS code (double-byte character code) to
support Japanese.
3
Operate the dial or the [DEC]/[INC] keys so
that the scene to which you want to assign
a song is displayed in the middle.
4
Move the cursor to the blue background
area in the middle of the list SONG TITLE/
FILE NAME field, and press the [ENTER]
key.
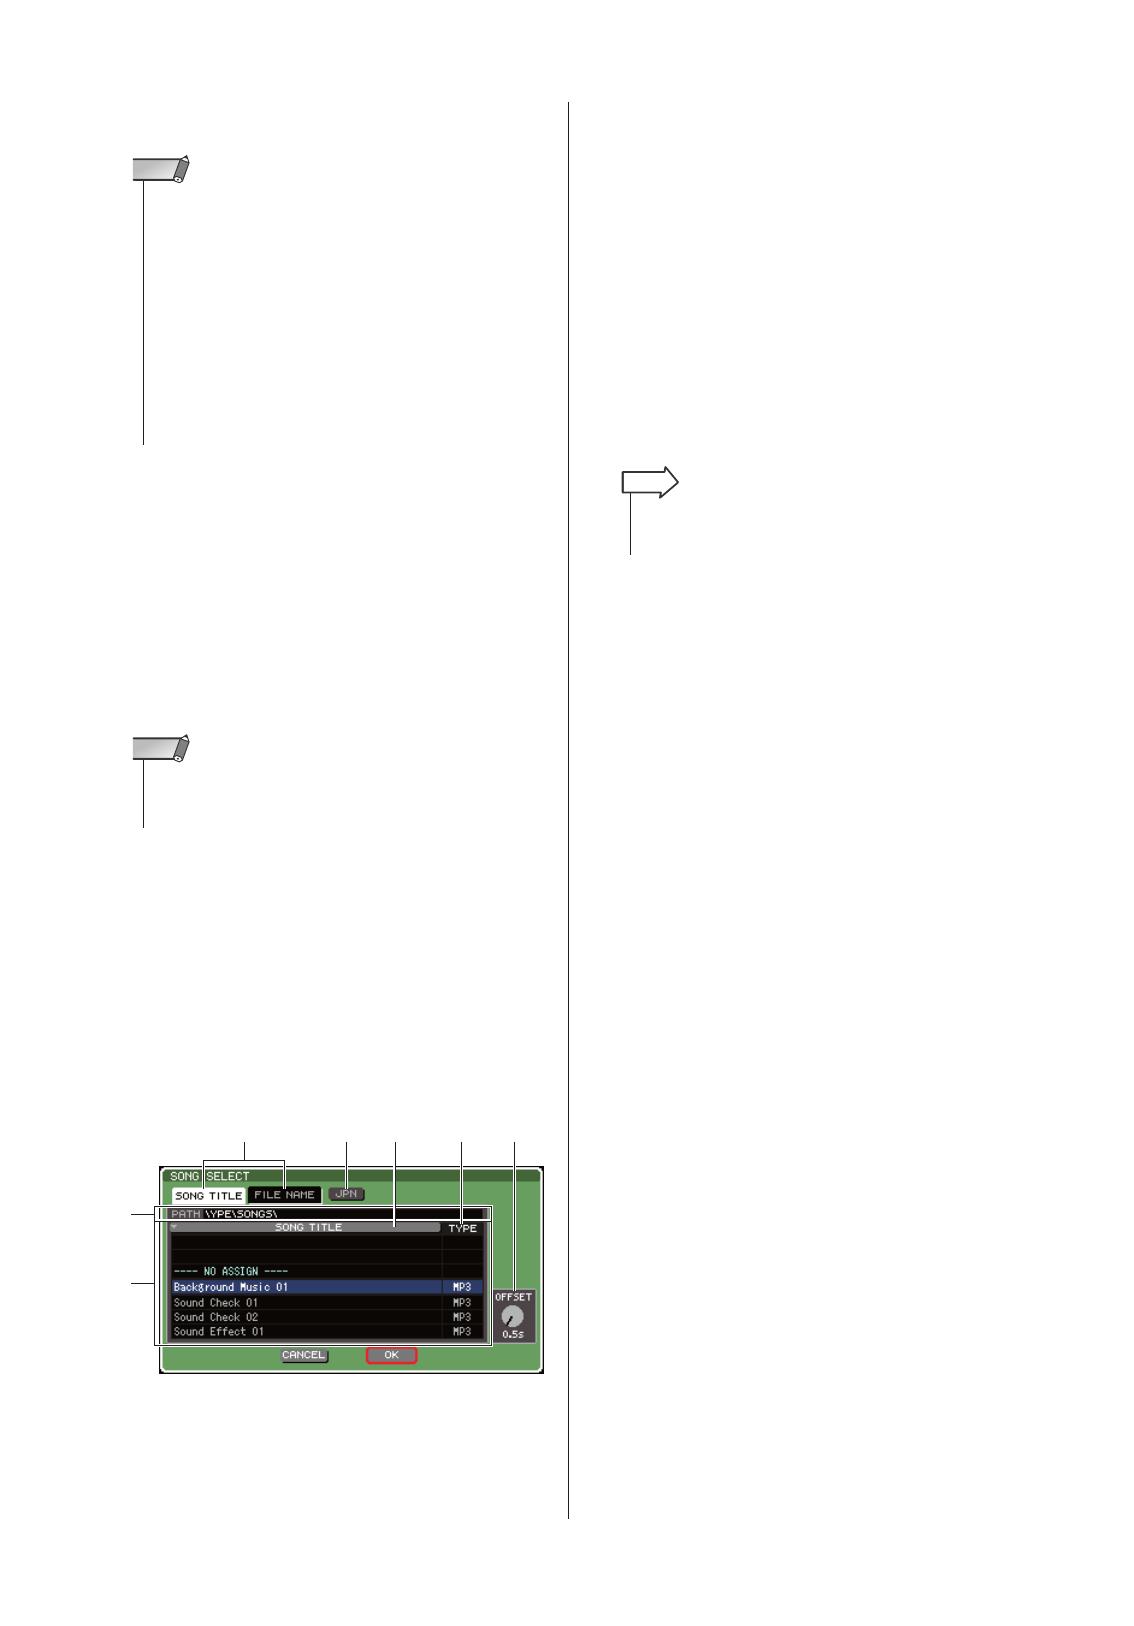
The SONG SELECT popup window will appear,
allowing you to select an audio file.
1
SONG TITLE/FILE NAME buttons
These buttons select the item (song title or file name)
that is shown in the song list.
B
JPN button
If this button is on, the song title will be displayed
using Shift-JIS code (double-byte character code) to
support Japanese.
C
PATH field
This indicates the path of the folder (
\
YPE
\
SONGS
\
)
in which the audio files are saved. This cannot be
changed.
D
Song list
This shows the playable audio files in the SONGS
folder.
E
SONG TITLE/FILE NAME button
When you move the cursor to this button and press the
[ENTER] key, the song list will be sorted in alphanu-
meric order by song tile or file name. Each time you
press the [ENTER] key, the list will alternate between
ascending and descending order.
F
TYPE
This indicates the type of the audio file. The signifi-
cance of this indication is as follows.
MP3
.............MPEG-1 Audio Layer-3
WMA
...........Windows Media Audio
•AAC
.............MPEG4 AAC
G
OFFSET (Offset time)
This specifies the time from the recall operation until
the corresponding audio file begins to play.
5
Operate the dial or the [DEC]/[INC] keys to
scroll the song list so that the file you want
to link to the scene is shown in the center
with a blue background.
6
If necessary, move the cursor to the OFF-
SET knob and use the dial or the [DEC]/
[INC] keys to specify an offset time before
the audio file will play back.
You can specify the offset time in a range of 0–99 sec-
onds in 0.5 second units.
The audio file to be played must be saved in the SONGS
folder within the YPE folder. Please note that you won’t be
able to specify a file that is in the root directory or another
folder. When you execute playback, the path in the TITLE
LIST screen will change to \YPE\SONGS\.
The file name is shown in black if the specified file no longer
exists, and the song title or file name is shown in yellow if the
file can no longer be recognized.
The file specified for linking is distinguished by its eight-char-
acter file name + three-character extension. If you change the
file name after specifying it for linking, or if you repeatedly
delete and copy the file, there may be rare cases in which the
linked file can no longer be recognized.
NOTE
Other items in the SCENE PLAYBACK LINK screen are the
same as in the SCENE LIST screen (
LS9 owner’s manual,
p. 134).
NOTE
1 2 5 6 7
3
4
•A maximum of 300 audio files can be displayed.
Files other than playable audio files will not be displayed.
HINT
7
Move the cursor to the OK button and press
the [ENTER] key.
The popup window will close, and you will return to
the SCENE PLAYBACK LINK screen. The title or file
name of the file you selected will be displayed in the
center of the song list.
Alternatively, if you select the CANCEL button
instead of the OK button, the settings will be discarded
and you will return to the SCENE PLAYBACK LINK
screen.
8
Move the cursor to the LINK field and press
the [ENTER] key to turn on the link to the
audio file.
The PLAY indicator will appear in the LINK field.
The PLAY indicator will also appear in the STATUS
field of the SCENE LIST screen.
9
Repeat steps 3–8 to assign audio files to
other scenes in the same way.
10
Recall a scene to which you’ve linked an
audio file.
After the offset time has elapsed, the audio file will
play only once.
As other ways to control audio file playback, you can use MIDI
MMC commands for remote control from an external device
(
LS9 owner’s manual p. 186), or assign the DIRECT PLAY
function to a user-defined key and play back the audio file
directly.
HINT
When you recall the scene, the constant display area will
show a count-down until the offset time has elapsed.
•You cannot play back during recording or in record-ready
mode.
If another song is playing when scene recall occurs, the cur-
rently-playing song will stop when recall occurs, regardless of
the offset time setting.
The linked audio file will be played only once, regardless of
the playback mode setting.
NOTE
U.R.G., Pro Audio & Digital Musical Instrument Division, Yamaha Corporation
© 2006 Yamaha Corporation
  • Page 1 1
  • Page 2 2
  • Page 3 3
  • Page 4 4

Yamaha LS9 Ohjekirja

Tyyppi
Ohjekirja
Tämä käsikirja sopii myös