Yamaha Tyros2 Asennusohje

Kategoria
Interface hubs
Tyyppi
Asennusohje
1
Tyros2 Accessory CD-ROM Installation Guide
English
SPECIAL NOTICES
The software and this Installation Guide are the exclusive copyrights of Yamaha Corporation.
Use of the software and this manual is governed by the license agreement which the purchaser fully agrees to upon breaking the seal of the software
packaging. (Please read carefully the Software Licensing Agreement at the end of this manual before installing the application.)
Copying of the software or reproduction of this manual in whole or in part by any means is expressly forbidden without the written consent of the
manufacturer.
Yamaha makes no representations or warranties with regard to the use of the software and documentation and cannot be held responsible for the results
of the use of this manual and the software.
This disk is a CD-ROM. Do not attempt to play the disk on an audio CD player. Doing so may result in irreparable damage to your audio CD player.
Future upgrades of application and system software and any changes in specifications and functions will be announced separately.
Copying of the commercially available musical data including but not limited to MIDI data and/or audio data is strictly prohibited except for your
personal use.
The company names and product names in this Installation Guide are the trademarks or registered trademarks of their respective companies.
BESONDERE HINWEISE
Das Programm und diese Installationsanleitung sind im Sinne des Urheberrechts alleiniges Eigentum der Yamaha Corporation.
Die Verwendung dieser Software sowie dieser Bedienungsanleitung unterliegen der Lizenzvereinbarung, mit deren Bestimmungen sich der Käufer
beim Öffnen des Softwarepakets in vollem Umfang einverstanden erklärt. (Bitte lesen Sie sich die Software-Lizenzvereinbarung am Ende dieses
Handbuchs vor der Installation des Programms sorgfältig durch.)
Das Kopieren der Software und die Vervielfältigung dieser Bedienungsanleitung als Ganzes oder in Teilen sind nur mit ausdrücklicher schriftlicher
Genehmigung des Herstellers erlaubt.
Yamaha übernimmt keinerlei Garantie hinsichtlich der Benutzung dieser Software und der dazugehörigen Dokumentation und kann nicht für die
Folgen der Benutzung von Handbuch und Software verantwortlich gemacht werden.
Bei dieser Disc handelt es sich um eine CD-ROM. Spielen Sie diese Disc nicht in einem Audio-CD-Player ab. Dies kann zu irreparablen Schäden an
Ihrem Audio-CD-Player führen.
Zukünftige Aktualisierungen von Anwendungs- und Systemsoftware sowie jede Änderung der technischen Daten und Funktionen werden separat
bekannt gegeben.
Das Kopieren von kommerziell erhältlichen Musikdaten (einschließlich, jedoch ohne darauf beschränkt zu sein, MIDI- und/oder Audio-Daten) ist mit
Ausnahme für den privaten Gebrauch strengstens untersagt.
Die in dieser Installationsanleitung erwähnten Firmen- und Produktnamen sind Warenzeichen bzw. eingetragene Warenzeichen der betreffenden
Firmen.
REMARQUES PARTICULIERES
Le logiciel et ce manuel d'installation sont sous copyright exclusif de Yamaha Corporation.
L’usage de ce logiciel et de ce manuel est régi par le contrat de licence auquel l’acheteur déclare souscrire sans réserve lorsqu’il ouvre l’emballage
scellé du logiciel. (Veuillez lire attentivement l’accord de licence du logiciel situé à la fin de ce manuel avant d’installer le logiciel.)
Toute copie du logiciel ou reproduction totale ou partielle de ce manuel, par quelque moyen que ce soit, est expressément interdite sans l’autorisation
écrite du fabricant.
Yamaha n’offre aucune garantie quant à l’usage du logiciel ou de la documentation et ne peut être tenu pour responsable des résultats de l’utilisation
de ce mode d’emploi ou du logiciel.
Ce disque est un CD-ROM. N’essayez donc pas de l’insérer dans un lecteur de CD audio. Vous risqueriez d’endommager ce dernier de manière
irréversible.
Les futures mises à niveau des logiciels d’application et des logiciels système ainsi que toutes les modifications apportées aux spécifications et aux
fonctions seront annoncées séparément.
La copie des données musicales disponibles dans le commerce, y compris, mais sans s’y limiter, les données MIDI et/ou audio, est strictement
interdite, sauf pour un usage personnel.
Les noms de sociétés et de produits cités dans ce manuel d'installation sont des marques commerciales ou déposées appartenant à leurs détenteurs
respectifs.
Tyros2 Accessory CD-ROM
Installation Guide/Installationshandbuch/Manuel d’installation
Tyros2 Accessory CD-ROM
Installation Guide/Installationshandbuch/Manuel d’installation
EnglishDeutschFrançais
FR
DE
EN
tyros_inst_guide_multi.fm Page 1 Tuesday, June 21, 2005 2:15 PM
2
Tyros2 Accessory CD-ROM Installation Guide
English
Important Notices about the CD-ROM
Data Types
This CD-ROM includes application software. Please refer to page 4 for software installation instructions.
Never attempt to play back the CD-ROM on an audio CD player. Doing so may result in damage to your hearing as
well as to your CD player/audio speakers.
Operating System (OS)
The applications in this CD-ROM are provided in versions for Windows operating systems.
Before breaking the seal of the software packaging, please read carefully the Software Licensing Agreement at the end of this
guide.
1
Verify that your system meets the operating requirements of the software (page 3).
2
Insert the CD-ROM into the CD-ROM drive of the computer.
3
Connect the instrument and the computer via a USB cable.
Refer to the Owner’s Manual of the instrument for details on connection.
4
Install the USB-MIDI driver to the computer (page 4).
5
Install the Voice Editor (page 4).
6
Start up the Voice Editor.
For subsequent operations, refer to the owner’s manual for the Voice Editor (PDF manual).
To view PDF files, you must install Adobe Reader on your computer. If you do not have Adobe Reader, you can
download the application from the Adobe website at the following URL:
http://www.adobe.com
CAUTION
CD-ROM Installation Procedure
NOTE
tyros_inst_guide_multi.fm Page 2 Tuesday, June 21, 2005 2:15 PM
3
Tyros2 Accessory CD-ROM Installation Guide
English
Contents of the CD-ROM
In addition, there is one HTML file in the CD-ROM. If your computer has an Internet connection, you can access the special
website for Tyros2 by double-clicking on “clickme.html.
Depending on your computer, a dialog prompting you to install the Flash player may appear. If so, click [Yes] to start
installation.
The system requirements below may differ slightly depending on the particular operating system.
• Tyros2 Voice Editor
OS
: Windows2000 / XP Home Edition / XP Professional
Computer
: 550 MHz or higher; Intel
®
Pentium
®
or Celeron
®
processor
Available Memory
: 128 MB or more (256 MB or more is recommended)
Hard Disk
: 20 MB or more (512 MB or more is recommended)
Display
: 1024 x 768 High Color (16-bit) or more
• USB MIDI Driver
OS
: Windows2000 / XP Home Edition / XP Professional
Computer
: 166 MHz or higher; Intel
®
Pentium
®
or Celeron
®
processor
Available Memory
: 32 MB or more (64 MB or more is recommended)
Hard Disk
: 2 MB or more
Folder Name Application Name Contents
VoiceEditor_ Tyros2 Voice Editor Enables you to edit the Tyros2 voices on your computer.
USBdrv2k_ Yamaha USB MIDI Driver
Enables communication between the Tyros2 and your computer via a USB
connection.
NOTE
Minimum System Requirements
tyros_inst_guide_multi.fm Page 3 Tuesday, June 21, 2005 2:15 PM
4
Tyros2 Accessory CD-ROM Installation Guide
English
Software Installation
USB MIDI Driver
To operate the Tyros2 from your computer via USB, you’ll
need to install the appropriate driver software.
The USB-MIDI driver is software that transfers MIDI data
back and forth between sequence software and the Tyros2
via a USB cable.
Installing the driver on Windows
2000
1
Start the computer and use the “Administrator” account to log
into Windows 2000.
2
Select [My Computer | Control Panel | System | Hardware |
Driver Signing | File Signature Verification], and check the
radio button to the left of “Ignore -Install all files, regardless
of file signature” and click [OK].
3
Insert the included CD-ROM into the CD-ROM drive.
4
First, make sure the POWER switch on the Tyros2 is set to
OFF, then use a USB cable to connect the USB connector of
the computer (or the USB hub) to the USB TO HOST con-
nector of the Tyros2.
When the Tyros2 is turned on, the computer automatically
displays the “Found New Hardware Wizard.” Click [Next].
5
Check the radio button to the left of “Search for a suitable
driver for my device. (Recommended).” Click [Next].
The window that appears enables you to select a location in
which to install the driver.
6
Check the “CD-ROM drives” box and uncheck all other
items. Click [Next].
The system may ask you to insert a Windows CD-ROM while it
checks for the driver. Specify the “USBdrv2k_” directory of the CD-
ROM drive (such as D:\USBdrv2k_\) and continue the installation.
7
When the installation is complete, the system displays “Com-
pleting the Found New Hardware Wizard.” Click [Finish].
Some computers may take about ten seconds to show this screen
after the installation is complete.
8
Restart the computer.
The driver has been installed.
Installing the driver on Windows XP
1
Start the computer.
2
Select [Start]
[Control Panel].
If the control panel appears as “Pick a category”, click
“Switch to Classic View” in the upper left of the window.
All control panels and icons will be displayed.
3
Go to [System]
[Hardware]
[Driver Signing Options],
and check the radio button to the left of “Ignore” and click
[OK].
4
Click the [OK] button to close System Properties, and then
click “X” in the upper right of the window to close the Con-
trol Panel.
5
Insert the included CD-ROM into the CD-ROM drive.
6
First, make sure the POWER switch on the Tyros2 is set to
OFF, then use a USB cable to connect the USB connector of
the computer (or the USB hub) to the USB TO HOST con-
nector of the Tyros2.
When the instrument is turned on, the computer automati-
cally displays the “Found New Hardware Wizard.
Some computers may take a few minutes to show this screen.
7
Check the radio button to the left of “Install the software
automatically. (Recommended).” Click [Next].
The system starts the installation.
8
When the installation is complete, the system displays “Com-
pleting the Found New Hardware Wizard.” Click [Finish].
Some computers may take about a few minutes to show this screen
after the installation is complete.
9
Restart the computer.
The driver has been installed.
Voice Editor
Once you’ve installed the Voice Editor, you can use your
computer to edit the voices of the Tyros2.
1
Double-click on the “VoiceEditor_” folder in the CD-ROM.
The file “setup.exe” will be displayed.
2
Double-click on the “setup.exe” file.
The setup dialog will be displayed.
3
Execute the installation by following the on-screen direc-
tions.
For subsequent operations, refer to the PDF owner’s manual
for the Voice Editor.
Computer
Sequence
Software
Driver
USB cable
Tyros2
NOTE
NOTE
NOTE
NOTE
tyros_inst_guide_multi.fm Page 4 Tuesday, June 21, 2005 2:15 PM
5
Tyros2 Accessory CD-ROM Installation Guide
English
Troubleshooting
• Is the USB cable connected correctly?
Check the USB cable connection.
Disconnect the USB cable, then connect it again.
• Is the USB function enabled on your computer?
When you connect the instrument to the computer for the first
time, if the “Add New Hardware Wizard” does not appear, the
USB function on the computer may be disabled Perform the
following steps.
1
Select [Control Panel]*
[System]
[Hardware]
[Device Manager].
* Classic View only in Windows XP.
2
Make sure that no “!” or “x” marks appear at “Universal
serial bus controller” or “USB Root Hub.” If you see an
“!” or “x” mark, the USB controller is disabled.
• Is any unknown device registered?
If driver installation fails, the instrument will be marked as an
“Unknown device,” and you will not be able to install the
driver. Delete the “Unknown device” by following the steps
below.
1
Select [Control Panel]*
[System]
[Hardware]
[Device Manager].
* Classic View only in Windows XP.
2
Look for “Other devices” in the menu “View devices by
type.
3
If you find “Other devices,” double-click it to extend the
tree to look for “Unknown device.” If one appears, select it
and click the [Remove] button.
4
Remove the USB cable from the instrument, and make the
connection again.
5
Install the driver again (page 4).
• Did you install the driver?
• Is the USB cable connected correctly?
Are the volume settings of the Tyros2, playback device, and
application program set to the appropriate levels?
• Have you selected an appropriate port in the Voice Editor?
(Refer to the Owner’s Manual for the Voice Editor.)
• Does your computer satisfy the system requirements?
• Is any other application or device driver running?
• Do not suspend the computer while the MIDI application is
running.
• If you are using Windows 2000, you may not be able to sus-
pend/resume normally, depending on the particular envi-
ronment (USB Host Controller, etc.). Even so, simply
disconnecting and connecting the USB cable will allow you
to use the instrument functions again.
The driver cannot be installed.
When controlling the Tyros2 from your com-
puter via USB, the Tyros2 does not operate
correctly or no sound is heard.
Playback response is delayed.
Cannot suspend or resume the computer cor-
rectly.
tyros_inst_guide_multi.fm Page 5 Tuesday, June 21, 2005 2:15 PM
6
Installationsanleitung für die Tyros2 Accessory CD-ROM
Deutsch
Wichtige Hinweise zur CD-ROM
Datentypen
Diese CD-ROM enthält Anwendungssoftware. Anweisungen zur Installation der Software finden Sie auf Seite 8.
Versuchen Sie bitte niemals, diese CD-ROM auf einem Audio-CD-Spieler abzuspielen. Durch Missachtung dieser War-
nung können Sie nicht nur Ihrem CD-Player und Ihren Lautsprechern, sondern auch Ihrem Gehör Schaden zufügen.
Betriebssystem
Die Anwendungen auf dieser CD-ROM werden in Versionen für Windows-Betriebssysteme bereitgestellt.
Lesen Sie, bevor Sie das Siegel der Softwareverpackung öffnen, bitte die Software-Lizenzvereinbarung am Ende dieses Hand-
buchs sorgfältig durch.
1
Vergewissern Sie sich, dass Ihr System die Betriebsanforderungen der Software erfüllt (Seite 7).
2
Legen Sie die CD-ROM in das CD-ROM-Laufwerk des Computers ein.
3
Verbinden Sie das Instrument über ein USB-Kabel mit dem Computer.
Einzelheiten zur Verbindung finden Sie in der Bedienungsanleitung des Instruments.
4
Installieren Sie den USB MIDI Driver auf dem Computer (Seite 8).
5
Installieren Sie Voice Editor (Seite 8).
6
Starten Sie Voice Editor.
Informationen zur weiteren Bedienung finden Sie in der Bedienungsanleitung für Voice Editor (PDF-Handbuch).
Um PDF-Dateien anzeigen zu können, müssen Sie Adobe Reader auf Ihrem Computer installieren. Wenn Sie Adobe
Reader noch nicht besitzen, können Sie das Programm unter der folgenden URL von der Adobe-Website herunterladen:
http://www.adobe.com
VORSICHT
Verfahren zur Installation der CD-ROM
HINWEIS
tyros_inst_guide_multi.fm Page 6 Tuesday, June 21, 2005 2:15 PM
7
Installationsanleitung für die Tyros2 Accessory CD-ROM
Deutsch
Inhalt der CD-ROM
Außerdem enthält die CD-ROM eine HTML-Datei. Falls Ihr Computer einen Internetanschluss hat, können Sie die Spezialweb-
site für den Tyros2 aufrufen, indem Sie auf „clickme.html“ doppelklicken.
Je nach Ihrem Computer erscheint möglicherweise ein Dialogfenster, das Sie auffordert, den Flash-Player zu instal-
lieren. Klicken Sie in diesem Fall auf [Yes] (Ja), um die Installation zu starten.
Die nachfolgend angegebenen Systemanforderungen können je nach Betriebsystem geringfügig abweichen.
• Tyros2 Voice Editor
Betriebssystem : Windows 2000 / XP Home Edition / XP Professional
Computer : Mindestens 550 MHz; Intel
®
Pentium
®
- oder Celeron
®
-Prozessor
Verfügbarer Arbeitsspeicher : 128 MB oder mehr (256 MB oder mehr werden empfohlen)
Festplatte : 20 MB oder mehr (512 MB oder mehr werden empfohlen)
Anzeige : 1024 x 768, High Color (16 Bit) oder mehr
• USB MIDI Driver
Betriebssystem : Windows 2000 / XP Home Edition / XP Professional
Computer : Mindestens 166 MHz; Intel
®
Pentium
®
- oder Celeron
®
-Prozessor
Verfügbarer Arbeitsspeicher : 32 MB oder mehr (64 MB oder mehr werden empfohlen)
Festplatte : 2 MB oder mehr
Name des Ord-
ners
Name der Anwendung Inhalt
VoiceEditor_ Tyros2 Voice Editor Ermöglicht Ihnen die Bearbeitung der Tyros2-Voices an Ihrem Computer.
USBdrv2k_ Yamaha USB MIDI Driver
Ermöglicht die Datenübermittlung zwischen dem Tyros2 und Ihrem Computer
über eine USB-Verbindung.
HINWEIS
System-Mindestanforderungen
tyros_inst_guide_multi.fm Page 7 Tuesday, June 21, 2005 2:15 PM
8
Installationsanleitung für die Tyros2 Accessory CD-ROM
Deutsch
Installation der Software
USB MIDI Driver
Um den Tyros2 über USB mit Ihrem Computer steuern zu
können, müssen Sie zunächst die geeignete Treiber-Soft-
ware (englisch: Driver) installieren.
Beim USB MIDI Driver handelt es sich um eine Software,
die zwischen einem Sequenzerprogramm und dem Tyros2
MIDI-Daten über ein USB-Kabel überträgt.
Installieren des Treibers unter Win-
dows 2000
1
Starten Sie den Computer, und melden Sie sich über den
„Administrator“-Login in Windows 2000 an.
2
Wählen Sie [Arbeitsplatz | Systemsteuerung | System | Hard-
ware | Treibersignierung | Dateisignaturverifizierung],
aktivieren Sie die Option „Ignorieren - Alle Dateien install-
ieren, unabhängig von der Dateisignatur“, und klicken Sie auf
[OK].
3
Legen Sie die mitgelieferte CD-ROM in das CD-ROM-Lauf-
werk ein.
4
Vergewissern Sie sich zunächst, dass der Netzschalter
[POWER] am Tyros2 auf OFF (Aus) gestellt ist, und ver-
wenden Sie dann ein USB-Kabel, um die USB-Schnittstelle
des Computers (oder des USB-Hubs) mit der USB-TO-
HOST-Buchse des Tyros2 zu verbinden.
Wenn der Tyros2 eingeschaltet wird, wird am Computer
automatisch der „Assistent für das Suchen neuer Hardware“
angezeigt. Klicken Sie auf [Weiter].
5
Aktivieren Sie bitte die Option „Nach einem passenden
Treiber für das Gerät suchen (empfohlen)“. Klicken Sie auf
[Weiter]. Im folgenden Fenster können Sie den Ordner ange-
ben, in dem der Treiber installiert werden soll.
6
Aktivieren Sie das Kästchen neben „CD-ROM-Laufwerk“
(und deaktivieren Sie alle anderen Kästchen). Klicken Sie auf
[Weiter].
Während der Suche nach dem Treiber kann es passieren, dass Sie
vom System dazu aufgefordert werden, die Windows-CD-ROM ein-
zulegen. Geben Sie das Verzeichnis „USBdrv2k_“ auf dem
CD-ROM-Laufwerk an (also beispielsweise „D:\USBdrv2k_\“),
und führen Sie die Installation fort.
7
Sobald die Installation erfolgreich beendet wurde, erscheint
das Fenster „Fertig stellen des Assistenten“. Klicken Sie auf
[Fertig stellen].
Bei einigen Computern kann es etwa zehn Sekunden dauern, bis
dieses Fenster nach erfolgreicher Installation angezeigt wird.
8
Starten Sie den Computer neu.
Der Treiber wurde installiert.
Installieren des Treibers unter Win-
dows XP
1
Starten Sie den Computer.
2
Wählen Sie [Start] [Systemsteuerung].
Falls im rechten Fenster der Systemsteuerung „Wählen Sie
eine Kategorie“ angezeigt ist, klicken Sie oben links im Fen-
ster auf „Zur klassischen Ansicht wechseln“.
Es werden alle Kontrollfelder und Symbole angezeigt.
3
Gehen Sie zu [System] [Hardware] [Treibersignaturop-
tionen], aktivieren Sie die Option „Ignorieren“, und klicken
Sie auf [OK].
4
Klicken Sie auf [OK], um das Fenster „Eigenschaften von
System“ zu schließen, und klicken Sie dann oben rechts im
Fenster auf die Schaltfläche „X“, um die Systemsteuerung zu
schließen.
5
Legen Sie die mitgelieferte CD-ROM in das CD-ROM-Lauf-
werk ein.
6
Vergewissern Sie sich zunächst, dass der Netzschalter
[POWER] am Tyros auf OFF (Aus) gestellt ist, und ver-
wenden Sie dann ein USB-Kabel, um die USB-Schnittstelle
des Computers (oder des USB-Hubs) mit der USB-TO-
HOST-Buchse des Tyros2 zu verbinden.
Wenn das Instrument eingeschaltet wird, wird am Computer
automatisch der „Assistent für das Suchen neuer Hardware“
angezeigt.
Bei einigen Computern kann es ein paar Minuten dauern, bis dieses
Fenster angezeigt wird.
7
Aktivieren Sie bitte die Option „Software automatisch instal-
lieren (empfohlen)“. Klicken Sie auf [Weiter].
Die Installation wird gestartet.
8
Sobald die Installation erfolgreich beendet wurde, erscheint
das Fenster „Fertig stellen des Assistenten“. Klicken Sie auf
[Fertig stellen].
Bei einigen Computern kann es ein paar Minuten dauern, bis nach
Beendigung der Installation dieses Fenster angezeigt wird.
9
Starten Sie den Computer neu.
Der Treiber wurde installiert.
Voice Editor
Sobald Sie Voice Editor installiert haben, können Sie die
Voices des Tyros2 an Ihrem Computer bearbeiten.
1
Doppelklicken Sie auf das Verzeichnis „VoiceEditor_“ der
CD-ROM.
Die Datei „setup.exe“ wird angezeigt.
2
Doppelklicken Sie auf die Datei „setup.exe“.
Das Setup-Dialogfenster wird angezeigt.
3
Führen Sie die Installation aus, indem Sie den Anweisungen
auf dem Bildschirm folgen.
Informationen zur weiteren Bedienung finden Sie in der
Bedienungsanleitung für Voice Editor.
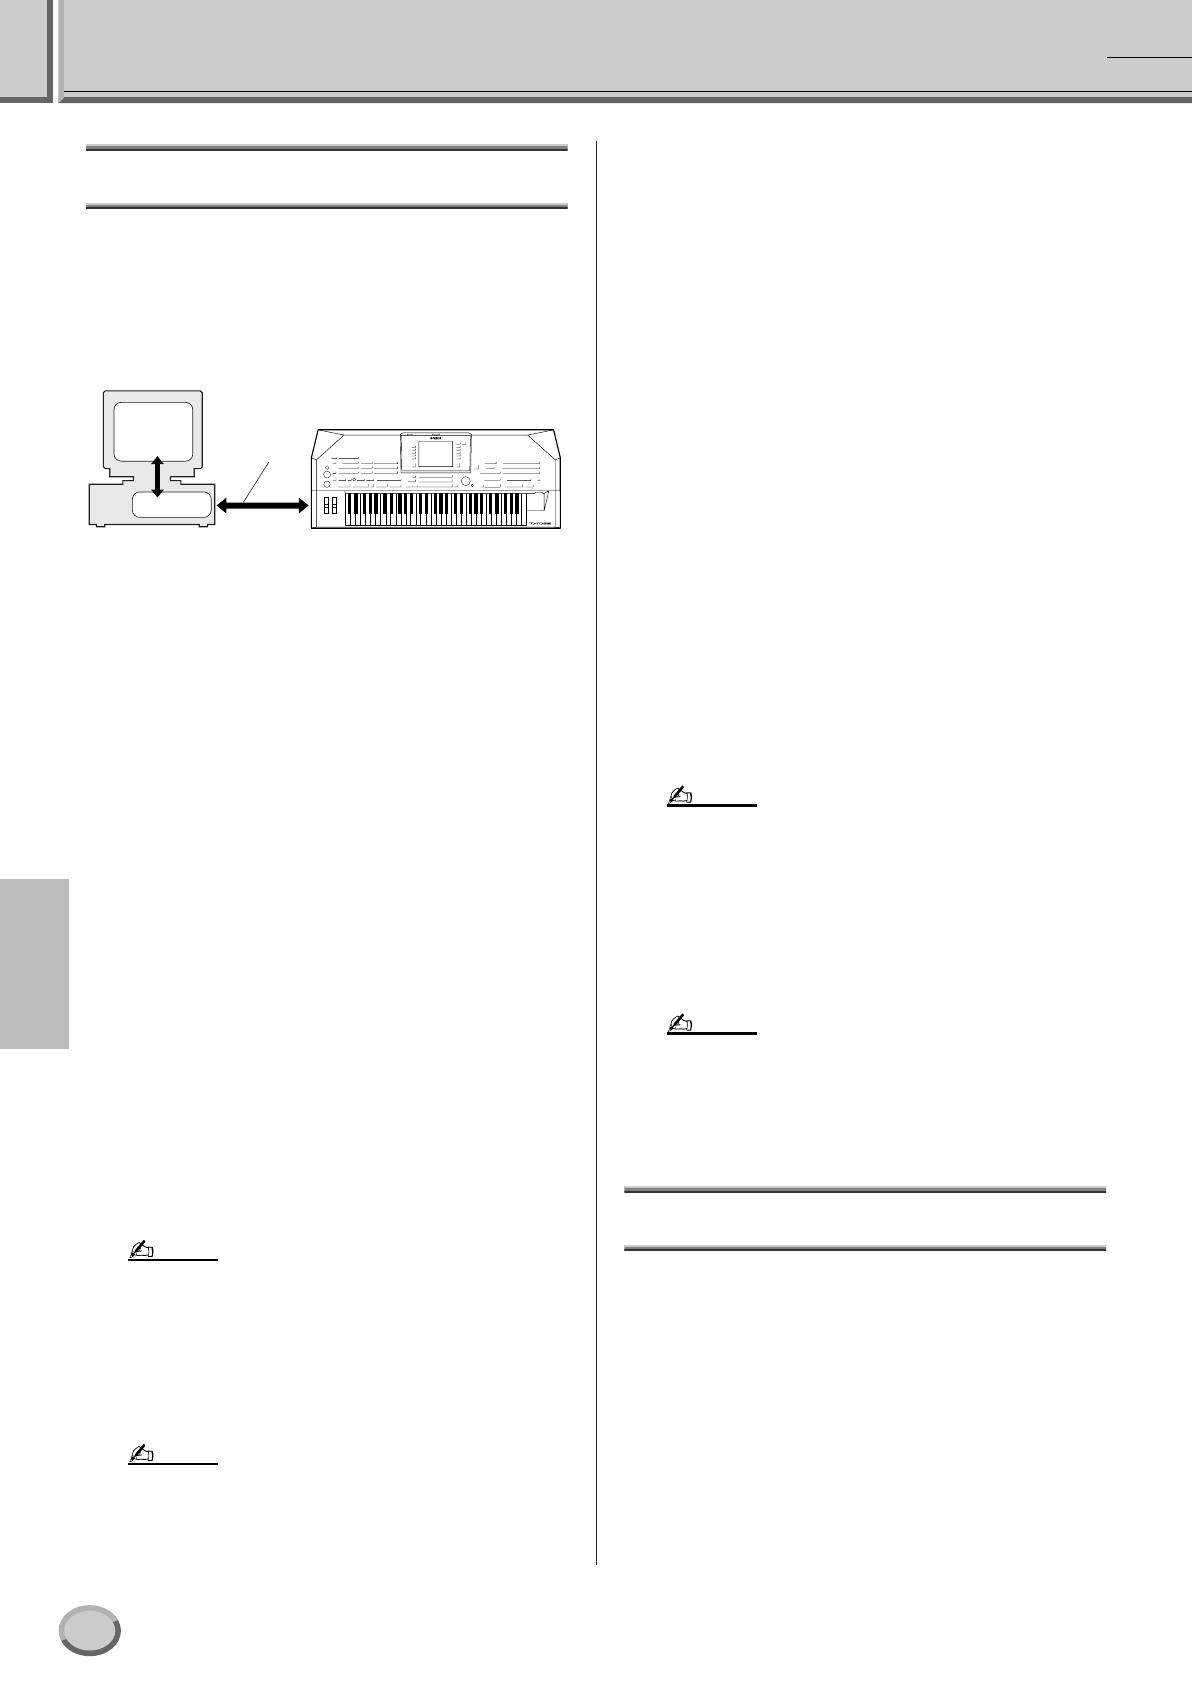
Computer
Sequenzer-
programm
Treiber
USB-Kabel
Tyros2
HINWEIS
HINWEIS
HINWEIS
HINWEIS
tyros_inst_guide_multi.fm Page 8 Tuesday, June 21, 2005 2:15 PM
9
Installationsanleitung für die Tyros2 Accessory CD-ROM
Deutsch
Fehlerbehandlung
• Ist das USB-Kabel korrekt angeschlossen?
Überprüfen Sie die USB-Kabelverbindung.
Ziehen Sie das USB-Kabel ab, und schließen Sie es erneut an.
• Wurde die USB-Funktion an Ihrem Computer aktiviert?
Falls beim erstmaligen Anschließen des Instruments an den
Computer der Hardware-Assistent nicht angezeigt wird, ist am
Computer möglicherweise die USB-Funktion nicht aktiviert.
Führen Sie folgende Schritte durch.
1
Wählen Sie [Systemsteuerung]* [System] [Hard-
ware] [Geräte-Manager].
* Klassische Ansicht nur unter Windows XP.
2
Vergewissern Sie sich, dass neben „Universeller serieller
Bus Controller“ oder „USB Root Hub“ keine der Marki-
erungen „!“ oder „x“ angezeigt wird. Falls dort ein solches
Zeichen zu sehen ist, ist der USB-Controller nicht aktivi-
ert.
• Wurde ein unbekanntes Gerät registriert?
Falls die Treiberinstallation fehlschlägt, wird das Instrument
als „Unbekanntes Gerät“ registriert, und Sie können den
Treiber nicht installieren. Führen Sie die folgenden Schritte
durch, um das „unbekannte Gerät“ zu löschen.
1
Wählen Sie [Control Panel]* [System] [Hardware]
[Geräte-Manager].
* Klassische Ansicht nur unter Windows XP.
2
Wählen Sie die Option „Modelle nach Typ anzeigen“ aus,
und suchen Sie nach „anderen Geräten“.
3
Wenn Sie einen Eintrag bei „Andere Geräte“ finden,
öffnen Sie dessen Baumstruktur, indem Sie darauf dop-
pelklicken, und suchen Sie dort nach einem „unbekannten
Gerät“. Falls dort eines aufgeführt wird, markieren Sie es,
und klicken Sie auf die [Entfernen]-Schaltfläche.
4
Ziehen Sie das USB-Kabel vom Instrument ab, und
stecken Sie es gleich wieder ein.
5
Installieren Sie den Treiber erneut (Seite 8).
• Haben Sie den Treiber installiert?
• Ist das USB-Kabel korrekt angeschlossen?
• Sind die Lautstärke-Einstellungen des Tyros2, des Wieder-
gabegeräts und der Anwendungssoftware auf geeignete
Werte gestellt?
• Haben Sie in Voice Editor einen geeigneten Port aus-
gewählt? (Informationen finden Sie in der Bedienungsanlei-
tung für Voice Editor.)
• Erfüllt Ihr Computer die Systemanforderungen?
• Werden gleichzeitig andere Anwendungen oder Geräte-
treiber ausgeführt?
• Versetzen Sie den Computer nicht in den Standby-Modus,
während eine MIDI-Anwendung ausgeführt wird.
• Wenn Sie Windows 2000 verwenden, können Sie je nach
Systemkonfiguration (USB Host Controller usw.) den Com-
puter u.U. nicht normal in den Ruhezustand versetzen.
Dennoch sollte ein simples Abziehen und Wiederan-
schließen des USB-Kabels dazu führen, dass Sie das
Instrument wieder steuern können.
Der Treiber kann nicht installiert werden.
Wenn der Tyros2 durch den Computer via USB
gesteuert wird, funktioniert der Tyros2 nicht
richtig oder erzeugt keinen Ton.
Die Wiedergabe erfolgt verzögert.
Der Standby-Modus des Computers lässt sich
nicht richtig aktivieren bzw. beenden.
tyros_inst_guide_multi.fm Page 9 Tuesday, June 21, 2005 2:15 PM
10
Manuel d'installation du CD-ROM d'accessoires du Tyros2
Français
Remarques importantes à propos du CD-ROM
Types de données
Ce CD-ROM contient des logiciels d'application. Pour obtenir des instructions relatives à leur installation, reportez-vous à la
page 12.
N'essayez jamais de lire le CD-ROM sur un lecteur de CD audio. Cela pourrait endommager votre ouïe, ainsi que le
lecteur CD et les haut-parleurs.
Systèmes d'exploitation
Les applications de ce CD-ROM sont proposées dans des versions compatibles avec les systèmes d'exploitation Windows.
Avant d'ouvrir l'emballage scellé du logiciel, lisez attentivement l'accord de licence de logiciel disponible à la fin de ce manuel.
1
Vérifiez que votre système est conforme à la configuration minimale requise pour le logiciel (page 11).
2
Insérez le CD-ROM dans le lecteur de CD-ROM de l'ordinateur.
3
Connectez l'instrument et l'ordinateur à l'aide d'un câble USB.
Reportez-vous au mode d'emploi de l'instrument pour plus d'informations sur les connexions.
4
Installez le pilote USB-MIDI sur l'ordinateur (page 12).
5
Installez le Voice Editor (page 12).
6
Démarrez le Voice Editor.
Pour les opérations ultérieures, reportez-vous au mode d'emploi du Voice Editor (manuel PDF).
Pour lire les fichiers PDF, vous devez d'abord installer le logiciel Adobe Reader sur votre ordinateur. Si vous ne
disposez pas d'Acrobat Reader, vous pouvez le télécharger depuis le site Web d'Adobe à l'adresse suivante :
http://www.adobe.com
ATTENTION
Procédure d'installation du CD-ROM
NOTE
tyros_inst_guide_multi.fm Page 10 Tuesday, June 21, 2005 2:15 PM
11
Manuel d'installation du CD-ROM d'accessoires du Tyros2
Français
Contenu du CD-ROM
Le CD-ROM propose en outre un fichier HTML. Si votre ordinateur possède une connexion Internet, vous pouvez accéder au
site Web spécial du Tyros2 en double-cliquant sur « clickme.html ».
En fonction de l'ordinateur que vous utilisez, une boîte de dialogue vous invitant à installer le logiciel Flash Player
peut s'afficher. Si c'est le cas, cliquez sur [Oui] pour démarrer l'installation.
La configuration matérielle présentée ci-dessous peut différer légèrement en fonction du système d'exploitation utilisé.
• Tyros2 Voice Editor
Système d'exploitation : Windows 2000 / XP Edition familiale / XP Edition professionnelle
Ordinateur : 550 MHz ou supérieur ; processeur Intel
®
Pentium
®
ou Celeron
®
Mémoire disponible : 128 Mo ou plus (256 Mo ou plus sont conseillés)
Disque dur : 20 Mo ou plus (512 Mo ou plus sont conseillés)
Ecran : 1024 x 768 haut en couleurs (16 bits) ou plus
• USB MIDI Driver
Système d'exploitation : Windows 2000 / XP Edition familiale / XP Edition professionnelle
Ordinateur : 166 MHz ou supérieur ; processeur Intel
®
Pentium
®
ou Celeron
®
Mémoire disponible : 32 Mo ou plus (64 Mo ou plus sont conseillés)
Disque dur : 2 Mo ou plus
Nom du dossier Nom de l'application Contenu
VoiceEditor_ Tyros2 Voice Editor Vous permet d'éditer les voix du Tyros2 sur votre ordinateur.
USBdrv2k_ Yamaha USB MIDI Driver Permet au Tyros2 de communiquer avec l'ordinateur via une connexion USB.
NOTE
Configuration minimale requise
tyros_inst_guide_multi.fm Page 11 Tuesday, June 21, 2005 2:15 PM
12
Manuel d'installation du CD-ROM d'accessoires du Tyros2
Français
Installation des logiciels
USB MIDI Driver
Pour pouvoir utiliser le Tyros2 à partir de votre ordinateur
via USB, vous devez installer le logiciel du pilote approprié.
Le programme USB-MIDI Driver est un logiciel qui permet
de transférer des données MIDI entre le logiciel de
séquençage et le Tyros2 via un câble USB.
Installation du pilote sous
Windows 2000
1
Démarrez l'ordinateur et utilisez le compte
« Administrateur » pour ouvrir la session Windows 2000.
2
Sélectionnez [Poste de travail | Panneau de configuration |
Système | Matériel | Signature du pilote | Vérification des sig-
natures de fichiers] et cochez la case d'option à gauche de
« Ignorer : installe tous les fichiers, quelles que soient leurs
signatures », puis cliquez sur [OK].
3
Insérez le CD-ROM fourni dans le lecteur de CD-ROM.
4
Vérifiez d'abord que l'interrupteur POWER du Tyros2 est
positionné sur OFF, puis raccordez le connecteur USB de
l'ordinateur (ou le concentrateur USB) au connecteur USB
TO HOST du Tyros2 à l'aide d'un câble USB.
Lorsque le Tyros2 est sous tension, l'ordinateur affiche
automatiquement la fenêtre « Assistant Ajout de nouveau
matériel détecté ». Cliquez sur [Suivant].
5
Cochez la case d'option à gauche de « Rechercher un pilote
approprié pour mon périphérique. (Recommandé) ». Cliquez
sur [Suivant].
La fenêtre qui apparaît alors vous permet de sélectionner
l'emplacement où installer le pilote.
6
Cochez la case « Lecteurs de CD-ROM » et décochez tous les
autres éléments. Cliquez sur [Suivant].
Le système est susceptible de vous demander d'insérer un
CD-ROM Windows pour la vérification du pilote. Sélectionnez le
répertoire « USBdrv2k_ » du lecteur de CD-ROM (par exemple,
D:\USBdrv2k_\) et poursuivez l'installation.
7
Lorsque l'installation est terminée, l'ordinateur affiche la
fenêtre « Fin de l'assistant Ajout de nouveau matériel
détecté ». Cliquez sur [Terminer].
Sur certains ordinateurs, l'affichage de cet écran peut prendre envi-
ron dix secondes une fois l'installation terminée.
8
Redémarrez l'ordinateur.
Le pilote est maintenant installé.
Installation du pilote sous Windows XP
1
Allumez l'ordinateur.
2
Sélectionnez [Démarrer] [Panneau de configuration].
Si le panneau de configuration affiche « Sélectionner une
catégorie », cliquez sur « Basculer vers l'affichage classique »
dans le coin supérieur gauche de la fenêtre.
De cette façon, tous les panneaux de configuration et les
icônes s'affichent.
3
Allez dans [Système] [Matériel] [Signature du pilote] et
cochez la case à gauche de « Ignorer », puis cliquez sur [OK].
4
Cliquez sur le bouton [OK] pour fermer la boîte de dialogue
Propriétés système, puis sur « X », dans le coin supérieur
droit de la fenêtre, pour fermer le panneau de configuration.
5
Insérez le CD-ROM fourni dans le lecteur de CD-ROM.
6
Vérifiez d'abord que l'interrupteur POWER du Tyros2 est
positionné sur OFF, puis raccordez le connecteur USB de
l'ordinateur (ou le concentrateur USB) au connecteur USB
TO HOST du Tyros2 à l'aide d'un câble USB.
Lorsque l'instrument est sous tension, l'ordinateur affiche
automatiquement la fenêtre « Assistant Ajout de nouveau
matériel détecté ».
Sur certains ordinateurs, l'affichage de cet écran peut prendre
quelques minutes.
7
Cochez la case d'option à gauche de « Installer le logiciel
automatiquement (Recommandé) ». Cliquez sur [Suivant].
Le système lance l'installation.
8
Lorsque l'installation est terminée, l'ordinateur affiche la
fenêtre « Fin de l'assistant Ajout de nouveau matériel
détecté ». Cliquez sur [Terminer].
Sur certains ordinateurs, l'affichage de cet écran peut prendre
quelques minutes après la fin de l'installation.
9
Redémarrez l'ordinateur.
Le pilote est maintenant installé.
Voice Editor
Une fois le Voice Editor installé, vous pouvez utiliser l'ordi-
nateur pour éditer les voix du Tyros2.
1
Double-cliquez sur le dossier « VoiceEditor_ » du CD-ROM.
Le fichier « setup.exe » s'affiche.
2
Double-cliquez sur le fichier « setup.exe ».
La boîte de dialogue d'installation s'affiche.
3
Procédez à l'installation en suivant les instructions qui appa-
raissent à l'écran.
Pour les opérations ultérieures, reportez-vous au mode
d'emploi au format PDF du Voice Editor.
Ordinateur
Logiciel de
séquençage
Pilote
Câble USB
Tyros2
NOTE
NOTE
NOTE
NOTE
tyros_inst_guide_multi.fm Page 12 Tuesday, June 21, 2005 2:15 PM
13
Manuel d'installation du CD-ROM d'accessoires du Tyros2
Français
Résolution des problèmes
• Le câble USB est-il correctement connecté ?
Vérifiez la connexion du câble USB.
Débranchez le câble USB, puis branchez-le à nouveau.
• La fonction USB est-elle activée sur votre ordinateur ?
Si l'Assistant Ajout de nouveau matériel n'apparaît pas lorsque
vous connectez l'instrument à l'ordinateur pour la première
fois, il se peut que la fonction USB de l'ordinateur soit désac-
tivée. Dans ce cas, procédez comme suit.
1
Sélectionnez [Panneau de configuration]* [Système]
[Matériel] [Gestionnaire de périphériques]
* Affichage classique uniquement sous Windows XP.
2
Assurez-vous qu'aucun symbole « ! » ou « x » n'apparaît à
côté de « Contrôleur de bus USB » ou « Concentrateur
USB racine ». Si l'un de ces symboles apparaît, cela signi-
fie que le contrôleur USB est désactivé.
• Des périphériques inconnus sont-ils enregistrés ?
Si l'installation du pilote échoue, l'instrument sera considéré
comme un « périphérique inconnu » et vous ne parviendrez
pas à installer le pilote. Supprimez le « périphérique inconnu »
en procédant comme suit.
1
Sélectionnez [Panneau de configuration]* [Système]
[Matériel] [Gestionnaire de périphériques]
* Affichage classique uniquement sous Windows XP.
2
Recherchez « Autres périphériques » dans le menu
« Affichage » sous « Périphériques par type ».
3
Si vous trouvez « Autres périphériques », double-cliquez
dessus pour développer l'arborescence et rechercher
« Périphérique inconnu ». S'il en existe un, sélectionnez-le
et cliquez sur le bouton [Supprimer].
4
Retirez le câble USB de l'instrument et rebranchez-le.
5
Réinstallez le pilote (page 12).
• Avez-vous installé le pilote ?
• Le câble USB est-il correctement connecté ?
• Le volume du Tyros2, du périphérique de reproduction et
du programme d'application est-il réglé sur un niveau
approprié ?
• Avez-vous sélectionné un port adéquat dans le Voice
Editor ? (Reportez-vous au mode d'emploi du Voice Editor.)
• Votre ordinateur respecte-t-il la configuration minimale ?
• Un autre pilote de périphérique ou d'application est-il en
cours d'utilisation ?
• N'arrêtez pas l'ordinateur tant que l'application MIDI fonc-
tionne.
• Si vous utilisez Windows 2000, il est possible que vous ne
puissiez pas arrêter/redémarrer normalement, en fonction
de l'environnement (contrôleur d'hôte USB, etc.). Même
dans ce cas, le simple fait de déconnecter et de recon-
necter le câble USB vous permettra d'utiliser à nouveau les
fonctions de l'instrument.
Impossible d'installer le pilote.
Lorsque vous contrôlez le Tyros2 depuis votre
ordinateur via un câble USB, le Tyros2 ne fonc-
tionne pas correctement ou aucun son n'est
audible.
La réponse de reproduction est lente.
Impossible d'arrêter ou de relancer l'ordina-
teur correctement.
tyros_inst_guide_multi.fm Page 13 Tuesday, June 21, 2005 2:15 PM
14
Tyros2 Accessory CD-ROM Installation Guide/Installationshandbuch/Manuel d’installation
SOFTWARE LICENSING AGREEMENT
The following is a legal agreement between you, the end user, and Yamaha Corporation (“Yamaha”). The enclosed Yamaha software
program is licensed by Yamaha to the original purchaser for use only on the terms set forth herein. Please read this licensing agreement
with care. Opening this package indicates that you accept all terms outlined herein. If you do not agree to the terms, return this package
unopened to Yamaha for a full refund. In the event that you obtained the enclosed Yamaha software program(s) as a part of a software
package or software bundled with a hardware product, you may not return the enclosed Yamaha software program(s) to Yamaha.
1. GRANT OF LICENSE AND COPYRIGHT
Yamaha grants you, the original purchaser, the right to use one copy of the enclosed software program and data (“SOFTWARE”) on a
single-user computer system. You may not use it on more than one computer or computer terminal. The SOFTWARE is owned by Yamaha
and is protected by Japanese copyright laws and all applicable international treaty provisions. You are entitled to claim ownership of the
media in which the SOFTWARE is included. Therefore, you must treat the SOFTWARE like any other copyrighted materials.
2. RESTRICTIONS
The SOFTWARE program is copyrighted. You may not engage in reverse engineering or reproduction of the SOFTWARE by other
conceivable methods. You may not reproduce, modify, change, rent, lease, resell, or distribute the SOFTWARE in whole or in part, or create
derivative works from the SOFTWARE. You may not transmit or network the SOFTWARE with other computers. You may transfer
ownership of the SOFTWARE and the accompanying written materials on a permanent basis provided that you retain no copies and the
recipient agrees to the terms of the licensing agreement.
3. TERMINATION
The licensing condition of the software program becomes effective on the day that you receive the SOFTWARE. If any one of the copyright
laws or clauses of the licensing conditions is violated, the licensing agreement shall be terminated automatically without notice from
Yamaha. In this case, you must destroy the licensed SOFTWARE and its copies immediately.
4. PRODUCT WARRANTY
Yamaha warrants to the original purchaser that if the SOFTWARE, when used in normal conditions, will not perform the functions
described in the manual provided by Yamaha, the sole remedy will be that Yamaha will replace any media which proves defective in
materials or workmanship on an exchange basis without charge. Except as expressly set forth above, the SOFTWARE is provided “as is,
and no other warranties, either expressed or implied, are made with respect to this software, including, without limitation the implied
warranties of merchantability and fitness for a particular purpose.
5. LIMITED LIABILITY
Your sole remedies and Yamaha’s entire liability are as set forth above. In no event will Yamaha be liable to you or any other person for any
damages, including without limitation any incidental or consequential damages, expenses, lost profits, lost savings or other damages arising
out of the use or inability to use such SOFTWARE even if Yamaha or an authorized dealer has been advised of the possibility of such
damages, or for any claim by any other party.
6. GENERAL
This license agreement shall be interpreted according to and governed by Japanese laws.
English
tyros_inst_guide_multi.fm Page 14 Tuesday, June 21, 2005 2:15 PM
15
Tyros2 Accessory CD-ROM Installation Guide/Installationshandbuch/Manuel d’installation
SOFTWARE-LIZENZVEREINBARUNG
Die folgende Vereinbarung ist eine rechtsgültige Vereinbarung zwischen Ihnen, dem Endanwender, und der Yamaha Corporation
(“Yamaha”). Yamaha erteilt dem ursprünglichen Käufer für das beiliegende Yamaha-Softwareprogramm ausschließlich zu den hier
ausgeführten Bedingungen eine Lizenz zur Verwendung. Bitte lesen Sie diese Lizenzvereinbarung sorgfältig. Durch das Öffnen dieser
Packung bringen Sie zum Ausdruck, dass Sie alle darin enthaltenen Bedingungen akzeptieren. Wenn Sie nicht mit den Bedingungen
einverstanden sind, können Sie die Packung ungeöffnet an Yamaha zurückgeben; der Kaufpreis wird in voller Höhe zurückerstattet. Falls
Sie das mitgelieferte Softwareprogramm bzw. die mitgelieferten Softwareprogramme von Yamaha als Teil eines Softwarepakets oder im
Paket mit einem Hardwareprodukt erworben haben, sind Sie nicht berechtigt, das mitgelieferte Softwareprogramm bzw. die mitgelieferten
Softwareprogramme an Yamaha zurückzugeben.
1. ERETILUNG VON LIZENZ UND COPYRIGHT
Yamaha erteilt Ihnen, dem ursprünglichen Käufer, das Recht, ein Exemplar des beiliegenden Softwareprogramms und der darin enthaltenen
Daten (“SOFTWARE”) als Einzelperson auf jeweils einem Computer zu verwenden. Sie dürfen sie nicht auf mehr als einem Computer
bzw. einer Computerstation verwenden. Die SOFTWARE bleibt im Besitz von Yamaha und ist durch japanische Copyrightgesetze sowie
alle anwendbaren internationalen Vertragsbestimmungen geschützt. Sie haben ein Anspruchsrecht auf das Eigentum an den Medien, denen
die SOFTWARE beiliegt. Daher müssen Sie die SOFTWARE wie alle anderen durch Copyright geschützten Materialien behandeln.
2. EINSCHRÄNKUNGEN
Die SOFTWARE ist durch Copyright geschützt. Sie dürfen Sie weder analysieren noch durch anderweitige Methoden reproduzieren. Sie
dürfen die SOFTWARE weder ganz noch teilweise reproduzieren, modifizieren, verändern, gegen Entgelt oder unentgeltlich verleihen,
verkaufen oder vertreiben, und Sie dürfen auf der Grundlage der SOFTWARE keine Ableitungen erstellen. Sie dürfen die SOFTWARE
nicht an andere Computer senden oder in Netzwerke einspeisen. Sie dürfen das Eigentum an der SOFTWARE und den schriftlichen
Begleitmaterialien auf unbefristeter Basis unter den Voraussetzungen übertragen, dass Sie keine Kopien zurückbehalten und sich der
Empfänger mit den Bedingungen der Lizenzvereinbarung einverstanden erklärt.
3. BEENDIGUNG
Die Lizenzbedingung des Softwareprogramms wird am Tag, an dem Sie die SOFTWARE erhalten, wirksam. Falls ein Copyrightgesetz
oder eine Bestimmung der Lizenzbedingungen verletzt wird, wird automatisch und ohne Benachrichtigung durch Yamaha die
Lizenzvereinbarung beendet. In diesem Fall müssen Sie die lizenzierte SOFTWARE und ihre Kopien unverzüglich vernichten.
4. PRODUKTGARANTIE
Yamaha garantiert dem ursprünglichen Käufer, dass, falls die SOFTWARE bei Verwendung unter normalen Bedingungen nicht die in der
von Yamaha bereitgestellten Anleitung beschriebenen Funktionen erfüllt, die einzige Abhilfe darin bestehen wird, dass Yamaha auf
Austauschbasis kostenlos jedes Medium ersetzen wird, das Material- oder Verarbeitungsfehler aufweist. Abgesehen von dem oben
Ausgeführten wird die SOFTWARE “wie die Ware liegt und steht” geliefert, und es werden keine anderen ausdrücklichen oder
stillschweigenden Garantien hinsichtlich dieser Software übernommen, einschließlich, aber nicht beschränkt auf, die stillschweigenden
Garantien für handelsübliche Qualität und Eignung für einen bestimmten Einsatzzweck.
5. BESCHRÄNKTE HAFTUNG
Ihre einzige Abhilfe und die gesamte Haftung Yamahas bestehen in dem oben Ausgeführten. Keinesfalls haftet Yamaha Ihnen oder einer
anderen Person gegenüber für etwaige Schäden, einschließlich, aber nicht beschränkt auf, zufällige Schäden oder Folgeschäden, Kosten,
Verdienstausfall, verlorene Ersparnisse oder andere Schadenersatzansprüche, die aus der Verwendung der SOFTWARE oder aus der
Tatsache hervorgehen, dass diese SOFTWARE nicht verwendet werden konnte, selbst wenn Yamaha oder ein autorisierter Händler über die
Möglichkeit derartiger Schadenersatzansprüche informiert wurde, oder für etwaige andere Ansprüche einer anderen Partei.
6. ALLGEMEINES
Diese Lizenzvereinbarung soll gemäß und in Übereinstimmung mit den japanischen Gesetzen ausgelegt werden.
Deutsch
tyros_inst_guide_multi.fm Page 15 Tuesday, June 21, 2005 2:15 PM
CONTRAT DE LICENCE DE LOGICIEL
Ceci est un contrat entre vous-même, l’utilisateur final, et Yamaha Corporation (« Yamaha »). Le logiciel Yamaha ci-inclus est concédé sous
licence par Yamaha à l’acheteur original et ne peut être utilisé que dans les conditions prévues aux présentes. Veuillez lire attentivement ce
contrat de licence. Le fait d’ouvrir ce coffret indique que vous acceptez l’ensemble des termes du contrat. Si vous n’acceptez pas lesdits
termes, renvoyez le coffret non ouvert à Yamaha pour en obtenir le remboursement intégral. Si vous avez obtenu le(s) programme(s) logiciel(s)
Yamaha inclus avec un package ou fourni(s) avec un produit matériel, vous ne pouvez pas le(s) renvoyer à Yamaha.
1. CONCESSION DE LICENCE ET DROITS D’AUTEUR
Yamaha vous concède le droit d’utiliser, en tant qu’acheteur original, un exemplaire du logiciel et des données afférentes à celui-ci
(« LOGICIEL ») sur un ordinateur pour utilisateur unique. Vous n’êtes pas autorisé à utiliser ces éléments sur plus d’un ordinateur ou terminal
d’ordinateur. Le LOGICIEL est la propriété de Yamaha. Il est protégé par les dispositions relatives au droit d’auteur contenues dans la
législation japonaise et les traités internationaux. Vous êtes en droit de revendiquer l’appartenance du support du LOGICIEL. A ce titre, vous
devez traiter le LOGICIEL comme tout autre élément protégé par le droit d’auteur.
2. RESTRICTIONS
Le LOGICIEL est protégé par le droit d’auteur. Vous n’êtes pas autorisé à reconstituer la logique du LOGICIEL ou à reproduire ce dernier par
quelque autre moyen que ce soit. Vous n’êtes pas en droit de reproduire, modifier, prêter, louer, revendre ou distribuer le LOGICIEL en tout ou
partie, ou d’utiliser le LOGICIEL à des fins de création dérivée. Vous n’êtes pas autorisé à transmettre le LOGICIEL à d’autres ordinateurs ou
à l’utiliser en réseau. Vous êtes en droit de céder, à titre permanent, le LOGICIEL et la documentation imprimée qui l’accompagne, sous
réserve que vous n’en conserviez aucun exemplaire et que le bénéficiaire accepte les termes du présent contrat.
3. RESILIATION
Les conditions énoncées dans le présent contrat de licence prennent effet à compter du jour où le LOGICIEL vous est remis. Si l’une
quelconque des dispositions relatives au droit d’auteur ou des clauses du contrat ne sont pas respectées, le contrat de licence sera résilié de
plein droit par Yamaha, ce sans préavis. Dans ce cas, vous devrez immédiatement détruire le LOGICIEL concédé sous licence ainsi que les
copies réalisées.
4. GARANTIE PRODUIT
Si, dans des conditions normales d’utilisation, le LOGICIEL ne remplit pas les fonctions décrites dans le manuel fourni, Yamaha s’engage vis-
à-vis de l’acheteur original à remplacer gratuitement, sur la base d’un échange, tout support reconnu défectueux par suite d’un défaut de
matière première ou d’un vice de fabrication. Ceci constitue le seul recours opposable à Yamaha. Hormis dans les cas expressément énoncés
plus haut, le LOGICIEL est livré « en l’état » et toute autre garantie expresse ou implicite le concernant, y compris, de manière non limitative,
toute garantie implicite de qualité marchande et d’adéquation à un usage particulier, est exclue.
5. RESPONSABILITE LIMITEE
Votre unique recours et la seule responsabilité de Yamaha sont tels qu’énoncés précédemment. En aucun cas Yamaha ne pourra être tenu
responsable, par vous-même ou une autre personne, de quelques dommages que ce soit, notamment et de manière non limitative, de
dommages indirects, frais, pertes de bénéfices, pertes de fonds ou d’autres dommages résultant de l’utilisation ou de l’impossibilité d’utiliser
le LOGICIEL, même si Yamaha ou un distributeur agréé ont été prévenus de l’éventualité de tels dommages, ou de quelque autre
revendication formulée par une tierce partie.
6. REMARQUE GENERALE
Le présent contrat de licence est régi par le droit japonais, à la lumière duquel il doit être interprété.
U.R.G., Pro Audio & Digital Musical Instrument Division, Yamaha Corporation
© 2005 Yamaha Corporation
WE87060 507POCP5.3-01A0
Printed in Japan
Yamaha Home Keyboards Home Page (English only)
http://music.yamaha.com/homekeyboard
Yamaha Manual Library
http://www.yamaha.co.jp/manual/
Français
This document is printed on chlorine free (ECF) paper with soy ink.
Auf Umweltpapier mit Sojatinte gedruckt.
Ce document a été imprimé sur du papier non blanchi au chlore avec de l’encre d’huile de soja.
  • Page 1 1
  • Page 2 2
  • Page 3 3
  • Page 4 4
  • Page 5 5
  • Page 6 6
  • Page 7 7
  • Page 8 8
  • Page 9 9
  • Page 10 10
  • Page 11 11
  • Page 12 12
  • Page 13 13
  • Page 14 14
  • Page 15 15
  • Page 16 16

Yamaha Tyros2 Asennusohje

Kategoria
Interface hubs
Tyyppi
Asennusohje