Samsung PS50B555T4W Ohjekirja

Kategoria
LCD TVs
Tyyppi
Ohjekirja
imagine the possibilities
Thank you for purchasing this Samsung product.
To receive more complete service, please register
your product at
www.samsung.com/register
Model Serial No.
BN68-02106F-01
Plasma TV
user manual
Contact SAMSUNG WORLD-WIDE
If you have any questions or comments relating to Samsung products, please contact the SAMSUNG customer care centre.
Country
Customer Care Centre
Web Site
AUSTRIA 0810 - SAMSUNG(7267864, € 0.07/min) www.samsung.com/at
BELGIUM 02 201 2418 www.samsung.com/be
CZECH REPUBLIC
800 - SAMSUNG (800-726786) www.samsung.com/cz
Samsung Zrt., česká organizační složka, Oasis Florenc, Sokolovská394/17, 180 00, Praha 8
DENMARK 8 - SAMSUNG(7267864) www.samsung.com/dk
EIRE 0818 717 100 www.samsung.com/ie
ESTONIA 800-7267 www.samsung.ee
FINLAND
30 - 6227 515
www.samsung.com/fi
FRANCE
3260 'dites' SAMSUNG (€ 0,15/Min)
0825 08 65 65 (€ 0.15/Min)
www.samsung.com/fr
GERMANY 01805 - SAMSUNG(7267864, € 0.14/Min) www.samsung.de
HUNGARY 06 - 80 - SAMSUNG(7267864) www.samsung.com/hu
ITALIA 800 - SAMSUNG(7267864) www.samsung.com/it
KAZAKHSTAN 8-10-800-500-55-500 www.samsung.com/kz_ru
KYRGYZSTAN 00-800-500-55-500
LATVIA 8000-7267 www.samsung.com/lv
LITHUANIA 8-800-77777 www.samsung.lt
LUXEMBURG 02 261 03 710 www.samsung.com/lu
NETHERLANDS 0900 - SAMSUNG(7267864, € 0.10/Min) www.samsung.com/nl
NORWAY 3 - SAMSUNG(7267864) www.samsung.com/no
POLAND
0 - 801 - 1SAMSUNG(172678)
022 - 607 - 93 - 33
www.samsung.com/pl
PORTUGAL 808 20 - SAMSUNG(7267864) www.samsung.com/pt
RUSSIA 8-800-555-55-55 www.samsung.ru
SLOVAKIA 0800 - SAMSUNG(7267864) www.samsung.com/sk
SPAIN 902 - 1 - SAMSUNG (902 172 678) www.samsung.com/es
SWEDEN 075 - SAMSUNG(726 78 64) www.samsung.com/se
Switzerland 0848 - SAMSUNG(7267864, CHF 0.08/min) www.samsung.com/ch
TADJIKISTAN 8-10-800-500-55-500
Turkey 444 77 11 www.samsung.com/tr
U.K 0845 SAMSUNG(7267864) www.samsung.com/uk
UKRAINE 8-800-502-0000 www.samsung.ua
UZBEKISTAN 8-10-800-500-55-500 www.samsung.com/kz_ru
BN68-02106F-Eng.indb 1 2009-04-10 오전 9:55:19
English - 2
User Instructions
Screen Image retention
Do not display a still image (such as on a video game or when hooking up a PC to this PDP) on the plasma monitor panel for more
than 2 hours as it can cause screen image retention. This image retention is also known as “screen burn”. To avoid such image
retention, reduce the degree of brightness and contrast of the screen when displaying a still image.
Height
The PDP can normally operate only under 2000m in height. It might abnormally function at a place over 2000m in height so do not
install and operate there.
Heat on the top of the PDP TV
The top side of the product may be hot after long period of use as heat dissipates from the panel through the vent hole in the upper
part of the product. This is normal and does not indicate any defect or operation failure of the product. However, children should be
prevented from touching the upper part of the product.
The product is making a ‘cracking’ noise.
A ‘cracking’ noise may occur when the product contracts or expands due to a change of surrounding environment such as
temperature or humidity. This is normal and not a defect of the unit.
Cell Defects
The PDP uses a panel consisting of 1,230,000(SD-level) to 3,150,000(HD-level) pixels which require sophisticated technology to
produce. However, there may be few bright or dark pixels on the screen. These pixels will have no impact on the performance of
the product.
Avoid operating the TV at temperatures below 5°C(41°F)
A still image displayed too long may cause permanent damage to the PDP Panel.
Watching the PDP TV in 4:3 format for a long period of time may leave traces of borders displayed on the left,
right and centre of the screen caused by the difference of light emission on the screen. Playing a DVD or a
game console may cause similar effect to the screen. Damages caused by the above effect are not covered by
the Warranty.
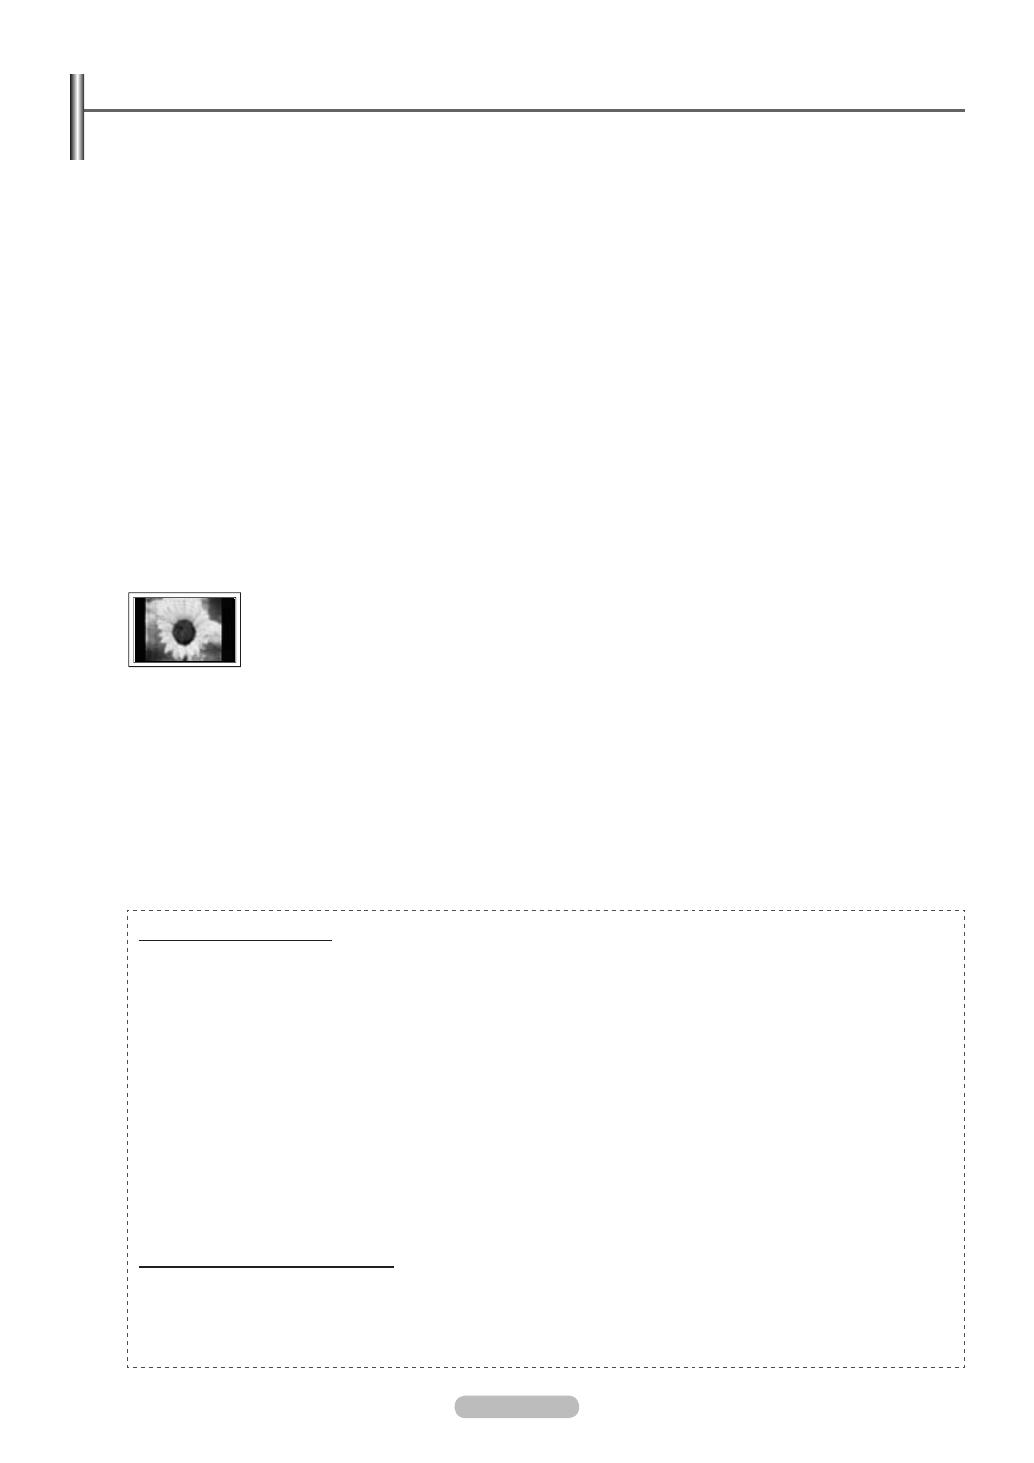
Afterimage on the Screen.
Displaying still images from Video games and PC for longer than a certain period of time may produce partial afterimages.
To prevent this effect, reduce the ‘brightness’ and ‘contrast’ when displaying still images.
Warranty
Warranty does not cover any damage caused by image retention.
Burn-in is not covered by the warranty.
Installation
Be sure to contact an authorized service centre, when installing your set in a location with heavy dust, high or low temperatures,
high humidity, chemical substance and where it operates continually such as the airport, the train station etc. Failure to do so may
cause a serious damage to your set.
Digital TV (DVB-T) Notice
1. Functionalities related to Digital TV(DVB) are only available in countries/areas where DVB-T (MPEG2 and MPEG4 AVC)
digital terrestrial signals are broadcasted or where you have access to a compatible DVB-C(MPEG2 and MPEG4 AAC)
cable-TV service. Please check with your local dealer the possibility to receive DVB-T or DVB-C signal.
2. DVB-T is the DVB European consortium standard for the broadcast transmission of digital terrestrial television and DVB-C
is that for the broadcast transmission of digital TV over cable.
However, some differentiated features like EPG (Electric Program Guide), VOD (Video on Demand) and so on, are not
included in this specication. So, they cannot be supported at this moment.
3.
Although this TV set meets the latest DVB-T and DVB-C standards[August,2008], the compatibility with future DVB-T digital
terrestrial and DVB-C digital cable broadcasts cannot be guaranteed.
4.
Some cable-TV providers may charge an additional fee for such a service and you may be required to agree to terms and
conditions of their business.
5.
Some Digital TV functions might be unavailable in some countries or regions and DVB-C might not work correctly with all
providers.
6.
For more information, please contact your local Samsung customer care centre.
Contact SAMSUNG WORLDWIDE
If you have any questions or comments relating to Samsung products, please contact the SAMSUNG
customer care centre. (See back cover for more informations.)
Figures and illustrations in this User Manual are provided for reference only and may dif
fer from actual product appearance.
Product design and specications may be changed without notice in order to enhance product performance.
N
© 2009 Samsung Electronics Co., Ltd. All rights reserved.
-
-
BN68-02106F-Eng.indb 2 2009-04-10 오전 9:55:20
English - 3
English
N O T
Symbol Press Note One-Touch Button TOOLS
Contents
Connecting and Preparing Your TV
Checking Parts ..........................................................................4
Using the Stand-Base ...............................................................4
How to assemble the Stand-Base (depending on the model) ...4
Assembling the Cables ..............................................................4
Viewing the Control Panel .........................................................5
Viewing the Connection Panel...................................................6
Remote Control .........................................................................8
Installing Batteries in the Remote Control .................................9
Switching On and Off.................................................................9
Placing Your Television in Standby Mode ..................................9
Viewing the Menus ..................................................................10
Using the TOOLS Button ........................................................10
Plug & Play Feature ................................................................ 11
Channel Control
Storing Channels ...................................................................12
Managing Channels ................................................................14
Picture Control
Changing the Picture Settings .................................................16
Setting up the TV with your PC ...............................................19
PC Display ...............................................................................20
Sound Control
Changing the Sound Setting ...................................................21
Selecting the Sound Mode ......................................................22
Function Description
Setting the Time ......................................................................23
Conguring the Setup Menu ....................................................24
Support / Input
Supported Program .................................................................26
Source List / Edit Name ...........................................................27
Media Play
Connecting a USB Device .......................................................28
Using the Media Play Function ................................................29
Using and Sorting Photo List ...................................................30
Viewing a Photo or Slide Show ..............................................31
Using and Sorting the Music List .............................................32
Playing a Music ......................................................................33
Picture / Music Settings Using Media Play ..............................34
Using the Setup Menu .............................................................34
About Anynet+
Connecting Anynet
+
Devices ...................................................35
Setting Up Anynet
+
................................................................. 36
Switching between Anynet+ Devices.......................................36
Recording ................................................................................37
Listening through a Receiver (Home theater) .........................38
Troubleshooting for Anynet
+
...................................................38
Recommendations for Use
Teletext Feature ....................................................................... 39
Wall Mount Kit Specications (VESA) .....................................40
Preparing before installing Wall- Mount ...................................41
Securing the TV to the Wall .....................................................41
Troubleshooting .......................................................................42
Specications ..........................................................................43
BN68-02106F-Eng.indb 3 2009-04-10 오전 9:55:20
English - 4
Using the Stand-Base
Two or more people should carry the PDP. Never lay the PDP on the oor
because of possible damage to the screen. Always keep the PDP upright.
The PDP can rotate 20 degrees in right and left directions.
N
N
How to assemble the Stand-Base (depending on the model)
Using the 4 screws for securing the stand base and the monitor, firmly attach the
monitor to the stand base.
Warning
Firmly secure the stand to the TV before
moving it, as the stand may fall and could
cause serious injury.
Two or more people should carry the TV.
Never lay the TV on the oor because of
possible damage to the screen. Always
store the TV upright.
The product colour and shape may vary
depending on the model.
N
N
In case of installing your TV on the wall, close the
cover (1) on the stand-base connection part using
two screws for hiding.
-20° ~ 20°
Checking Parts
Owners Instructions Remote Control/
AAA Batteries (2ea)
Power Cord Cloth-Clean Holder-Wire Cable Warranty Card/Quck Setup
Guide (Not available in all
locations)
Screw (4ea) Cover-Bottom Holder-Ring (4ea)
(Refer to page 41)
Ferrite Core for
Power Cord
Ferrite Core fo
Headphone
Ferrite CoreThe ferrite cores are used to shield the cables from interference.When connecting a
cable, open the ferrite core and clip it around the cable near the plug.
N
Connecting and Preparing Your TV
Assembling the Cables
Enclose the cables in the Holder-Wire Cable so that the cables are not visible through the
transparent stand.
BN68-02106F-Eng.indb 4 2009-04-10 오전 9:55:23
English - 5
Viewing the Control Panel
The product colour and shape may vary depending on the model.
N
Front Panel buttons
Touch each button to
operate.
1
SOURCE
Toggles between all the available input sources
(TV, Ext1, Ext2, AV, PC, Component, HDMI1, HDMI2/DVI,
HDMI3, HDMI4, USB).
In the on-screen menu, use this button as you would use
the ENTER
E
button on the remote control.
2
MENU
Press to see an on-screen menu of your TV’s features.
3
+
Press to increase or decrease the volume. In the on-screen
menu, use the + buttons as you would use the
◄ and ► buttons on the remote control.
N
4
CH
Press to change channels. In the on-screen menu, use the
CH buttons as you would use the ▲ and ▼ buttons
on the remote control.
5
POWER INDICATOR
Blinks and turns off when the power is on and lights up in
stand-by mode.
6
(
POWER)
Touch the silver sensor below the (icon) mark to turn the TV
on and off.
7
REMOTE CONTROL SENSOR
Aim the remote control towards this spot on the TV.remote control towards this spot on the TV. control towards this spot on the TV.
8
SPEAKERS
BN68-02106F-Eng.indb 5 2009-04-10 오전 9:55:25
English - 6
Viewing the Connection Panel
Whenever you connect an audio or video system to your set, ensure that all elements are switched off.
When connecting an external device, match the colour of the connection terminal to the cable.
N
N
The product colour and shape may vary depending on the model.
N
1
POWER IN
Connect the supplied power cord.
2
COMPONENT IN
Audio (AUDIO L/R) and video (Y / P
B
/ P
R
) inputs for
Component.
3
PC IN (AUDIO / PC)
Connect to the video and audio output jack on your PC.
4
EXT 1, EXT 2
Inputs or outputs for external devices, such as VCR, DVD,
video game device or video disc players.
In EXT mode, DTV Out only supports MPEG SD Video
and Audio.
In EXT Mode, Game mode is not available
Input/Output Specification
Connector
Input Output
Video Audio(L/R) RGB Video + Audio(L/R)
EXT 1
Only TV or DTV output
is available.
EXT 2
Output you can choose.
5 HEADPHONE
Connect a set of headphones if you wish to watch a television
program without disturbing other people in the room.
Prolonged use of headphones at a high volume may
damage your hearing.
6
DIGITAL AUDIO OUT (OPTICAL)
Connect to a Digital Audio Component.
7
SERVICE
Connector for service.
N
N
N
8
AUDIO OUT(AUDIO R/L)
Connect RCA audio signals from the TV to an external source,
such as Audio equipment.
9
ANT IN
75Ω Coaxial connector for Aerial/Cable Network.
0
HDMI IN 1, 2(DVI), 3
No additional Audio connection is needed for an HDMI to
HDMI connection.
- When using an HDMI/DVI cable connection, you must
use the HDMI IN 2 (DVI) jack.
What is HDMI?
- High Definition Multimedia interface allows the
transmission of high denition digital video data and
multiple channels of digital audio.
- The HDMI/DVI terminal supports DVI connection to
an extended device with the appropriate cable (not
supplied). The difference between HDMI and DVI is
that the HDMI device is smaller in size, has the HDCP
(High Bandwidth Digital Copy Protection) coding feature
installed, and supports multi - channel digital audio.
DVI AUDIO IN
DVI audio outputs for external devices.
Supported modes for HDMI/DVI and Component
480i 480p 576i 576p 720p 1080i 1080p
HDMI/DVI 50Hz X X X O O O O
HDMI/DVI 60Hz X O X X O O O
Component O O O O O O O
-
N
TV Rear Panel
Cable Television
Network
or
or
1
432 8 06
9
7
5
BN68-02106F-Eng.indb 6 2009-04-10 오전 9:55:28
English - 7
1
COMMON INTERFACE Slot
Insert CI (Common Interface) card into the slot.
(refer to page 25)
When not inserting CI CARD in some channels,
Scramble Signal is displayed on the screen.
The pairing information containing a telephone number,
CI CARD ID, Host ID, and other information will be
displayed in about 2~3 minutes. If an error message is
displayed, please contact your service provider.
When the channel information conguration has nished,
the message Updating Completed is displayed,
indicating that the channel list is now updated.
Insert the CI-Card in the direction marked on it.
CAM is not supported in some countries and
regions,check with your authorized dealer.
-
-
-
N
N
2
HDMI IN 4
Connect to the HDMI jack of a device with HDMI output.
3
USB
Connect a USB mass storage device to view and play photo
les (JPEG) and audio les (MP3).
4
AV IN (VIDEO, AUDIO L/R)
Video and audio inputs for external devices, such as a
camcorder or VCR.
The product colour and shape may vary depending on the model.
N
TV Side Panel
2
4
1
3
BN68-02106F-Eng.indb 7 2009-04-10 오전 9:55:29
English - 8
Remote Control
You can use the remote control up to a distance of about 23 feet from the TV.
The performance of the remote control may be affected by bright light.
N
1
POWER button
(turns the TV on and off)
2
Selects the TV mode directly.
3
Number buttons for direct channel
access
4
Use to select on-screen menu items
5
Temporary sound switch-off
6
Volume increase
Volume decrease
7
Available source selection
8
Channel control button
9
Use to quickly select frequently used
functions.
0
Control the cursor in the menu
!
Use to see information on the current
broadcast
@
Use these buttons in the Channel List
and Media Play, etc.
$
Sound mode selection
%
Use these buttons in the Channel list,
Media Play and Anynet+.
^
Previous channel
&
Next channel
Previous channel
*
Displays the main on-screen menu
(
Press to switch to your Favourite
channels.
)
Returns to the previous menu
a
Exit the on-screen menu
b
This function enables you to view
and play the photo (JPEG) and music
(MP3) les from an external devices.
c
Picture size selection
d
Digital subtitle display
e
Electronic Program Guide (EPG)
display
Teletext Functions
2
Exit from the teletext display
(depending on the model)
7
Teletext mode selection (LIST/FLOF)
8
Teletext store
9
Teletext size
!
Teletext reveal
@
Fastext topic selection
#
Teletext display/mix both
teletext information and the normal
broadcast
^
Teletext sub page
&
P :Teletext next page
P
:Teletext previous page
*
Teletext index
)
Teletext hold
a
Teletext cancel
BN68-02106F-Eng.indb 8 2009-04-10 오전 9:55:30
English - 9
Installing Batteries in the Remote Control
1. Lift the cover at the back of the remote control upward as shown in the gure.
2. Install two AAA size batteries.
Make sure to match the ‘+’ and ‘–’ ends of the batteries with the diagram inside
the compartment.
3.
Close the cover.
Remove the batteries and store them in a cool, dry place if you won’t be using the
remote control for a long time.
If the remote control doesn’t work, check the following
1. Is the TV power on?
2. Are the plus and minus ends of the batteries reversed?
3. Are the batteries drained?
4. Is there a power outage or is the power cord unplugged?
5. Is there a special uorescent light or neon sign nearby?
N
Switching On and Off
The mains lead is attached to the rear of your set.
1.
Plug the mains lead into an appropriate socket.
The standby indicator lights up on your set.
2. Press the POWER
P
button on your set.
You also can press the POWER
P
button or the TV button on the remote control to turn the TV on.
The programme that you were watching last is reselected automatically.
3.
Press the numeric button (0~9) or channel up / down (
< / >) button on the remote control or < CH> button on your set.
When you switch the set on for the very rst time, you will be asked to choose language in which the menus are to be displayed.
4.
To switch your set off, press the POWER
P
button again.
Placing Your Television in Standby Mode
Your set can be placed in standby mode in order to reduce the power consumption. The standby mode can be useful when you wish to
interrupt viewing temporarily (during a meal, for example).
1.
Press the POWER
P
button on the remote control.
The screen is turned off and a red standby indicator appears on your set.
2. To switch your set back on, simply press the POWER
P
, numeric buttons (0~9), TV button or channel up / down (< / >) button
again.
Do not leave your set in standby mode for long periods of time (when you are away on holiday
, for example). It is best to unplug
the set from the mains and aerial.
N
N
N
N
N
N
N
N
BN68-02106F-Eng.indb 9 2009-04-10 오전 9:55:31
English - 10
Viewing the Menus
1. With the power on, press the MENU button. The main menu appears on the
screen. The menu’s left side has icons: Picture, Sound, Channel, Setup, Input,
Application, Support.
2. Press the ▲ or ▼ button to select one of the icons. Then press the ENTER
E
button to access the icon’s sub-menu.
3.
Press the EXIT button to exit.
The on-screen menus disappear from the screen after about one minute.
Using the TOOLS Button
You can use the TOOLS button to select your frequently used functions quickly and easily. The Tools menu changes depending on
which external input mode you are viewing.
1.
Press the TOOLS button. The Tools menu will appear.
2. Press the ▲ or ▼ button to select a menu, then press the ENTER
E
button.
3.
Press the ▲ / ▼ / ◄ / ► / ENTER
E
buttons to display, change, or use the selected
items. For a more detailed description of each function, refer to the corresponding
page.
Anynet
+
(HDMI-CEC), see page 36
Picture Mode, see page 16
Sound Mode, see page 21
Sleep Timer, see page 23
SRS TS HD, see page 21
Energy Saving, see page 25
Auto Adjustment, see page 19
N
Mode : Standard
Cell Light : 7
Contrast : 95
Brightness : 45
Sharpness : 50
Colour : 50
Tint (G/R) : G50/R50
Advanced Settings
Picture
Tools
Anynet+ (HDMI-CEC)
Picture Mode : Standard
Sound Mode : Custom
Sleep Timer : Off
SRS TS HD : Off
Energy Saving : Off
Add to Favourite
U
Move
E
Enter
e
Exit
BN68-02106F-Eng.indb 10 2009-04-10 오전 9:55:32
English - 11
Plug & Play Feature
When the TV is initially powered on, basic settings proceed automatically and subsequently.
The Screen Saver is activated if there is no remote control key input for longer than 1 minute while Plug & Play is running.
The Screen Saver is activated if there is no operating signal for longer than 15 minutes.
If you accidentally select the wrong country for your TV, the characters on the screen may be wrongly displayed.
1.
Press the POWER button on the remote control. Select the OSD Language. menu
is automatically displayed. Select the appropriate language by pressing the ▲ or ▼
button. Press the ENTER
E
button to conrm your choice.
2. Press the ◄ or ► button to select Store Demo or Home Use, then press the
ENTER
E
button.
We recommend setting the TV to Home Use mode for the best picture in your
home environment.
Store Demo mode is only intended for use in retail environments.
If the unit is accidentally set to Store Demo mode and you want to return to Home Use (Standard): Press the Volume button on
the TV. When the volume OSD is displayed, press and hold the MENU button on the TV for 5 seconds.
3.
Press the ENTER
E
. Select the appropriate country by pressing the ▲ or ▼ button. Press the ENTER
E
button to conrm your
choice.
4.
Press the ▲ or ▼ button to memorise the channels of the selected connection, then press the ENTER
E
button.
Air: Air antenna signal.
Cable: Cable antenna signal.
5.
Press the ▲ or ▼ button to select the channel source to memorise. Press the ENTER
E
button to select Start.
Digital & Analogue: Digital and Analogue channels.
Digital: Digital channels.
Analogue: Analogue channels.
The channel search will start and end automatically.
For more detailed description of selecting Cable mode, refer to Auto Store chapter
6.
The message Set the Clock Mode is displayed. Press the ENTER
E
button. Press the ▲ or ▼ button to select Auto, then Press
the ENTER
E
button.
If you select Manual, Set current date and time is displayed. (For a more detailed description of Manual, refer to 23 page)
If you have received a digital signal, the time will be set automatically.
7. The brief instruction on How to get the best performance from your new HDTV. is displayed. Press the ENTER
E
button.
This menu is available HD Connection Guide in the Support menu.
8. The message Enjoy your TV. is displayed. When you have nished, press the ENTER
E
button.
If you want to reset this feature...
1.
Press the MENU button to display the menu. Press the ▲ or ▼ button to select Setup,
then press the ENTER
E
button.
2. Press the ENTER
E
button again to select Plug & Play.
3.
Enter your 4 digit PIN number. The default PIN number of a new TV set is ‘0-0-0-0’.
If you want to change PIN number, refer to 24 page.
The Plug & Play feature is only available in the TV mode.
N
N
N
N
N
N
N
N
N
N
N
N
N
Setup
Plug & Play
Language : English
Time
Game Mode : Off
Child Lock : On
Change PIN
Parental Lock
Subtitle
Plug & Play
Select the OSD Language.
U
Move
E
Enter
Nederlands
English
Eesti
Menu Language :
BN68-02106F-Eng.indb 11 2009-04-10 오전 9:55:32
English - 12
Storing Channels
Country
Digital Channel: You can change the country for digital channels.
Analogue Channel: You can change the country for analogue channels.
The PIN number input screen appears. Enter your 4 digit PIN number.
Auto Store
Scans for all channels with active broadcast stations (and availability depends on your
country) and stores them in the TV's memory.
You can memorise the channels of the selected connection.
Air: Air antenna signal.
Cable: Cable antenna signal.
You can memorise the channel source
Digital & Analogue: Digital and Analogue channels.
Digital: Digital channels.
Analogue: Analogue channels.
When selecting Cable
Search Mode: Displays the search mode. (Quick)
- Network ID: Displays the network identication code.
- Frequency: Displays the frequency for the channel.
- Modulation: Displays available modulation values.
- Symbol Rate: Displays available symbol rates.
Search Mode: Displays the search mode.(Full, Network)
- Start Frequency: Displays the frequency start values.
- End Frequency: Displays the frequency stop values.
- Modulation: Displays available modulation values.
- Symbol Rate : Displays available symbol rates.
For more detailed description of Full search mode.
If you want to stop Auto Store, press the ENTER
E
button.
The Stop Auto Store? message will be displayed.
Select Yes by pressing the ◄ or ► button, then press the ENTER
E
button.
Manual Store
Scans for a channel manually and stores it in the TV’s memory.
Digital Channel (Digital)
Digital Channel is only available in DTV mode.
Channel: Set the Channel number using the ▲, ▼ or number (
0~9) buttons.
Frequency: Set the frequency using the number buttons.
Bandwidth: Set the bandwidth using the ▲, ▼ or number (
0~9) buttons.
When it has nished, channels are updated in the channel list.
Analogue Channel
Manual store for analogue channel.
Programme (Programme number to be assigned to a channel): Sets the programme number using the ▲, ▼ or number (
0~9)
buttons.
: Sets the colour system value using the ▲ or ▼ button.
Sound SystemBG / DK / I / L : Sets the sound system value using the ▲ or ▼ button.
Channel (When you know the number of the channel to be stored): Press the ▲ or ▼ button to select C (Air channel) or S
(Cable channel). Press the ► button, then press the ▲, ▼ or number (
0~9) buttons to select the required number.
If there is abnormal sound or no sound, reselect the sound standard required.
Search (When you do not know the channel numbers): Press the ▲ or ▼ button to start the search. The tuner scans the
frequency range until the rst channel or the channel that you selected is received on the screen.
Store (When you store the channel and associated programme number): Set to OK by pressing the ENTER
E
button.
Channel mode
- C (Air channel mode):
You can select a channel by entering the assigned number to each air broadcasting station in this mode
.
- S (Cable channel mode): You can select a channel by entering the assigned number for each cable channel in this mode.
N
N
N
N
N
N
N
N
N
N
Channel Control
Continued...
Channel
Country
Auto Store
Manual Store
Full Guide
Mini Guide
Default Guide : Full Guide
Channel List
Channel Mode : Added Ch.
BN68-02106F-Eng.indb 12 2009-04-10 오전 9:55:33
English - 13
Full Guide / Mini Guide
The EPG (Electronic Programme Guide) information is provided by the broadcasters. Programme entries may appear blank or out
of date as a result of the information broadcast on a given channel. The display will dynamically update as soon as new information
becomes available.
Full Guide: Displays the programme information as time ordered One hour segments. One hours of programme information is
displayed which may be scrolled forwards or backwards in time.
Mini Guide: The information of each programme is displayed by each line on the current channel Mini Guide screen from the
current programme onwards according to the programme starting time order.
Default Guide
Mini Guide / Full Guide
You can decide whether to display either the Mini Guide or the Full Guide when the
GUIDE button on the remote control is pressed.
You can also display the guide menu simply by pressing the GUIDE button.
Using the Full / Mini Guide
▲ / ▼ / ◄ / ►
,
(ENTER)
Select a programme by pressing the ▲/▼/◄/► button.
RED Toggle between the Mini Guide or Full Guide.
GREEN
Full Guide: Scroll backwards quickly (-24 hours).
Mini Guide: Display next page quickly.
YELLOW
Full Guide: Scroll forwards quickly (+24 hours).
Mini Guide: Display previous page quickly.
BLUE Exit the guide.
INFO INFO button for the detailed information.
Channel Mode
When the press the P (</>) button, Channels will be switched within the selected channel list.
Added Ch.:
Channels will be switched within the memorised channel list.
Favourite Ch.:
Channels will be switched within the favourite channel list.
Fine Tune (only analogue channels)
If the reception is clear, you do not have to ne tune the channel, as this is done automatically during the search and store
operation. If the signal is weak or distorted, you may have to ne tune the channel manually.
Fine tuned channels that have been saved are marked with an asterisk * on the right-hand side of the channel number in the
channel banner.
If you do not store the ne-tuned channel in memory, adjustments are not saved.
To reset the ne-tuning, select Reset by pressing the ▼ button and then press the ENTER
E
button.
O
N
N
N
Channel
Full Guide
Mini Guide
Default Guide : Full Guide
Channel List
Channel Mode : Added Ch.
Fine Tune
Full Guide
DTV Cable 900 f tn 2:10 Tue 1 Jun
Freshmen On Campus
2:00 - 2:30
No Detailed Information
Today 2:00 - 3:00 3:00 - 4:00
Mint Extra
Loaded
Fresh 40 with Dynamite MC
The Distillery
Smash Hits! Sunday
900 f tn
901 ITV Play
902 Kerrang!
903 Kiss
903 oneword
903 Smash Hits!
Street Hypn..
Kisstory
No Information
No Information
No Information
Freshmen O..
Watch
INFO
Information
Mini Guide
+24 Hours
Exit
Mini Guide DTV Cable 900 f tn
Street Hypnosis
Booze Britain
2:00
2:30
5:00
Freshmen On Campus
Watch
INFO
Information
Full Guide
Next Page
Exit
BN68-02106F-Eng.indb 13 2009-04-10 오전 9:55:34
English - 14
Managing Channels
Using this menu, you can Add / Delete or set Favourite channels and use the programme
guide for digital broadcasts.
Select a channel in the All Channels, Added Channels, Favourites, or Programmed
screen by pressing the ▲ / ▼ buttons, and pressing the ENTER
E
button.
Then you can watch the selected channel.
All Channels:
Shows all currently available channels.
Added Channels:
Shows all added channels.
Favourites:
Shows all favourite channels.
Programmed:
Shows all current reserved programmes.
Press the CH LIST button on the remote control to bring up the channel lists.
Using the Colour buttons with the Channel List
Red (Channel Type): Toggle between your TV, Radio, Data/Other and All.
Green (Zoom): Enlarges or shrinks a channel number.
Yellow (Select): Selects multiple channel lists.
T (Tools): Displays the Delete (or Add), Add to Favourite (or Delete from
Favourite), Timer Viewing, Edit Channel Name, Edit Channel Number, Sort,
Lock (or Unlock), Select All (or Deselect All), or Auto Store menu.
(The Tools menus may differ depending on the situation.)
Channel Status Display Icons
A
An Analogue channel.
c
A channel selected by pressing the
yellow button.
A channel set as a Favourite.
(
A programme currently being
broadcast.
\
A locked channel.
)
A reserved programme
Channel List Tools Menu (in All Channels / Added Channels / Favourites)
Press the TOOLS button to use the option menu.
The Tools menu items may differ depending on the channel status.
Add / Delete
You can delete or add a channel to display the channels you want.
All deleted channels will be shown on All Channels menu.
A gray-coloured channel indicates the channel has been deleted.
The Add menu only appears for deleted channels.
You can also delete a channel to the Added Channels or Favourite menu in the
same manner.
Add to Favourite / Delete from Favourite
You can set channels you watch frequently as favourites.
Press the TOOLS button to display Tools menu.
You can also add the favourite channel by selecting ToolsAdd to Favourite
(or Delete from Favourite).
T
To select the Favourite channels you have set up, press the FAV.CH button on the
remote control.
The “♥” symbol will be displayed and the channel will be set as a favourite.
All favourite channels will be shown on Favourite menu.
Lock / Unlock
You can lock a channel so that the channel cannot be selected and viewed. This function is available only when the Child Lock is
set to on. (see page 24)
The PIN number input screen appears. Enter your 4 digit PIN number.
The default PIN number of a new TV set is ‘0-0-0-0’. You can change the PIN, by selecting Change PIN from the menu.
The “\” symbol will be displayed and the channel will be locked.
N
O
N
-
-
-
-
N
N
N
N
N
N
N
O
N
N
N
N
N
Channel
Mini Guide
Default Guide : Full Guide
Channel List
Channel Mode : Added Ch.
Fine Tune
824 UKTV Gold
825 UKTV style
A
1 C --
A
2 C
--
A
3
C
--
A
4 C
--
A
5 C
--
A
6 C
--
A
7 C
--
A
8 C
--
Added Channels
All
Channel Type
Zoom
Select
Tools
824 UKTV Gold
825 UKTV style
A
1 C --
A
2 C
--
A
3
C
--
A
4 C
--
A
5 C
--
A
6 C
--
A
7 C
--
A
8 C
--
All Channels
All
Channel Type
Zoom
Select
Tools
Delete
Add to Favourite
Lock
Timer Viewing
Edit Channel Name
Sort
Continued...
BN68-02106F-Eng.indb 14 2009-04-10 오전 9:55:35
English - 15
Timer Viewing
If you reserve a programme you want to watch, the channel is automatically switched to the reserved channel in the Channel List;
even when you are watching another channel. To reserve a programme set the current time rst. (See page 23)
Only memorised channels can be reserved.
You can set the channel, month, day, year, hour and minute directly by pressing the number buttons on the remote control.
Reserving a programme will be shown on Programmed menu.
Digital Programme Guide and Viewing Reservation
When a digital channel is selected, and you press the ► button, the Programme Guide for the channel appears.
You can reserve a programme according to the procedures described above.
Edit Channel Name (only analogue channel)
Channels can labeled so that their call letters appear whenever the channel is selected.
The names of digital broadcasting channels are automatically assigned and cannot be labeled.
Edit Channel NumberNumber (only digital channel)
You can also edit the channel number by pressing the number buttons on the remote control.
Sort (only analogue channel)
This operation allows you to change the programme numbers of the stored channels. This operation may be necessary after using
the auto store.
Select All / Deselect All
You can perform the add / delete, add to Favourites / delete from Favourites, or lock / unlock function for multiple channels at
the same time. Select the required channels and press the yellow button to set all the selected channels at the same time.
The c mark appears to the left of the selected channels.
You can only select Deselect All when there is a selected channel.
Auto Store
For further details on setting up options, refer to page 12.
If a channel is locked using the Child Lock function, the PIN input window appears.
Channel List Option Menu (in Programmed )
You can view, modify or delete a reservation.
Press the TOOLS button to use the option menu.
Change Info: Select to change a viewing reservation.
Cancel Schedules: Select to cancel a viewing reservation.
Information: Select to view a viewing reservation. (You can also change the
reservation information.)
Select All / Deselect All: Select or deselect all reserved programmes.
N
N
N
N
N
N
N
N
N
N
N
Programmed
1 / 1 / 2009
13:59 5 TV1 Quincy, M.E
18:59 2 TV3 The Equalizer
20:59 2 TV3 McMillan & Wife
21:59 2 TV3 M.Spillane’s mike Hammer
Change Info
Cancel Schedules
Information
Select All
All
Zoom
Select
Tools
Information
BN68-02106F-Eng.indb 15 2009-04-10 오전 9:55:35
English - 16
Changing the Picture Settings
Mode
You can select the type of picture which best corresponds to your viewing requirements.
Dynamic / Standard / Eco / Movie
Press the TOOLS button to display Tools menu.
You can also set the picture mode by selecting .
T
Cell Light / Contrast / Brightness / Sharpness / Colour / Tint (G/R)
Your television has several setting options that allow you to control the picture quality.
Cell Light: Adjusts the pixel brightness.
Contrast: Adjusts the contrast level.
Brightness: Adjusts the brightness level.
Sharpness: Adjusts the sharpness.
Colour: Adjusts colour saturation of the picture
Tint (G/R): Adjusts the colour tint of the picture.
When you make changes to Cell Light, Contrast, Brightness, Sharpness, Colour or Tint (G/R), the OSD will be adjusted
accordingly.
The adjusted values are saved for each picture mode.
In Analogue TV, Ext., AV modes of the PAL system, you cannot use the Tint Function.
In PC mode, you can only make changes to Cell Light, Contrast and Brightness.
Each adjusted setting will be stored separately according to its input mode.
The energy consumed during use can be signicantly reduced if the level of brightness of the picture is reduced, and then this
will reduce the overall running cost.
Advanced Settings
You can adjust the advanced settings for your screen including the colour and contrast.
Advanced Settings is available in Standard or Movie mode.
In PC mode, you can only make changes to Dynamic Contrast, Gamma and
White Balance from among the Advanced Settings items.
              Off / Dark / Darker / Darkest
You can enhance the picture depth by adjusting the black colour density.
              Off / Low / Medium / High
You can adjust the screen contrast so that the optimal contrast is provided.
Gamma
You can adjust the primary colour (Red, Green, Blue) Intensity.
Colour Space
Colour Space is a colour matrix composed of red, green and blue colours. Select your favourite Colour Space to experience the
most natural colour.
Auto: Automatically sets the colour range depending on the input video source.
Native: Sets a colour range wider than that of the input video source.
Custom: Adjusts the colour range to suit your preference.
Customizing the Colour Space
- Adjusts the Colour range to suit your preference. Colour is available when Colour Space is set to Custom.
- Colour Red / Green / Blue / Yellow / Cyan / Magenta
- Red / Green / Blue: In Colour, you can adjust the RGB values for the selected colour.
- Reset: Resets the colour space to the default values.
White Balance
You can adjust the colour temperature for more natural picture colours.
R-Offset / G-Offset / B-Offset / R-Gain / G-Gain / B-Gain: Changing the adjustment value will refresh the adjusted screen.
Reset: Resets the default white balance.
N
N
N
N
N
N
N
N
N
Picture Control
Continued...
Mode : Standard
Cell Light : 7
Contrast : 95
Brightness : 45
Sharpness : 50
Colour : 50
Tint (G/R) : G50/R50
Advanced Settings
Picture
Colour : 50
Tint (G/R) : G50/R50
Advanced Settings
Picture Options
Picture Reset
Picture
BN68-02106F-Eng.indb 16 2009-04-10 오전 9:55:36
English - 17
Flesh Tone
You can emphasize the pink esh tone in the picture.
Changing the adjustment value will refresh the adjusted screen.
      Off / On
You can emphasize object boundaries in the picture.

Setting the xvYCC mode to on increases detail and colour space when watching movies from an external device (i.e. DVD player).
xvYCC is available when the picture mode is set to Movie, and the external input is set to HDMI or Component mode.
If xvYCC function is active, PIP cannot be selected.
Picture Options
You can customize the additional picture settings to suit your preference.
In PC mode, you can only make changes to the Colour Tone, Size and Screen
Burn Protection from among the items in Picture Options.
                  Cool / Normal / Warm1 / Warm2 / Warm3
You can select the most comfortable colour tone to your eyes.
The adjusted values are stored according to the selected Picture mode.
Warm1, Warm2, or Warm3 is only activated when the picture mode is Movie.

You can select the picture size which best corresponds to your viewing requirements.
Auto Wide: Sets the picture in Auto Wide format.
16:9: Sets the picture to the 16:9 aspect ratio.
: Select this menu to view 4:3 aspect ratio pictures over a 16:9 aspect ratio TV by stretching the 4:3 picture
vertically.
: Stretches the 16:9 aspect ratio picture vertically.
4:3: Sets the picture to the 4:3 aspect ratio.
Screen Fit: Displays the full native HD signal that cannot be viewed using a normal TV
.
Alternately, you can press the  button on the remote control repeatedly to
change the picture size.
Depending on the input source, the picture size options may vary.
The items available may differ depending on the selected mode.
In PC Mode, only 16:9 and 4:3 mode can be adjusted.
Settings can be adjusted and stored for each external device you have connected to an input of the
TV.
Temporary image retention may occur when viewing a static image on the set for more than two hours.
: Press the ► button to select Position, then press the ENTER
E
button.
Press the ▲ or ▼ button to move the screen up / down. Then press the ENTER
E
button.
: Press the ► button to select Position, then press the ENTER
E
button. Press the ▲ or ▼ button to move the
picture up and down. Then press the ENTER
E
button. Press the ► button to select Size, then press the ENTER
E
button.
Press the ▲ or ▼ button to magnify or reduce the picture size in the vertical direction.
Then press the ENTER
E
button.
After selecting Screen Fit in HDMI (1080i / 1080p) or Component (1080i / 1080p) mode: Select Position by pressing
the ◄ or ►button. Use the ▲, ▼, ◄ or ► button to move the picture.
Reset: Press the ◄ or ► button to select Reset, then press the ENTER
E
button. You can initialize the setting.
If you use the Screen Fit function with HDMI 720p input, 1 line will be cut at the top, bottom, left and right as in the overscan
function.
Screen Mode
When setting the picture size to Auto Wide in a 16:9 wide TV, you can determine the picture size you want to see the 4:3 WSS
(Wide Screen Service) image or nothing. Each individual European country requires different picture size so this function is
intended for users to select it.
This function is available in Auto Wide mode.
This function is not available in PC, Component or HDMI mode.
Digital NR Off / Low / Medium / High / Auto
If the broadcast signal received by your TV is weak, you can activate the Digital Noise Reduction feature to help reduce any static
and ghosting that may appear on the screen.
When the signal is weak, select one of the other options until the best picture is displayed.
N
N
N
N
N
N
O
N
N
N
N
N
N
N
N
N
N
N
N
N
Continued...
Tint (G/R) : G50/R50
Advanced Settings
Picture Options
Picture Reset
Picture
BN68-02106F-Eng.indb 17 2009-04-10 오전 9:55:36
English - 18
HDMI Black Level Normal / Low
You can directly select the black level on the screen to adjust the screen depth.
This function is active only when the external input connects to HDMI (RGB signals).

Samsung' new generation PDP panels deliver stunning Full HD motion clarity when viewing fast action sports, movies, and games.
This function is not available in PC, Game or Media Play mode.
Film Mode
You can optimize the picture mode for watching movies.
Off: Turn the Film Mode function off.
Auto1: Automatically adjusts the picture for the best quality when watching a lm.
Auto2: Automatically optimizes the video text when watching a lm.
Film mode is supported in TV, Video, Component(480i / 1080i) and HDMI(1080i).

This function is for AV device measurement experts. This function displays the blue signal only by removing the red and green
signals from the video signal so as to provide a Blue Filter effect that is used to adjust the Colour and Tint of video equipment such
as DVD players, Home Theaters, etc.
Blue Only Mode is available when the picture mode is set to Movie or Standard.
Screen Burn Protection
To reduce the possibility of screen burn, this unit is equipped with screen burn prevention technology. This technology enables you
to set picture movement up/down (Vertical) and side to side (Horizontal). The Time setting allows you to program the time between
movement of the picture in minutes.
Pixel Shift: Using this function, you can minutely move pixels on the PDP in horizontal or vertical direction to minimize after
image on the screen.
Optimum condition for pixel shift
Item TV/Ext/AV/Component/HDMI/PC
Horizontal 0~4 2
Vertical 0~4 4
Time (minute) 1~4 min 2 min
The Pixel Shift value may differ depending on the monitor size (inches) and mode.
This function is not available in the Screen Fit mode.
Scrolling: This function helps remove after images on the screen by moving all the pixels on the PDP according to a pattern
Use this function when there are remaining after images or symbols on the screen especially when you displayed a still image
on the screen for a long time.
Side Grey: When you watch TV with the screen ratio of 4:3, the screen is prevented from any damage by adjusting the white
balance on both extreme left and right sides.
- Dark: When you set the screen ratio to 4:3, it darkens the left and right sides.
- Light: When you set the screen ratio to 4:3, it brightens the left and right sides.
           Reset Picture Mode / Cancel
Resets all picture settings to the default values.
Select a picture mode to be reset. The reset is performed for each picture mode.
N
N
N
N
N
N
N
N
Picture
Advanced Settings
Picture Options
Picture Reset
Picture
BN68-02106F-Eng.indb 18 2009-04-10 오전 9:55:36
English - 19
Setting up the TV with your PC
Preset: Press the SOURCE button to select PC mode.
Auto Adjustment
Auto Adjustment allows the PC screen of set to self-adjust to the incoming PC video
signal. The values of ne, coarse and position are adjusted automatically.
This function does not work in DVI-HDMI mode.
Press the TOOLS button to display Tools menu.
You can also set the adjustment by selecting .
T
Screen
The purpose of picture quality adjustment is to remove or reduce picture noise. If the noise is not removed by Fine-tuning alone,
then adjust the frequency as best as possible (Coarse) and Fine-tune again. After the noise has been reduced, readjust the picture
so that it is aligned on the center of screen.
Coarse
Adjusts the frequency when vertical noise appears on the screen.
Fine
Adjusts the screen to be clearer.
PC Position
Adjust the PC’s screen positioning if it does not t the TV screen. Press the ▲ or ▼ button to adjusting the Vertical-Position.
Press the ◄ or ► button to adjust the Horizontal-Position.
Image Reset
You can replace all image settings with the factory default values.
N
N
Brightness : 45
Sharpness : 50
Auto Adjustment
Screen
Advanced Settings
Picture Options
Picture Reset
Picture
BN68-02106F-Eng.indb 19 2009-04-10 오전 9:55:37
English - 20
PC Display
Setting Up Your PC Software (Based on Windows XP)
The Windows display-settings for a typical computer are shown below. The actual
screens on your PC will probably be different, depending upon your particular version
of Windows and your particular video card. However, even if your actual screens
look different, the same basic set-up information will apply in almost all cases. (If not,
contact your computer manufacturer or Samsung Dealer.)
1.
First, click on ‘Control Panel’ on the Windows start menu.
2. When the control panel window appears, click on ‘Appearance and Themes’ and a
display dialog-box will appear.
3.
When the control panel window appears, click on ‘Display’ and a display dialog-box
will appear.
4.
Navigate to the ‘Settings’ tab on the display dialog-box.
The correct size setting (resolution)
Optimum: 1920 X 1080 pixels
If a vertical-frequency option exists on your display settings dialog box, the correct
value is ‘60’ or ‘60 Hz’. Otherwise, just click ‘OK’ and exit the dialog box.
Display Modes
Both screen position and size will vary depending on the type of PC monitor and its resolution.
The resolutions in the table are recommended.
When using an HDMI/DVI cable connection, you must use the HDMI IN 2(DVI) jack.
The interlace mode is not supported.
The set might operate abnormally if a non-standard video format is selected.
Separate and Composite modes are supported. SOG is not supported.
Too long or low quality VGA cable can cause picture noise at high resolution modes (1920x1080).
D-Sub and HDMI/DVI Input
Mode Resolution Horizontal Frequency (kHz) Vertical Frequency (Hz) Pixel Clock Frequency (MHz) Sync Polarity (H/V)
IBM
640 x 350 31.469 70.086 25.175 + / -
720 x 400 31.469 70.087 28.322 - / +
MAC
640 x 480 35.000 66.667 30.240 - / -
832 x 624 49.726 74.551 57.284 - / -
1152 x 870 68.681 75.062 100.000 - / +
VESA CVT
720 x 576 35.910 59.950 32.750 - / +
1152 x 864 53.783 59.959 81.750 - / +
1280 x 720
44.772 59.855 74.500 - / +
56.456 74.777 95.750 - / +
1280 x 960 75.231 74.857 130.000 - / +
VESA DMT
640 x 480
31.469 59.940 25.175 - / -
37.861 72.809 31.500 - / -
37.500 75.000 31.500 - / -
800 x 600
37.879 60.317 40.000 + / +
48.077 72.188 50.000 + / +
46.875 75.000 49.500 + / +
1024 x 768
48.363 60.004 65.000 - / -
56.476 70.069 75.000 - / -
60.023 75.029 78.750 + / +
1152 x 864 67.500 75.000 108.000
+ / +
1280 x 800
49.702 59.810 83.500
- / +
62.795 74.934 106.500
- / +
1280 x 960 60.000 60.000 108.000
+ / +
1280 x 1024
63.981 60.020 108.000
+ / +
79.976 75.025 135.000
+ / +
1360 x 768 47.712 60.015 85.500
+ / +
1440 x 900
55.935 59.887
106.500
- / +
70.635 74.984 136.750
- / +
1680 x 1050 65.290 59.954 146.250
- / +
VESA DMT /
DTV CEA
1920 x 1080p 67.500 60.000 148.500
+ / +
VESA GTF
1280 x 720 52.500 70.000 89.040
- / +
1280 x 1024 74.620
70.000
128.943
- / -
N
N
N
N
N
BN68-02106F-Eng.indb 20 2009-04-10 오전 9:55:37
1 / 1

Samsung PS50B555T4W Ohjekirja

Kategoria
LCD TVs
Tyyppi
Ohjekirja