Kenwood KVC3100S Omistajan opas

Kategoria
Mixer/food processor accessories
Tyyppi
Omistajan opas
TYPE KVC30 (Chef)
TYPE KVL40 (Chef XL)
instructions
istruzioni
instrucciones
Bedienungsanleitungen
gebruiksaanwijzing
Instrukcja obsługi
instruções
English 2 - 11
Nederlands 12 - 22
Français 23 - 33
Deutsch 34 - 44
Italiano 45 - 55
Português 56 - 66
Español 67 - 77
Dansk 78 - 87
Svenska 88 - 97
Norsk 98 - 107
Suomi 108 - 117
Türkçe 118 - 126
Česky 127 - 136
Magyar 137 - 146
Polski 147 - 158
Eλληνικά 159 - 170
Slovenčina 171 - 180
Українська 181 - 190
ÝY
oww - owo
9
16
15
3
10
11
8
7
6
5
4
1
2
14
13
12
Know your Kenwood Stand Mixer
Congratulations on buying a Kenwood. With such a wide range of attachments
available, it is more than just a mixer. It is a state-of-the-art Stand Mixer. We hope
you will enjoy it.
Robust. Reliable. Versatile. Kenwood.
2
Safety
O
Read these instructions carefully and retain for future
reference.
O
Remove all packaging and any labels.
O
If the plug or cord is damaged it must, for safety reasons, be
replaced by Kenwood or an authorised Kenwood repairer in
order to avoid a hazard.
O
Turn the speed control to ‘O’ OFF position and unplug before
fitting or removing tools/attachments, after use and before
cleaning.
O
Keep your fingers away from moving parts and fitted
attachments.
O
Never leave the Stand Mixer unattended when it is operating.
O
Never use a damaged appliance. Get it checked or repaired:
see ‘Service and customer care’ section.
O
Never operate the Stand Mixer with the head in the raised
position.
O
Never let the cord hang down where a child could grab it.
O
Never let the power unit, cord or plug get wet.
O
Never use an unauthorised attachment or more than one
attachment at once.
O
Never exceed the quantities stated in the maximum capacity
chart.
O
When using an attachment, read and follow the safety
instructions that are supplied with it.
English
3
O
Take care when lifting this appliance as it is heavy. Ensure the
head is correctly latched in the down position and that the
bowl, tools, outlet covers and cord are secure before lifting.
O
Do not move or raise the mixer head with an attachment fitted
as the Stand Mixer could become unstable.
O
When moving the appliance always pick up by the pedestal
base and mixer head. Do not lift or carry the appliance by the
bowl handle.
O
Do not operate your appliance near the edge or overhanging
the work surface or apply force to an attachment when fitted,
as this may cause the unit to become unstable and tip over,
which may result in injury.
O
Take care when removing bowl tools after extended use as
they may get hot.
O
Children should be supervised to ensure that they do not play
with the appliance.
O
Do not operate your appliance near the edge of a work surface.
O
The short power-supply cord is used to reduce risk resulting
from becoming entangled in or tripping. Extension cords
may be used if care is exercised in their use. If an extension
cord is used: 1) The marked electrical rating of the extension
cord should be at least as great as the electrical rating of the
appliance; and 2) The cord should be arranged so that it will
not drape over the countertop or tabletop where it can be
pulled on by children or tripped over unintentionally. 3) The
extension cord should be an earthed-type 3-wire cord. The
electrical rating of the appliance is listed on the bottom of the
unit.
O
Appliances can be used by persons with reduced physical,
sensory or mental capabilities or lack of experience and
knowledge if they have been given supervision or instruction
concerning use of the appliance in a safe way and if they
understand the hazards involved.
O
Misuse of your appliance can result in injury.
O
This appliance shall not be used by children. Keep the
appliance and its cord out of reach of children.
4
O
The maximum rating is based on the mini chopper/mill
attachment that draws the greatest load. Other attachments
may draw less power.
O
Only use the appliance for its intended domestic use.
Kenwood will not accept any liability if the appliance is subject
to improper use, or failure to comply with these instructions.
Before plugging in
Make sure your electricity supply is
the same as the one shown on the
underside of your machine.
This appliance conforms to EC
Regulation 1935/2004 on materials and
articles intended to come into contact
with food.
Before using for the first time
Wash the parts: see ‘Care and cleaning’
section.
Know your Stand Mixer
Key
Attachment outlets
high-speed outlet
slow-speed outlet
bowl tool socket
Mixer
high speed outlet cover
mixer head
speed and pulse control
power unit
head release lever
bowl seating pad
(1
bowl
(2
slow speed outlet cover
(3
K-beater
(4
whisk
(5
dough tool
(6
spatula
(7
splashguard
Optional attachments
There are a range of optional attachments
available to use with your Stand Mixer.
See the attachment leaflet included in your
pack or visit www.kenwoodworld.com
to see the full range and how to buy an
attachment not included in your pack.
Note: Slow Speed outlet attachments
The slow speed outlet on your Stand
Mixer model features the Twist Connection
System. It is designed to accept Twist
Connection System attachments.
When purchasing new attachments for
the slow speed outlet you should check
compatibility with your Stand Mixer. All
Twist Connection System attachments
can be identified by the product code
which starts with KAX and also by
the Twist logo
which is visible on
packaging. For more information visit
www.kenwoodworld.com/twist.
5
If you own attachments featuring the Bar
Connection System
you will need to
use the KAT002ME adaptor to connect
these to the Twist Connection System
on your Stand Mixer.
For more information visit
www.kenwoodworld.com/twist.
Know your Stand Mixer
K-beater
For making cakes, biscuits, pastry, icing,
fillings, éclairs and mashed potato.
Dough Tool
For yeast mixtures only.
Whisk
For eggs, cream, batters, fatless sponges,
meringues, cheesecakes, mousses,
soufflés. Do not use the whisk for heavy
mixtures (e.g. creaming fat and sugar) -
you could damage it.
To use your bowl tools
1 Turn the head lift lever anti-clockwise
and raise the mixer head until it locks
.
Ensure the bowl seating pad
is
correctly fitted with the
symbol
uppermost.
2 Fit the bowl on the base, press down
and turn clockwise
to secure in
position.
3 Place the required tool into the socket.
Then push up
and turn
the tool to
lock into position.
Note: If the K-beater or Whisk are
not picking up ingredients from the
bottom of the bowl refer to the “Tool
Adjustment” section.
4 Lift the mixer head slightly then turn the
head-lift lever anti-clockwise and lower
the mixer head until it locks.
5 Start the machine by turning the speed
control
to the desired speed setting.
Use the pulse (P) position for short
bursts of maximum speed.
6 After use, return the speed control to
‘O’ OFF position and unplug your Stand
Mixer.
7 Release the tool by turning clockwise
to unlock from the tool socket and then
remove.
Important
Ensure that no bowl tools are fitted or
stored in the bowl when using other
outlets.
The bowl tools and some of their uses
6
Recommended Usage Chart
Tool Recipe/ Process Maximum Capacities
* (Minutes)
Hints and Tips
Chef Chef XL
K-beater
Creaming butter/margarine and
sugar
2.72kg
(9 Egg mix)
4.55kg
(15 Egg
mix)
Min
Max
4 • To avoid splashing of ingredients
gradually increase the speed.
• When creaming fat and sugar for
cake mixes, always use the fat at
room temperature or soften it first.
• To fully incorporate the ingredients
stop mixing and scrape down the
bowl with the spatula frequently.
• Use cold ingredients for pastry unless
your recipe says otherwise.
Beating eggs into cake mixes
Min
Max
1 – 4
Folding in flour, fruit etc
Min
1
30 – 60 secs
Pastry & Biscuits
– rubbing fat into
flour
Flour Weight 680g 910g
Min
2
2
All In one cake
mixes
Total Weight 2kg 5kg
Min
Max
45 – 60 secs
Whisk
Egg whites 12 (455g) 16 (605g)
Min
Max
1½ – 2
Important
• To avoid splashing of ingredients
gradually increase the speed.
The whisk is not suitable for
making all in one cake mixes as
these mixes are too heavy and
will damage it.
• Best results achieved when eggs are
at room temperature.
• Before whisking egg whites, make
sure there is no grease or egg yolk
on the whisk or the bowl.
Fatless sponges 620g
(6 Egg Mix)
930g
(9 Egg Mix)
4
6
Cream
(Fresh whipping Cream used,
38% fat content. Processing
times may vary, depending on
fat content of cream)
1L 2L
Min
4-6
1½ – 3
Mayonnaise Egg yolk 2 Max 1 – 1½ • For best results scrape down the
bowl after the addition of the oil and
run for a further 10 secs at max
speed.
Mustard 10g
Vegetable Oil 200ml
Pancake Batter Flour 250g
‘Min’ speed for
10 secs. Then
increase to
max speed for
45 – 60 secs
1 • Add flour to the bowl first, followed
by the wet ingredients.
• Mix on minimum speed to
incorporate ingredients.
Milk 500g
Eggs 200g
Eggs sizes used = medium sized (Weight 53 – 63g)
* This is for guidance only and will vary depending on the exact recipe and ingredients being processed
7
Tool Recipe/ Process Maximum Capacities
* (Minutes)
Hints and Tips
Chef Chef XL
Dough Tool
(For Yeast-
ed Dough
Mixes)
Bread Dough
(stiff yeasted)
Flour Weight
500g –
1.36kg
500g –
1.5kg
Min 60 secs
Important
• Never exceed the maximum
capacities stated – you may overload
the machine.
• If you hear the machine labouring,
switch off, remove half the dough
and do each half separately.
• The ingredients mix best if you put
the liquid in first.
Yeast
Dried yeast (the type that needs
reconstituting): pour the warm water
into the bowl. Then add the yeast
and the sugar and leave to stand for
about 10 minutes until frothy.
Fresh yeast: crumble into the flour.
Other types of yeast: follow the
manufacturer’s instructions.
• Put the dough into a greased
polythene bag or a bowl covered with
a tea towel. Then leave somewhere
warm until doubled in size.
13
4
Total Weight
805g –
2.18kg
805g –
2.42kg
Re-knead
Speed 1
60 secs
Soft yeasted
dough
(enriched with
butter and eggs
Flour Weight
500g
1.3kg
500g
1.6kg
Min 60 secs
Total Weight 965g –
2.5kg
965g –
3.1kg
13
4
Re-knead
Speed 1
60 secs
Eggs sizes used = medium sized (Weight 53 – 63g)
* This is for guidance only and will vary depending on the exact recipe and ingredients being processed
8
To fit and use
your Splashguard
1 Raise the mixer head until it locks.
2 Fit the bowl onto the base.
3 Push the splashguard onto the underside
of the mixer head
until fully located.
The hinged section should be positioned as
shown.
4 Insert required tool.
5 Lower the mixer head.
During mixing, ingredients can be added
directly to the bowl via the hinged
section of the splashguard
.
You do not need to remove the
splashguard to change tools.
6 Remove the splashguard by raising the
mixer head and pushing it down.
K-beater & Whisk
The tools are set to the correct height for
the bowl supplied in the factory and should
not require adjustment.
However, if you wish to adjust the tool use
a suitable sized spanner:
TYPE KVC30 = 15mm
TYPE KVL40 = 19mm
Then follow the instructions below:
1 Unplug the appliance.
2 Raise the mixer head and insert the
whisk or beater.
3 Lower the mixer head. If the clearance
needs to be adjusted, raise the mixer
head and remove the tool. Ideally the
whisk and K-beater should be almost
touching the bottom of the bowl
.
4 Using a suitable spanner loosen the nut
sufficiently to allow adjustment of the
shaft
. To lower the tool closer to the
bottom of the bowl, turn the shaft anti-
clockwise. To raise the tool away from
the bottom of the bowl turn the shaft
clockwise.
5 Re-tighten the nut.
6 Fit the tool to the mixer and lower the
mixer head. (Check its position see
points above).
7 Repeat the above steps as necessary
until the tool is set correctly. Once this is
achieved tighten the nut securely.
Note: Spanner shown is for illustration
purpose only.
Dough Tool
This tool is set at the factory and should
require no adjustment.
Tool Adjustment
9
Always switch off and unplug before
cleaning.
A little grease may appear at the slow
speed outlet
when you first use it.
This is normal – just wipe it off.
Power Unit And Outlet Covers
Wipe with a damp cloth, then dry.
Never use abrasives or immerse in water.
Bowl
Wash by hand, then dry thoroughly or
wash in the dishwasher.
Never use a wire brush, steel wool or
bleach to clean your stainless steel bowl.
Use vinegar to remove limescale.
Keep away from heat (cooker tops,
ovens, microwaves).
Whisk & Splashguard
Wash by hand, then dry thoroughly or
wash in the dishwasher.
K beater & Dough Tool
Wash by hand, then dry thoroughly.
recipe
chilli marinade
200g clear runny honey
1 chilli (whole)
20g (1tsp) crunchy peanut butter
Seasoning
1 Place all the ingredients into the mini
chopper/mill.
2 Fit the attachment to the Stand Mixer
and allow the ingredients to settle around
the blade.
3 Switch to max speed for 4 seconds.
4 Use as required.
If you experience any problems with
the operation of your appliance, before
requesting assistance refer to the
“troubleshooting guide” section in the
manual or visit www.kenwoodworld.com.
Please note that your product is covered
by a warranty, which complies with
all legal provisions concerning any
existing warranty and consumer rights
in the country where the product was
purchased.
If your Kenwood product malfunctions
or you find any defects, please send it
or bring it to an authorised KENWOOD
Service Centre. To find up to date
details of your nearest authorised
KENWOOD Service centre visit
www.kenwoodworld.com or the website
specific to your Country.
Designed and engineered by Kenwood
in the UK.
Made in China.
Care & Cleaning Service and
Customer Care
10
Service and
Customer Care
IMPORTANT INFORMATION FOR
CORRECT DISPOSAL OF THE
PRODUCT IN ACCORDANCE
WITH THE EUROPEAN DIRECTIVE
ON WASTE ELECTRICAL AND
ELECTRONIC EQUIPMENT (WEEE)
At the end of its working life, the product
must not be disposed of as urban waste.
It must be taken to a special local authority
differentiated waste collection centre or to
a dealer providing this service.
Disposing of a household appliance
separately avoids possible negative
consequences for the environment and
health deriving from inappropriate disposal
and enables the constituent materials to be
recovered to obtain significant savings in
energy and resources. As a reminder of the
need to dispose of household appliances
separately, the product is marked with a
crossed-out wheeled dustbin.
11
Troubleshooting guide
Problem Cause Solution
The whisk or K-beater Tool at the wrong Adjust the height using a suitable
knocks against the bottom height and needs spanner – see “Tool Adjustment”
of the bowl or not reaching adjusting. section.
the ingredients in the
bottom of the bowl.
Slow speed attachment Check your attachment Attachment must have the KAX
cannot be fitted. is compatible for twist connection system
to fit
use with your model. the outlet.
Twist connection If you own attachments featuring
system required the Bar Connection System
(Model KAX)
you will need to use the
KAT002ME adaptor to connect
these to the Twist Connection
System on your Stand Mixer.
For more information visit
www.kenwoodworld.com/twist.
The Stand Mixer Overload protection or Unplug and check for
stops during operation. overheat system obstruction or overloading.
activated. Turn the speed control to “O”
Maximum capacity and then restart.
exceeded. If the machine will not operate,
remove some of the ingredients to
reduce the load and restart.
If this still does not resolve the
problem, unplug and allow to
stand for 15 minutes. Plug in and
reselect the speed.
If the machine does not restart
following the above procedure
contact “customer care” for further
advice.
12
Kennismaking met de Kenwood
keukenmachine
U bent de gelukkige eigenaar van een Kenwood. Dankzij het grote assortiment
beschikbare hulpstukken, is deze machine veel meer dan zomaar een mixer. Het is
een geavanceerde keukenmachine. We hopen dat u er veel plezier van zult hebben.
Robuust. Betrouwbaar. Veelzijdig. Kenwood.
Veiligheid
O
Lees deze instructies zorgvuldig door en bewaar ze voor
toekomstig gebruik.
O
Verwijder alle verpakking en labels.
O
Als de stekker of het snoer beschadigd is, moet het om
veiligheidsredenen door Kenwood of een door Kenwood
geautoriseerd reparatiebedrijf vervangen worden, om gevaar
te voorkomen.
O
Zet de snelheidsregeling op ‘O’ (uit) en haal de stekker uit het
stopcontact voordat u hulpstukken monteert of verwijdert,
zowel na het gebruik als voor de reiniging.
O
Houd uw vingers uit de buurt van bewegende onderdelen en
aangebrachte hulpstukken.
O
Laat de keukenmachine nooit onbeheerd aan staan.
O
Gebruik nooit een machine die beschadigd is. Laat de
machine controleren of repareren: raadpleeg het deel
‘Onderhoud en klantenservice’.
O
Zet de keukenmachine nooit aan als de kop omhoog staat.
O
Laat het snoer nooit overhangen, zodat een kind erbij kan.
O
Zorg ervoor dat het motorgedeelte, het snoer en de stekker
nooit nat worden.
O
Gebruik nooit een hulpstuk dat niet goedgekeurd is en gebruik
nooit meer dan één hulpstuk per keer.
O
Overschrijd nooit de hoeveelheden die staan vermeld op de
tabel met de maximumcapaciteiten.
Nederlands
13
O
Als u een hulpstuk gebruikt, dient u de meegeleverde
veiligheidsinstructies te lezen en op te volgen.
O
Wees voorzichtig wanneer u de machine optilt. Hij is zwaar.
Zorg ervoor dat de kop omlaag staat en vergrendeld is, en dat
de kom, de hulpstukken, de contactdeksels en het snoer vast
zitten, voordat u de machine optilt.
O
Verplaats de machine niet en haal de Mixerkop niet omhoog
als een hulpstuk aangebracht is, omdat de keukenmachine
dan instabiel kan worden.
O
Bij het verplaatsen van het apparaat altijd oppakken bij de voet
en de mengkop. Het apparaat NIET optillen of dragen aan de
komgreep.
O
Gebruik uw apparaat niet in de buurt van de rand of
overhangend werkoppervlak en oefen geen kracht uit op een
vastgemaakte bevestiging, omdat dit ertoe kan leiden dat
het apparaat instabiel wordt en kantelt, wat kan resulteren in
verwondingen.
O
Wees voorzichtig bij het verwijderen van de komhulpstukken
na langdurig gebruik, omdat ze heet kunnen zijn.
O
Kinderen mogen de machine alleen onder toezicht gebruiken,
om te voorkomen dat ze ermee spelen.
O
Gebruik de machine niet aan de rand van het werkoppervlak.
O
Het snoer is kort om risico op verstrengeling of struikelen te
voorkomen. Een verlengsnoer kan gebruikt worden, maar
wees voorzichtig. Als u een verlengsnoer gebruikt: 1) zorg
ervoor dat het aangegeven vermogen van het verlengsnoer
minstens gelijk is aan het vermogen van het apparaat. 2) zorg
ervoor dat het snoer niet over het aanrecht of de tafel hangt
waar kinderen eraan kunnen trekken of over kunnen struikelen.
3) het verlengsnoer moet geaard zijn en drie aders hebben.
Het vermogen staat onder op het apparaat vermeld.
O
Dit apparaat kan worden gebruikt door personen met
verminderde lichamelijke, sensorische of geestelijke
capaciteiten of gebrek aan ervaring en kennis mits ze onder
toezicht staan of instructie hebben gekregen over het veilig
gebruik van het apparaat en de betrokken risico’s begrijpen.
14
Voordat u de stekker in het
stopcontact steekt
Zorg dat de elektriciteitsvoorziening
dezelfde spanning heeft als op de
onderkant van het apparaat wordt
aangegeven.
Dit apparaat voldoet aan EG Verordening
1935/2004 inzake materialen en
voorwerpen die bestemd zijn om met
levensmiddelen in contact te komen.
Voordat u de machine voor
het eerst gebruikt
Lees het deel ‘Onderhoud en reiniging’,
voordat u de onderdelen gaat
schoonmaken.
O
Misbruik van uw apparaat kan tot letsel leiden.
O
Dit apparaat mag niet door kinderen worden gebruikt. Houd
het apparaat en het snoer buiten het bereik van kinderen.
O
De maximale beoordeling is gebaseerd op de mini-hakmolen /
molenhulpstuk dat de grootste belasting trekt. Andere
hulpstukken kunnen minder stroom verbruiken.
O
Gebruik het apparaat alleen voor het huishoudelijke gebruik
waarvoor het is bedoeld. Kenwood kan niet aansprakelijk
worden gesteld in het geval dat het apparaat niet correct is
gebruikt, of waar deze instructies niet worden opgevolgd.
De onderdelen van de keukenmachine
legenda
Contacten voor hulpstukken
Contact hoge snelheid
Contact lage snelheid
Contact voor het komhulpstuk
Mixer
Deksel voor hogesnelheidscontact
Mixerkop
Snelheids- en stootregeling
Motorgedeelte
Kopontgrendeling
Basisplaat voor kom
(1
Kom
(2
Deksel voor lagesnelheidscontact
(3
K-klopper
(4
Garde
(5
Deeghaak
(6
Spatel
(7
Spatscherm
15
Optionele hulpstukken
Er zijn diverse optionele hulpstukken
verkrijgbaar voor uw keukenmachine.
Raadpleeg de brochure met hulpstukken
in de verpakking of ga naar www.
kenwoodworld.com om het hele
assortiment te bekijken, compleet met
instructies voor het kopen van een hulpstuk
dat niet met de machine is meegeleverd.
Opmerking: Hulpstukken voor het
lagesnelheidscontact
Het lagesnelheidscontact van uw
keukenmachinemodel heeft een
draaiverbinding. Het is speciaal ontworpen
voor hulpstukken die uitgerust zijn met het
draaiverbindingssysteem.
Als u nieuwe hulpstukken voor het
lagesnelheidscontact koopt, dient u de
compatibiliteit met uw keukenmachine
te controleren. Alle hulpstukken met het
draaiverbindingssysteem zijn te herkennen
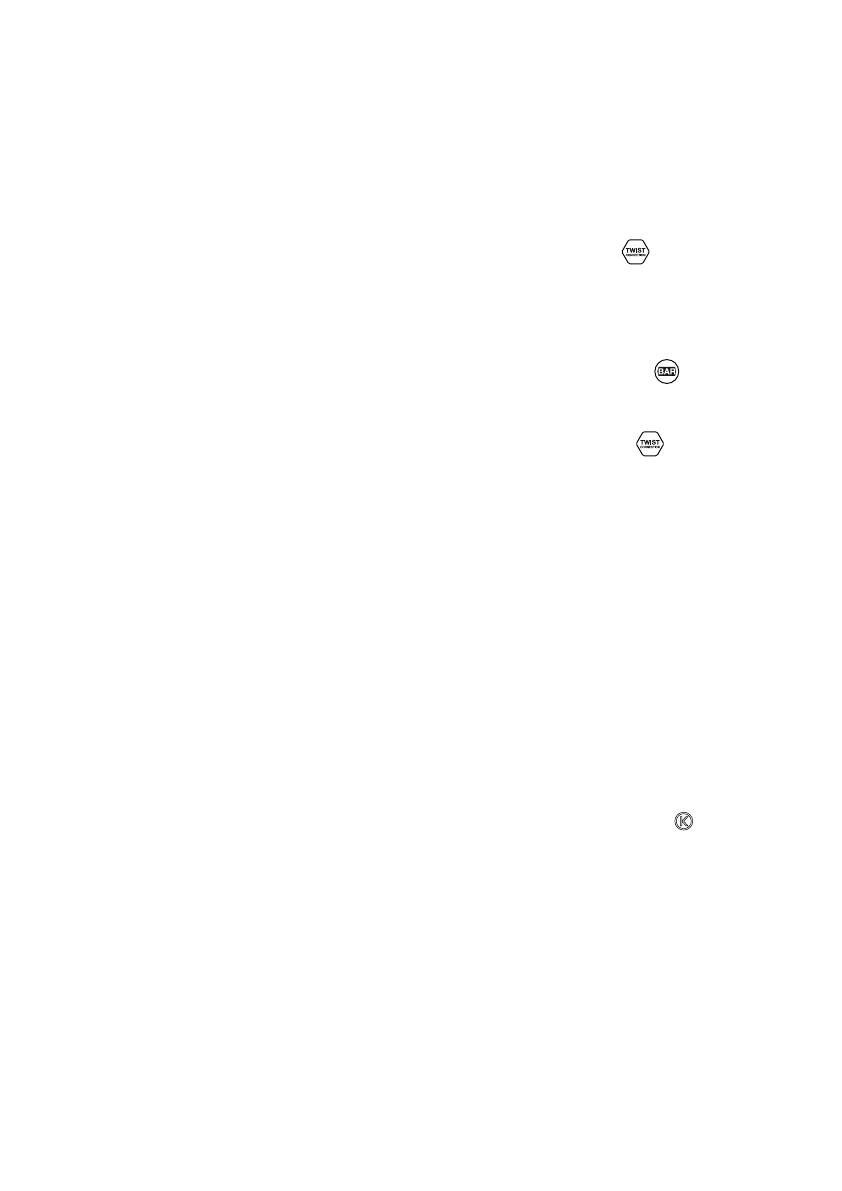
aan de productcode die begint met KAX
en aan het Twist-logo
dat op de
verpakking staat. Voor nadere informatie
gaat u naar
www.kenwoodworld.com/twist.
Als u hulpstukken hebt met het
stangverbindingssysteem
, dan hebt u
de KAT002ME-adapter
nodig om deze
hulpstukken aan het
draaiverbindingssysteem
van uw
keukenmachine te bevestigen.
Ga voor meer informatie naar
www.kenwoodworld.com/twist.
De onderdelen van de keukenmachine
De menghulpstukken gebruiken
K-klopper
Voor het bereiden van taarten, koekjes,
gebakjes, suikerglazuur, vullingen, éclairs
en aardappelpuree.
Deeghaak
Alleen voor gistmengsels.
Garde
Voor eieren, room, beslag, vetloos
eiergebak, meringue, kaastaart, mousse,
soufflés. Gebruik de garde niet voor zware
mengsels (bijv. boter en suiker), omdat de
garde daardoor beschadigd kan raken.
De menghulpstukken
gebruiken
1 Draai de kopontgrendeling naar rechts
en haal de mixerkop omhoog, tot hij
vastklikt
.
Zorg dat de basisplaat van de kom
goed is bevestigd met het
symbool
naar boven.
2 Plaats de kom op het onderstel, druk
hem omlaag en draai hem naar rechts
vast.
3 Steek het gewenste hulpstuk in het
contact. Duw het hulpstuk omhoog
en draai eraan
om hem op zijn plaats
vast te zetten.
Opmerking: Als de K-klopper of garde
geen ingrediënten van de bodem van de
kom meenemen, raadpleegt u het deel
‘Hulpstukken afstellen’.
16
4 Haal de mixerkop iets omhoog; draai de
kopontgrendeling naar links en laat de
mixerkop zakken tot hij vastklikt.
5 Start de machine door de
snelheidsregeling
naar de gewenste
snelheid te draaien. Gebruik de stoot
(P) stand voor korte stoten op de
maximumsnelheid.
6 Na het gebruik zet u de snelheidsregeling
op ‘O’ (uit) en haalt u de stekker uit het
stopcontact.
7 Draai het hulpstuk naar rechts uit het
contact en verwijder het.
Belangrijk
Zorg ervoor dat er geen menghulpstukken
zijn geplaatst of in de kom aanwezig zijn
wanneer u andere contacten gebruikt.
17
Tabel met aanbevolen snelheden
Hulpmiddel
Recept/proces Maximale capaciteit
* (Minuten)
Tips
Chef Chef XL
K-klopper
Boter/margarine en suiker
romig maken
2,72 kg
(9 eieren)
4,55 kg
(15 eieren)
Min
Max
4 • Als u wilt voorkomen dat de ingrediënten
opspatten, verhoogt u de snelheid
geleidelijk.
• Wanneer u boter en suiker voor
taartbeslag vermengt, moet u de boter
altijd eerst op kamertemperatuur brengen
of verzachten.
• Stop de machine regelmatig om de kom
met de spatel af te schrapen, zodat alle
ingrediënten goed worden gemengd.
• Gebruik koude ingrediënten als u deeg
gaat maken, tenzij het recept iets anders
voorschrijft.
Eieren in cakemix kloppen
Min
Max
1–4
Bloem, vruchten, etc. in het
mengsel vouwen
Min
1
30–60 sec.
Deegwaren
en koekjes –
boter en bloem
vermengen
Bloemgewicht
680 g 910 g
Min
2
2
All-in-one
cakemix
Totaalgewicht
2 kg 5 kg
Min
Max
45–60 sec.
Garde
Eiwit 12 (455 g) 16 (605 g)
Min
Max
1½–2
Belangrijk
• Als u wilt voorkomen dat de ingrediënten
opspatten, verhoogt u de snelheid
geleidelijk.
De garde is niet geschikt voor all-in-
one cakemixes, omdat ze te zwaar zijn
en de garde zullen beschadigen.
• Het beste resultaat wordt bereikt wanneer
de eieren op kamertemperatuur zijn.
• Zorg ervoor dat er geen boter of eigeel
op de garde of in de kom aanwezig is,
voordat u eiwit gaat opkloppen
Vetloze sponge cake 620 g
(6 eieren)
930 g
(9 eieren)
4–6
Room
(Verse slagroom, 38% vet.
Verwerkingstijd kan variëren,
afhankelijk van het vetgehalte
van de room.)
1 l 2 l
Min
4-6
1½–3
Mayonaise Eierdooier 2 Max 1–1½ • Voor het beste resultaat schraapt u de
kom af nadat u de olie hebt toegevoegd.
Meng nog eens 10 seconden op maximale
snelheid.
Mosterd 10 g
Plantaardige
olie
200 ml
Gebruikte eieren = medium (gewicht 53-63 g)
* Dit dient alleen als richtlijn en kan variëren afhankelijk van het recept en de ingrediënten die worden gebruikt
1 / 1