17
KITCHEN MACHINE · KM1B-70 / KM1GY-70
EN
USE
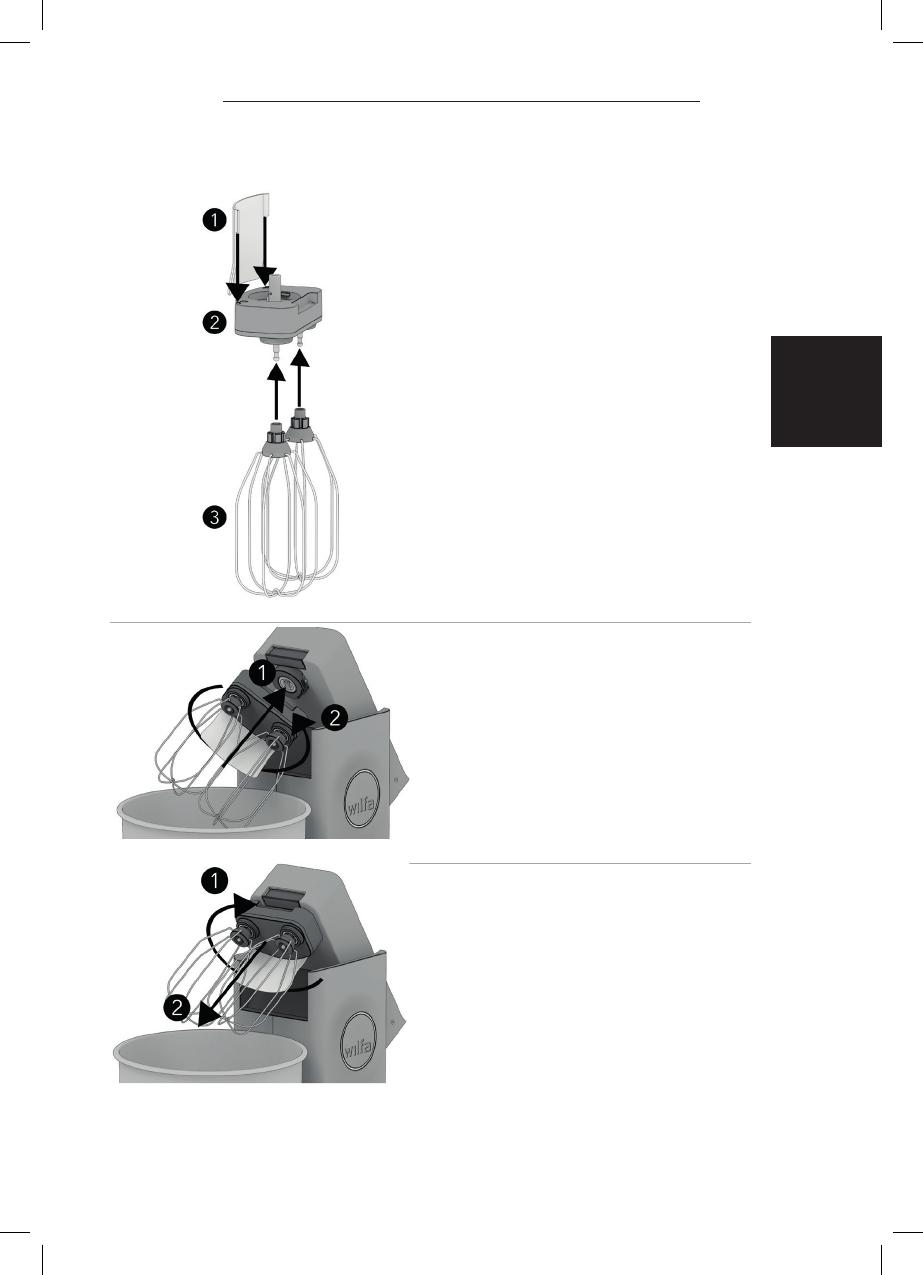
MOUNT THE WHISK
1. Mount the whisk balloons (3) to the
whisk gearbox (2) by pushing them
into the whisk balloon attachment
shafts. The whisks are properly
inserted when they snap into place.
2. It is recommended to use the
whisk splash guard (1) and bowl lid
(ref. “basic operation”) to avoid
splashing. The splash guard is
mounted by sliding it into the slots
in the whisk gearbox.
Note: The whisk balloons are
designed to automatically adjust
their height based on content. This
means that with a very small amount
of content the whisk might touch the
bottom of the bowl.
ATTACH DUAL WHISK
1. Start with the whisk gearbox
angled approximately 45 degrees
clockwise as in the illustration and
insert the tool shaft into the tool
holder.
2. Lock the tool in place by twisting it
anticlockwise until it locks in place.
DETACH DUAL WHISK
1. Rotate the whisk gearbox clockwise
approximately 45 degrees until it
cannot be rotated further.
2. Pull the tool away from the mixer
head to remove it.


