
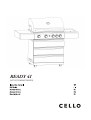
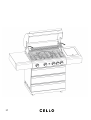
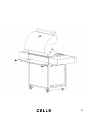
READY 4I
(502100732/6438313544203)

GB
GENERAL INSTRUCTIONS
BARBECUE-RELATED WARNINGS AND
SAFETY INSTRUCTIONS
By purchasing this gas barbecue, you accept the
obligation of reading all the instructions on assembly,
use, care, and maintenance contained in this manual.
Read all the instructions and advice before using the
unit. In particular, read and understand all warning
and safety instructions before using the gas barbe-
cue. Follow all ignition and operation-related instruc-
tions closely. Handle metal parts carefully to avoid
injuries. Follow the order of steps.
1. The barbecue is for outdoor use only.
2. Use of the barbecue for any other purpose than
intended may be dangerous.
3. After use always turn o gas supply from the
gas cylinder.
4. Follow all assembly instructions. Ignoring of
the instructions may cause problems in use.
THIS BARBECUE IS FOR OUTDOOR USE ONLY.
DUE TO OPEN DESIGN OF THE BARBECUE, POS-
SIBLE FAT LEAKS INTO THE COMPONENTS AND
FAT SPILLS OUTSIDE THE BARBECUE, DO NOT
USE THE BARBECUE NEAR OR ON TOP OF SENSI-
TIVE SURFACES.
FAT OF MARINADE MAY LEAK UNDER THE BAR-
BECUE, ONTO A BOTTOM PLATE OR INTO A CABI-
NET, AND FAT/MARINADE SPLASHES TO THE
SURROUNDING SURFACES ARE POSSIBLE. WHEN
USING THE BARBECUE, FAT LEAKS OR SPLASHES
ARE COMPLETELY NORMAL.
THE BARBECUE IS CE-MARKED AND APPROVED
IN ACCORDANCE WITH VALID LEGISLATION.
ANY STRUCTURAL MODIFICATION OF THE BAR-
BECUE IS PROHIBITED. WHEN ASSEMBLING THE
BARBECUE, NO COMPONENTS MAY BE OMITTED
OR ANY COMPONENTS ADDED TO THE STRUC-
TURE.
5. The barbecue heats up during use – be careful if there
are pets, children, or the elderly nearby.
6. If you sense a strong smell of gas, turn o gas supply
from the gas cylinder immediately. Extinguish all flames
by closing the controller for each burner. Open the
barbeque lid and check for possible leaks. Carry out a leak
test in accordance with the instructions. Repair any
leaking joints. If you cannot locate the fault, contact a
qualified gas equipment maintenance services provider or
the importer.
7. Do not move the barbecue while it is in use or still hot.
8. Do not use or store combustible materials, liquids or
gasses near the barbecue.
9. Never check for leaks with open flame.
10. Do not use the barbecue if there are faults.
11. While the barbecue is in use, never disconnect any
gas connections from the barbecue or regulator.
12. Never leave the barbecue unattended while in use.
13. Do not allow children to use the barbecue.
14. Clean the barbecue at regular intervals. Be careful not
to damage the burner openings and controller nozzles
during the cleaning.
15. In particular, the bottom of the barbecue, drip pan,
barbecue plate and grid must be kept clean of fat and
marinades. Risk of grease fire!
16. Do not use the barbecue under a canopy, next to a
wall, inside a garage, motor-caravan or caravan, on board
of a boat, in an enclosed area, or indoors. Check that
there are no combustible or flammable materials nearby.
There must be at least 1 metre (preferably more) of free
space around the barbecue in all directions.
17. We recommend servicing and cleaning the barbecue
at least once a year. If you are not sure of how to service
the unit, instead of servicing it by yourself, contact an
authorised gas equipment maintenance services provider.
18. Only a qualified gas equipment maintenance services
provider is allowed to service and adjust the barbecue’s
main valves, gas taps, and valve nozzles.
19. Before using the barbecue after a long period of
storage (for example, in spring) and after each replace-
ment of the gas cylinder or installation of new components
(such as pressure regulator or gas hose), always carry out
a leak test.
2

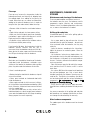
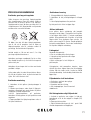
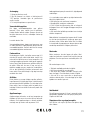
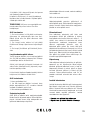
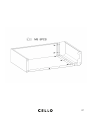
Gas cylinder installation
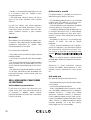
Gas cylinder removal
Prior to first use
20. When lighting the barbecue, the lid must always
be open.
21. Use heat-resistant BBQ gloves and sturdy long-
handled BBQ utensils when operating the barbecue.
22. Be prepared for possible accidents: make sure
you know the location of the first aid kit and fire extin-
guisher and are capable of using them.
Check the condition of the gas hose on regular basis.
Replace worn or damaged hose. Keep the gas hose
away from hot parts of the barbecue.
Make sure the gas hose is not twisted in a manner
preventing gas flow through the hose.
1. Check that all controllers of the barbecue are in the
OFF position.
2. Install the gas hose tightly to the low-pressure
regulator’s hose fitting and the other hose end to the
hose fitting on the barbecue. Use hose clamps for
tightening.
3. Attach the low-pressure regulator to the gas cylin-
der. Check the regulator connection to the gas cylin-
der by pulling the regulator strongly upwards.
4. Open gas supply from the low-pressure regulator
slowly, to stabilise the gas pressure.
1. Use the low-pressure regulator to turn o
the gas
flow.
2. Check that all controllers of the barbecue are in the
OFF position.
3. Detach the low-pressure regulator from the gas
cylinder.
Do not replace the gas cylinder near open flame or
embers.
Before first use of the barbecue, carry out full leak
testing in accordance with the instructions. Light the
barbecue and use all burners at MAX power for
approx. 5 minutes (but not longer) with the lid open.
After that, close the lid and continue using the barbe-
cue at MAX power for additional 2-3 minutes. Once
this is accomplished, the storage grease residues
have burned o
. Let the barbecue cool for about 15
minutes. Clean the grid and grilling plate by BBQ
cleaning brush. Oil the grid and grilling plate with
some cooking oil. Now the barbecue is ready for use.
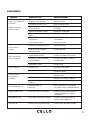
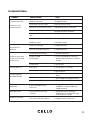
TECHNICAL SPECIFICATIONS
BEFORE USING THE BARBECUE
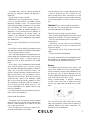
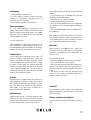
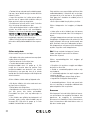
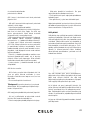
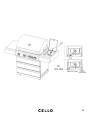
Gas cylinder, gas hose, pressure regulator
The gas hose, low-pressure regulator and hose
clamps are not supplied by the manufacturer. These
components need to be purchased separately.
Acquire a LPG cylinder (min. 5 kg, max. 11 kg), low-
pressure regulator (30 mbar), and gas hose from your
dealer.
Note! The regulator connected to the cylinder may not
be adjustable in any way and must be marked with
the operating pressure 30 mbar.
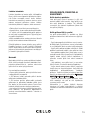
The 30 mbar low-pressure regulators in the picture
are suitable for a gas barbecue, while the high-
pressure regulator on the right is intended for LPG
tools and must not be used with a gas barbecue.
The gas hose used must be a 10 mm LPG hose
approved for use in local country; the length may not
exceed 1.2 m.
3
2531-19
PIN CODE:2531CU-0080
Modell: Cello Ready 4i (A410)
Total power 17,2 kW
Main burners: 14 kW
Side burner: 3,2 kW
Gas consumption: 1252 g/h
Operating pressure: 30 mbar
Gas: Liquefied petroleum gas
(LPG) Category of use: I3 B/P
Main burner nozzle diameter: 0,93 mm
Side burner nozzle diameter: 0,89 mm

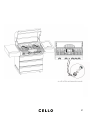
Leak test
Ignition by battery operated piezo- igniter
Lighting by match in case of piezo igniter
failure
USING THE BARBECUE
Always check the following when
carrying out a leak test
Carry out leak testing as follows
Leak testing is always required in the following cases:
š%HIRUHıUVWWLPHLJQLWLRQRIWKHEDUEHFXH
š(YHU\WLPHDQHZJDVF\OLQGHULVLQVWDOOHGRUVRPH
component replaced.
š:HUHFRPPHQGSHUIRUPLQJWKHWHVWDWOHDVWRQFHD
year, before every barbecue season.
Always carry out the leak test outdoors, away from
heat, open flame, and combustible liquids. Do not
smoke while performing the test. Always use 50/50
liquid soap/water solution for leak testing. Never use
a match or open flame.
š*DVF\OLQGHUYDOYHVDQGF\OLQGHUWKUHDG
š$OOJDVF\OLQGHUZHOGV
š5HJXODWRUPRXQWLQJDQGJDVF\OLQGHUFRQQHFWLRQV
š$OOKRVHMRLQWVLQFOXGLQJVLGHEXUQHUKRVHVLI
present).
š 8VH D UHFHQWO\ ıOOHG DQG FKHFNHG JDV F\OLQGHU
connected to the barbecue with all of the barbecue
connectors in the OFF position.
š2SHQWKHSUHVVXUHUHJXODWRU
š8VLQJDEUXVKDQGVRDSZDWHUVROXWLRQZHWDOORI
the connections and components
š&KHFNFDUHIXOO\IRUEXEEOHVVLJQVRIJDVOHDNDJH
š,IEXEEOHVDSSHDUQH[WWRFRQQHFWLRQVWLJKWHQWKH
connections until retesting shows no sign of leakage
(always turn o gas supply for the duration of leakage
repairs).
š&ORVHWKH SUHVVXUHUHJXODWRU DQG PDNHVXUH WKH
control valves are closed.
Do not use the barbecue if you fail to eliminate a leak.
Close the gas cylinder valve, detach the gas cylinder
and contact the importer.
If the burner does not ignite in 10 seconds in spite of
repeated attempts, turn o the barbecue controller
and cut gas supply from the cylinder. Leave the lid
open and wait for at least 5 minutes before
re-attempting to light the barbecue. This way, the gas
accumulated in the barbecue can escape.
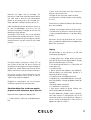
1. Always open the barbecue lid before igniting a
burner.
2. Turn on gas supply from the cylinder and low-
pressure regulator.
3. Press control knob to bottom and turn it
anticlockwise till position.
4. Push ignition button until burner ignites.
5. Adjust the burner flame by turning the
controller between high and low power.
6. After the burner has ignited, the rest of the
burners can be ignited by turning the corresponding
control knobs counter- clockwise.
If burner does not ignite, see troubleshooting table, or
ignite with long match.
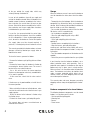
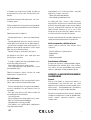
Grill firebox’s right side has open hole, where grill can
be ignited with long match.
1. Always open the lid before lighting the barbecue.
2. Turn on gas supply from the cylinder and low-
pressure regulator.
3. Though firebox’s open hole place a burning match
next to the burner.
4. Push and turn right side control knob till posi-
tion. Make sure by looking through the grid and heat
distribution panel that the burner has definitely
ignited.
If the burner still does not ignite, see the trouble-
shooting table for help.
Warning! Never lean over the barbecue when lighting
or using it.
4

Side burner ignition Turning o the barbecue
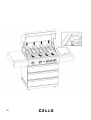
Flame tamers
Preparations
Cooking time
Using the barbecue
Flame withdrawal from the burner
Use control knob from side burner’s control panel.
1. Always open the side burner lid before igniting a
burner.
2. Turn on gas supply from the cylinder and low-
pressure regulator.
3. Press control knob to bottom and turn it anticlock-
wise till big flame position. At the same time hears
click-voice. After click-voice, keep control knob
bottom pushed 2-3 seconds.
4. Repeat point 3 3-4 times.
5. Adjust the burner flame by turning the
controller between high and low power.
If burner does not ignite, see troubleshooting table, or
ignite with long match
Note! Side table frame is designed to hold max 5 kg
weight. Do not surpass weight limit.
1. Close o gas supply from the cylinder to the barbe-
cue.
2. When all of the burner flames have extinguished,
turn the burner controllers to the
OFF position. Once more, make sure gas supply from
the cylinder has been turned o.
3. Detach the pressure regulator from the gas cylin-
der.
This barbecue is provided with flame tamers above
the burners. The flame tamers are intended for even
distribution of heat over the barbecue area, prevent-
ing hot flames from directly contacting the barbecued
food, and protection of the burners against the fat,
salty liquids and marinades dripping from the food.
Lava stones may not be used in this barbecue.
The flame tamers are placed on top of burners, under
the barbecue grid. A flame tamer is not used under
blank grilling plate. Because of this, the number of
flame tamers may diers from the number of burn-
ers.
The barbecue needs to be warmed up before cooking
food. For this, light up the barbecue and use it at MAX
power for approx. 3-5 minutes with the lid down. If
the food prepared requires lower cooking tempera-
ture, use the controllers to lower the temperature
before loading the food. Never use all burners of the
barbecue simultaneously at MAX power – otherwise,
the barbecue will be too hot for cooking and the gas
is wasted. Keeping one or two burners on at a time is
usually sucient, and a low power setting is recom-
mended. Experience will teach you to choose the best
setting.
This is influenced by several factors, and barbecuing
experience comes in handy. The time required may
depend on the raw materials, size of the barbecued
food, and even the weather. Experience suggests that
on a hot day, a lower power setting works better,
whereas on a cold day a higher power setting could
be more favourable. Try cooking various foods at
dierent settings to get the best feel.
1. When cooking food with the barbecue lid closed,
do not use more than one burner at MAX power. In
most cases, a single burner at full power is sucient
for food preparation.
2. Never use more than two burners at MAX power
simultaneously. Excessive heat may damage the
barbecue components.
3. Never leave an operating barbecue unattended,
not even for a moment.
In windy weather, the wind may push the flame away
from the burner. In such cases, the flame will burn
under the control panel. At the same time, loud
roaring or swishing noise can be heard.
The barbecue must be turned o immediately. If the
barbecue is not turned o, the barbecue valve,
control panel, and control knobs can be damaged.
Damages caused by wind-related flame withdrawal
are not covered by the warranty.
5

Flare-ups
Maintenance and cleaning of the barbecue
Grilling grids and plates
Other barbecue components
Marinades
Flare-ups may increase the temperature inside the
barbeque overmuch and intensify fat dripping from
the cooked foods, thus adding to the grease fire
hazard. Minor flare-ups are normal and beneficial,
adding to the pleasant barbecue taste. In order to
keep the flare-ups under control, follow these tips:
š5HPRYHYLVLEOHIDWIURPWKHPHDWEHIRUHEDUEHFX-
ing.
š&RRNFKLFNHQDQGSRUNDWDORZHUSRZHUVHWWLQJ
š0DNHVXUHWKDWWKHIDWGUDLQDSHUWXUHRQWKHEDUEH-
cue bottom is open and that the drip pan is not full.
Empty and wash the drip pan regularly.
š,ISRVVLEOHDOZD\VFRRNZLWKWKHOLGGRZQDQGXVH
the minimum ecient power setting.
If you keep the lid down, the temperature inside the
barbecue remains constant and less gas is
consumed. Also, the food does not dry out if the lid is
down, due to the water vapors and heat released by
the LPG gas circulating inside the barbecue.
To ensure good condition and optimal service of
the barbecue over the years, the barbecue and its
components require cleaning and maintenance.
Perform at least the following operations after each
use, as soon as the barbecue has cooled.
If barbecued food has stuck to the grilling grids or
plates, proceed as follows:
- Use a paper towel to wipe o excessive fat and
marinade from the grid. Be thorough – do not leave
fat or marinade inside the barbecue, for they may
catch fire.
- Ignite the burners according to the instructions.
Adjust the burners to maximum power. Close the
barbecue lid.
- Let the burners incinerate any food residues, fat,
and marinade stuck to the grid and barbecue pan.
Use the burners at full power in an empty barbecue
for max. 5 minutes, otherwise the barbecue compo-
nents may overheat.
- Close the burners open the lid and let the compo-
nents cool for at least 15 minutes, until it is safe to
touch them.
- Use a brass BBQ brush to remove burnt food from
the grid and barbeque pan. Only a brash brush
intended specifically for barbecue cleaning may be
used for this. The bristles of an ordinary steel brush
are too hard and will spoil the surfaces of barbecue
components. The consequences of using a steel
brush are not covered by warranty.
- Finally, when the grids are clean, apply some cook-
ing oil on them, rendering the barbecue ready for next
use.
Any wear or corrosion of the grilling grid and plate
due to ordinary use, improper maintenance, or incor-
rect storage are not covered by the warranty.
The wooden parts of the barbecue must be cleaned
as follows:
Marinades are intended for flavouring of the barbe-
cued food. Inside the barbecue, marinades cause
sticking of the food to the barbecue grid or grilling
plate, may drain under the barbecue or catch fire.
If there is marinade present:
š%HIRUHSODFLQJWKHIRRGLQWRWKHEDUEHFXHZLSHRij
excessive marinade.
š 1HYHU SRXU PDULQDGH RQ EDUEHFXHG IRRG ZKLOH
inside the barbecue.
š1HYHUDSSO\PDULQDGHLQZKLFKUDZPHDWFKLFNHQ
or fish have been kept onto barbecued food by a BBQ
brush. Otherwise, the bacteria from raw meat will end
up in the cooked food.
š,I\RX ZDQW WR DGGWDVWHRU VKLQ\ VXUIDFH WRWKH
barbecued food, use a brush to apply some barbecue
sauce onto the food during the final stage of cooking.
Always prepare the sauces separately.
MAINTENANCE, CLEANING AND
STORAGE
6

Burners
- All wooden parts must be regularly cleaned by
washing with soap/water solution and wiping by a
damp cloth.
- Dry the cleaned surfaces carefully.
- Wooden parts must be treated at least 2-3 times
a year by cleaning products for outdoor furniture
commonly available in stores. This prevents drying
and cracking of wooden components. Use the prod-
ucts in accordance with their instructions, but make
sure they are suitable for wooden components. A
good idea is to try cleaning and care products on
some wood component not directly visible, for
example, on the underside of the side table, before
actual use. This ensures compatibility of the product
with wooden parts.
The steel parts of the barbecue must be cleaned as
follows:
- All steel parts must be regularly cleaned by washing
with soap/water solution and wiping by a damp cloth.
- Dry the cleaned surfaces carefully.
- Texts and images printed on the control panel may
only be wiped clean with damp cloth. Do not scrub or
use any cleaning agents. A cleaning agent may
detach the texts or other markings of the control
panel.
- All steel parts, such as the barbecue lid and control
panel, must be treated at least 2-3 times a year by
steel cleaning and maintenance products available in
stores, such as the CRC 5-56 universal spray. This
prevents sticking of impurities and occurrence of rust
spots on steel surfaces. Use care products in accor-
dance with their instructions, but make sure they are
suitable for steel surfaces of the barbeque. A good
idea is to try cleaning and care products on some
steel component not directly visible, for example, in
the rear corner of the lid, before actual use. This
ensures compatibility of the product with the steel
parts of the barbecue.
- Use cleaning and maintenance products only on the
outer surfaces of the barbecue.
Drip pan under the barbecue:
- The drip pan under the barbecue must be emptied
whenever there are marinade and fat drips from the
barbecue. Avoid formation of fat pools on the drip
pan, as they may catch fire.
- Clean the drip pan by washing it in kitchen sink.
Cleaning of the drip pan can be made
easier by covering it with a sheet of baking paper and
a sheet of aluminium foil. Use a couple of small
stones to keep them in place. When there is fat and
marinade on the drip pan, remove and discard the foil
and the baking paper. Do not put sand on the drip
pan.
Attention! The fat and marinade on the drip pan
may catch fire. The warranty does not cover grease
fire-induced damages to the barbecue.
The flame tamers must be cleaned as follows:
- When the grids and grilling plate have been cleaned
according to instructions, lift them out of their seats.
- Clean the heat distribution panels using a BBQ
cleaning brush.
- Alternatively, you can wash the heat distribution
panels in kitchen sink. Do not use a dishwasher for
washing the panels.
- After cleaning, put the flame tamers back to their
places.
- Put back the grid and grilling plate.
Any wear or corrosion of the heat distribution panels
due to ordinary use, improper maintenance, or incor-
rect storage are not covered by the warranty.
The condition and functionality of the burners and
valves of the barbecue must be checked regularly.
Detach the burners and check their condition at least
two times per year. All burner openings must be
checked and possible blockages cleared. At the same
time, check that the valve nozzle is clean.
During transport/storage or between barbecue
sessions, small insects (such as spiders) may crawl
into the gas supply tubes and build nests or webs
there.
This may prevent gas from arriving to the venturi
tube, causing yellowish, smoky flame at the burner or
rendering lighting of the burner impossible. This
could even result in combustion
7

Storage
Barbecue components to be stored indoors
of the gas outside the supply tube, which may
seriously damage the barbecue.
In case of such problems, close o gas supply and
wait for the barbecue to cool. When the barbecue has
cooled, remove the burner according to the instruc-
tions and clean the venturi tubes by brush or pipe
cleaner. Reinstall the burner according to the instruc-
tions and make sure the gas supply tubes have been
installed onto the gas valve nozzles.
If a gas fire has occurred outside the venturi tube,
before re-igniting the barbecue, check the condition
of all its components. If there are damaged compo-
nents, do not use the barbecue. Contact the importer.
Gas supply tubes must be cleaned regularly, in
particular, at the beginning of each barbecue season.
The warranty granted to the barbecue does not cover
damages caused by blocked gas supply tubes or
blocked valve nozzle.
To clean the burners, proceed as follows:
- Remove the barbecue grid, grilling plate and flame
tamers.
- Remove the burner from the barbecue’s firebox by
unscrewing the burner fixation screw. The screw is
located at the rear end of the burner.
- Use a thin wire to clean the burner openings.
Replace any damaged or extensively corroded burn-
ers as soon as possible.
- At the same time, check that the valve nozzle is
clean.
If the burners are in good condition, reinstall them in
the correct position.
- When reinstalling the burner to the barbecue, make
sure that the valve nozzle enters into the burner’s gas
supply aperture.
- Attach the burner to the barbecue’s firebox using
the fixation screw.
- Put back the flame tamers, grid and grilling palte.
The warranty does not cover use-related wear or
corrosion of the burners.
When the barbecue season is over and the barbecue
must be stored for the winter, do at least the follow-
ing:
- Thoroughly clean the barbeque. Wash the barbecue
components by dishwashing brush and soap/water
solution. Wash the burner box and lid of the barbecue
from the inside as well. Rinse thoroughly.
- Re-assemble the barbecue and turn it on for about
20 minutes, until it is completely dry.
- Let the barbecue cool down again.
- Clean the grid and grilling plate using a BBQ
cleaning brush.
- Oil the grid and grilling plate with some
cooking oil.
- Remove burners according to the instructions.
- Wrap the burners, grid and grilling plate,
warming rack, and flame tamers loosely with news-
paper and store the components indoors, in a dry and
warm place.
- Treat the wooden components of the barbecue with
wood oil.
- Detach the pressure regulator from the gas cylinder.
If you intend to store the barbecue outdoors, use a
decent protection cover sold separately. Such a
protection cover protects the barbecue from top to
bottom and stays in place even in windy weather.
Make sure there is air circulation under the protection
cover. The barbecue must always be stored at least
under a canopy, protected against direct rain or
snowfall. Make sure snow dropping from the roof
cannot damage the barbecue.
The warranty does not cover damages caused by
dropping snow or strong wind (toppling of the barbe-
cue).
The following barbecue components must be stored
indoors, in a dry place over the winter:
- Cast iron grid and grilling plate
- Warming rack
- Burners
- Flame tamers
8

Gas cylinder storage
Warranty
Warranty
This barbecue and its components are covered by a
two-year manufacturing and materials warranty.
Keep the sales receipt, make a copy of the receipt
and attach it to these instructions for use as a
warranty certificate. In warranty matters, reliable
verification of the place of purchase and date of
purchase must be possible.
The warranty does not cover normal wear of the com-
ponents, warping or cracking of wooden parts, corro-
sion of components or surfaces, faults induced by
corrosion, faults and damages caused by improper
use or inadequate maintenance of the unit.
Discoloration of steel surfaces, spotting and darken-
ing are normal consequences of use and the passage
of time. Especially in humid and salty environments,
spot corrosion of steel surfaces is possible, for which
reason use of steel care products in accordance with
the instructions is very important. Such possible spot
corrosion does not interfere with use of the unit and
occurrence of the corrosion is completely normal for
steel surfaces, for which reason it is not covered by
the warranty.
If you should discover a fault of the product or product
component during the warranty period, please
contact the purchase place of the barbecue. The
importer will take care of all warranty procedures.
The importer will deliver a new component to replace
the damaged or missing component, but will not be
responsible for installation of the new component. In
case of self- assembled barbecues, the customer is
always
When the barbecue is not in use, gas flow from the
cylinder to the barbecue must be turned o. The gas
cylinder needs to be stored outdoors, in a well-
ventilated place. Do not store the gas cylinder in a
garage, basement, attic, or next to a heater.
responsible for replacement of components, in accor-
dance with the barbecue’s instructions. Failure to
follow said instructions will void the warranty and the
use will not comply with the product certificate.
Use of the product for commercial production, sales,
or leasing purposes will void the warranty. The follow-
ing barbecue components are subject to use-related
wear, for which reason the warranty does not cover
any wear or corrosion thereof due to the use.
- Cast iron or stainless tube burners
- Barbecue grids and grilling plates
- Warming rack
- Flame tamers
- Grease tray
If a fault is discovered in the product or product com-
ponent during the warranty period, or if components
are found missing during the assembly of the barbe-
cue, contact the place of purchase.
Before submitting a warranty claim, carefully read the
instructions for use and make sure that the claim is
not related to improper use or lack of maintenance.
In warranty matters, the following data must be
submitted to the place of purchase:
š7KHEUDQGDQGPRGHORIWKHEDUEHFXH
š7KHFDXVHIRUWKHFODLP
š7KHSDUWQXPEHURIWKHGHIHFWLYHSDUW
according to the parts list
WARRANTY AND WARRANTY PROCEDURE
9

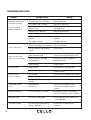
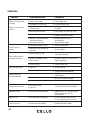
Problem Possible causes Remedy
Impossible to light burner
(with igniter or match)
The burners do not
produce enough heat
Burner can be lit with
match, but not with igniter
Excessive heat
excessive flare-ups
TROUBLESHOOTING GUIDE
šThe burner openings are blocked
Yellow, smoky flame
Flame goes out
Flames under control
panel
Regulator humming
Incomplete flame
The flame is too big
šClear the blockages
šOpen gas cylinder valve
šClean or replace burner
šReplace with new cylinder
š Straighten gas hose
š Clear the blockages
šClean burners
šMake sure the burner and igniter
areinstalled correctly
šReplace igniter
šMove barbecue away from wind
šReplace cylinder
šTrim excess fat and reduce burner power
šClean the fat collector and burners
šPosition cooked food correctly.
šShut o gas immediately, allow
barbecue to cool down and clean
burners
šA temporary situation caused by high
outside air temperature and full cylinder
šClean or replace burner and check for
burner blockages
šReplace with 30 mbar pressure
regulator
šCheck all connections for tightnessctly
š Check regulator connection to
cylinder
šMake sure barbecue burners
are fittedto valves
šGas cylinder valve is not open
šBurner air inlet is blocked
šCylinder is empty or almost empty
šGas supply is blocked
šBurner air inlet openings are blocked
šPoor conductor contact
šWindy weather
šFat-rich food
šBlocked burners
šThis is not a defect or a hazard
šThe flame is visibly yellow
šYou are using the wrong type of
pressure regulator.
šStrong wind
šBlocked fat drain from barbecue
šCooked food is not positioned
correctly
šCylinder almost empty
šDefective igniter or electrode
šDefective igniter
šPoor grounding
šLots of salt or marinade on burner
surfaces
š Regulator is not fitted properly to
cylinder
šBurners are not fitted properly to
barbecue valves
10

FI
YLEISET OHJEET
GRILLIIN LIITTYVÄT VAROITUKSET JA
TURVAOHJEET
Ottaessasi tämän kaasugrillin käyttöön olet samalla
velvoitettu lukemaan kaikki tässä käyttöohjeessa
olevat kasaamis-, käyttö-, hoito- ja huolto-ohjeet. Lue
kaikki ohjeet ja neuvot ennen kuin käytät laitetta.
Erityisesti sinun tulee lukea ja ymmärtää kaikki varoi-
tus- ja turvaohjeet ennen kaasugrillin käyttöä. Seuraa
tarkoin sytytykseen ja käyttöön liittyviä ohjeita. Käsit-
tele metalliosia varovasti, ettet loukkaa itseäsi.
Seuraa kaikkia kohtia järjestyksessä.
1. Grilli on tarkoitettu ainoastaan ulkokäyttöön.
2. Grillin käyttäminen muuhun kuin suunniteltuun
tarkoitukseen voi aiheuttaa vaaraa.
3. Sulje kaasuntulo kaasupullolta aina käytön jälkeen.
TÄMÄ GRILLI ON TARKOITETTU AINOASTAAN
ULKOKÄYTTÖÖN.
JOHTUEN GRILLIN AVONAISESTA RAKENTEESTA,
MAHDOLLISISTA RASVAVALUMISTA RAKEN-
TEISSA JA RASVAN ROISKUMISESTA GRILLIN
ULKOPUOLELLE, ÄLÄ KÄYTÄ GRILLIÄ ARKOJEN
PINTOJEN LÄHEISYYDESSÄ TAI PÄÄLLÄ.
GRILLISTÄ SAATTAA VALUA RASVAA TAI MARI-
NADEJA GRILLIN ALLE, ALATASOLLE TAI KAAP-
PIIN, SEKÄ NIITÄ SAATTAA ROISKUA GRILLIN
YMPÄRISTÖÖN. RASVAVALUMAT TAI ROSKEET
OVAT NORMAALI ILMIÖ KÄYTETTÄESSÄ GRIL-
LIÄ.
GRILLI ON CE-MERKITTY JA SE ON VOIMASSA
OLEVIEN ASETUSTEN MUKAISESTI HYVÄKSYTTY.
GRILLIN PIENIKIN RAKENTEELLINEN MUUT-
TAMINEN ON KAIKILTA OSIN KIELLETTY. GRILLIN
KASAUKSESSA EI MITÄÄN OSIA SAA RAKEN-
TEESTA JÄTTÄÄ POIS, MYÖSKÄÄN MITÄÄN OSIA
RAKENTEESEEN EI SAA LISÄTÄ.
4. Seuraa kaikkia asennusohjeita. Jos ohjeita ei seurata,
voi ilmetä ongelmia käytössä.
5. Grilli kuumenee käytön aikana, ole tarkkaavainen jos
lähettyvillä on lemmikkejä, lapsia tai vanhuksia.
6. Jos tunnet voimakasta kaasun hajua, sulje kaasuntulo
kaasupullolta välittömästi. Sammuta kaikki palavat liekit
sulkemalla jokaisen polttimen säädin. Avaa grillin kansi ja
tarkista mahdolliset vuodot. Tee vuototesti ohjeiden
mukaan. Korjaa mahdolliset vuotavat liitokset. Jos et löydä
vikaa, ota yhteyttä kaasuasennusliikkeeseen tai ostopaik-
kaan.
7. Älä siirrä grilliä käytön aikana tai kun grilli on vielä
kuuma.
8. Älä käytä tai säilytä palavia materiaaleja, nesteitä tai
kaasuja grillin läheisyydessä.
9. Älä koskaan tarkista kaasuvuotoa avotulella.
10. Älä käytä grilliä jos siinä on vikaa.
11. Älä irrota mitään kaasuliitoksia grillistä tai säätimestä
kun grilli on käytössä.
12. Älä koskaan jätä grilliä vartioimatta käytön aikana.
13. Älä anna lasten käyttää grilliä.
14. Grilli täytyy puhdistaa säännöllisin väliajoin. Varo ettet
vaurioita polttimien aukkoja ja säätimien suuttimia puhdis-
tuksen aikana.
15. Etenkin grillin pohja, rasvapelti, parila ja ritilä tulee
pitää puhtaana rasvasta ja marinadeista. Rasvapalon
vaara.
16. Älä käytä grilliä katoksen alla, seinän vieressä, autot-
allissa, matkailuautossa tai – vaunussa, veneessä, sulje-
tussa tilassa tai sisätiloissa. Tarkista ettei lähettyvillä ole
palavia tai syttyviä materiaaleja. V apaata tilaa täytyy olla
grillin sivuilla joka suuntaan vähintään yksi metri, mielel-
lään enemmän.
17. Suosittelemme huoltamaan ja puhdistamaan grillin
vähintään kerran vuodessa. Jos et ole varma miten laite
huolletaan, älä yritä itse huoltaa laitetta, vaan anna valtuu-
tetun kaasuhuoltoliikkeen tehdä huolto.
18. V ain kaasuasennusoikeudet omaava huoltoliike saa
huoltaa ja säätää grillin pääventtiileitä, kaasuhanoja ja
venttiilien suuttimia.
19. Tee grillille aina vuototesti kun otat sen käyttöön
pitkän varastointiajan jälkeen esim. keväällä ja aina kun
11

Kaasupullon asennus
Kaasupullon irrotus
Grillin käyttöönotto
vaihdat kaasupullon tai olet asentanut uusia osia
järjestelmään, kuten paineensäätimen tai kaasulet-
kun.
20. Grillin kansi täytyy olla aina auki kun sytytät grillin.
21. Käytä kuumaa kestäviä grillihanskoja ja tukevia
pitkävartisia grillaustarvikkeita apuvälineenä kun
käytät grilliä.
22. Valmistaudu mahdolliseen onnettomuuteen niin
että tiedät missä ensiapupakkaus ja käsisammutin
ovat, ja että osaat käyttää niitä.
Tarkista kaasuletkun kunto säännöllisesti. Vaihda
kulunut tai vaurioitunut letku uuteen. Pidä huoli, ettei
kaasuletku ota kiinni grillin kuumiin osiin.
Katso, ettei kaasuletku ole kiertynyt tiukalle mutkalle,
joka estää kaasun virtauksen kaasuletkussa.
Käytä grillin alla olevaa tasoa vain kaasupullon säilyt-
tämiseen. Kun käytät grilliä, ota kaasupullo aina pois
grillin alta turvallisuus syistä.
1. Tarkasta että kaikki grillin säätimet ovat kiinni
asennossa (OFF).
2. Asenna kaasuletku tiiviisti matalapainesäätimen
letkuistukkaan ja toinen pää grillissä olevaan letkuis-
tukkaan. Käytä kiristykseen letkuklemmareita.
3. Kiinnitä matalapainesäädin kaasupulloon. Tarkista
säätimen kiinnitys kaasupulloon vetämällä
säätimestä voimakkaasti ylöspäin.
4. Avaa kaasuntulo matalapainesäätimestä hitaasti,
että kaasunpaine tasaantuu.
1. Sulje kaasunvirtaus matalapainesäätimestä.
2. Tarkasta että kaikki grillin säätimet ovat kiinni
asennossa (OFF).
3. Irrota matalapainesäädin kaasupullosta.
Älä vaihda kaasupulloa avotulen tai hiilloksen lähei-
syydessä.
Ennen ensimmäistä grillin käyttökertaa, tee sille
täydellinen vuototesti ohjeiden mukaisesti. Sytytä
grilli ja käytä kaikkia polttimia Max-teholla noin 5
minuuttia kansi auki, älä yhtään kauemmin. Sen
jälkeen sulje kansi ja jatka grillin käyttöä Max-teholla
vielä 2-3 minuutin ajan. Kun tämä on suoritettu, on
grillistä varastorasvat poltettu pois. Anna grillin
jäähtyä noin 15 minuuttia. Puhdista ritilä ja parila
grillinpuhdistusharjalla. Öljyä ritilä ja parila
ruokaöljyllä. Nyt grilli on valmis käyttöön.
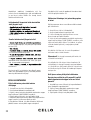
TEKNISET TIEDOT
ENNEN GRILLIN KÄYTTÖÄ
Kaasupullo, kaasuletku ja paineensäädin
Grillin mukana ei toimiteta kaasuletkua, matalapa-
ineensäädintä eikä letkukiristimiä. Ne myydään
erikseen. Hanki vähintään 5 kg ja enintään 11 kg
nestekaasupullo, matalapainesäädin (29-30 mbar) ja
kaasuletku jälleenmyyjältäsi. Huom.! Pulloon liitettävä
paineensäädin ei saa olla millään tavoin säädettä-
vissä ja siinä pitää lukea, että säätimen käyttöpaine
on 29-30 mbar.
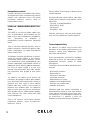
Kuvassa 29-30 mbar matalapainesäätimet, jotka
ovat oikea valinta kaasugrillille sekä oikealla
korkeapainesäädin, joka on tarkoitettu nestekaasu-
työkaluille eikä sitä saa käyttää kaasugrillissä.
Kaasuletku pitää olla Suomessa hyväksyttyä halkaisi-
jaltaan 10 mm nestekaasuletkua ja sen pituus saa
olla enintään 1,2 m.
12
2531-19
TUNNISTEKOODI:2531CU-0080
Malli: Cello Ready 4i (A410)
Kokonaisteho, pääpoltin: 17,2 kW
Kokonaisteho, sivupoltin: 14 kW
Kaasunkulutus: 1252 g/h
Käyttöpaine: 30 mbar
Kaasu: Nestekaasu
Käyttöluokka: I3B/P
Pääpolttimen suuttimen halkaisija: 0,93 mm
Sivupolttimen suuttimen halkaisija: 0,89 mm

Vuototesti
Seuraavat asiat täytyy aina tarkistaa
vuototestissä
Tee vuototesti seuraavasti
Vuototesti tulee suorittaa aina seuraavissa yhteyk-
sissä:
jokin osa vaihdetaan.
testi ainakin käyttökauden alussa.
Vuototesti täytyy tehdä aina ulkona, etäällä kuumuud-
esta, avotulesta ja tulenaroista nesteistä. Älä tupakoi
testiä suorittaessasi. Käytä ainoastaan nestesaippuan
ja veden seosta 50/50 vuototestiin. Älä koskaan
käytä tulitikkua tai avotulta.
letkut jos niitä on.
-
pulloa, joka on liitetty grilliin, ja kaikki grillin säätimet
kiinni-asennossa (OFF).
kastele kaikki kohdassa mainitut
liitokset ja osat.
-
sevat kaasuvuotoa.
testattaessa ei havaita vuodon merkkejä (Sulje kaas-
untulo aina vuotojen korjaamisen ajaksi).
ovat kiinni.
Älä käytä grilliä ellei vuotoja saa korjattua. Sulje
kaasupullon venttiili, irrota kaasupullo ja ole yhtey-
dessä maahantuojaan.
13
Polttimen sytyttäminen paristotoimisella
piezo-sytyttimellä
Sytyttäminen tulitikulla, jos paristotoiminenpiezo
ei toimi.
Grillin tulilaatikon oikeassa päädyssä olevaa
ilmanottoaukkoa aukkoa voidaan käyttää grillin
sytyttämiseen.
GRILLIN KÄYTTÄMINEN
1. Avaa grillin kansi aina kun sytytät polttimen.
2. Avaa kaasun tulo pullosta ja matalapainesää-
timestä.
3. Paina ja käännä säädin FLAME SYMBOL-
asentoon.
4. Paina piezo-sytytin pohjaan, kunnes grillin poltin
syttyy.
5. Säädä polttimen liekkiä kääntämällä säädintä ison
ja pienen tehon välillä.
6. Kun poltin on syttynyt, voidaan loput polttimet
sytyttää kääntämällä poltinta vastaavaa säätönuppia
vastapäivään.
Jos poltin ei syty, katso ongelmanratkaisutaulukko
tai sytytä grilli pitkän tulitikun avulla.
1. Avaa grillin kansi aina kun sytytät grillin.
2. Avaa kaasun tulo pullosta ja matalapainesäätimestä.
3.Työnnä sytytetty tulitikku tulilaatikon aukkoon,
polttimen viereen.
4.Paina ja käännä oikeanpuoleinen säädin FLAME
SYMBOL -asentoon, jolloin polttimen pitäisi syttyä.
Varmistu katsomalla ritilän ja lämmönjakolevyn läpi,
että poltin on varmasti syttynyt.
Jos poltin ei vieläkään syty, katso ongelmanrat-
kaisutaulukosta apua.
Varoitus! Älä milloinkaan kumarru grillin päälle, kun
sytytät tai käytät grilliä.
Jos grillin poltin ei syty useista yrityksestä huolimatta
10 sekunnin aikana, sulje grillin säädin ja kaasun tulo
pullosta. Jätäkansi auki ja odota vähintään 5 minuuttia
ennen kuin yrität uudelleen sytyttää grillin. Näin grilliin
kerääntynyt kaasu tuulettuu pois.

Sivukeittimen polttimen sytyttäminen Grillin sammuttaminen
Lämmönjakopellit
Esivalmistelut
Kypsennysaika
Grillin käyttäminen
Liekin vetäytyminen polttimen juureen
Käytä piezo-sytytintä ohjauspanelista ja säädintä
sivukeittimen ohjauspanelista.
1. Sulje kaasuntulo pullolta grilliin.
2. Kun kaikki liekit ovat polttimista sammuneet,
käännä polttimien säätimet kiinni OFF-asentoon. V
armistu vielä että kaasun tulo pullosta on varmasti
kiinni.
3. Irrota paineensäädin kaasupullosta.
Tässä grillissä on lämmönjakopellit polttimien
yläpuolella. Lämmönjakopeltien tehtävä on jakaa
lämpö tasaisesti grillausalueelle, estää kuuman liekin
osumista suoraan grillattaviin tuotteisiin sekä suojella
polttimia ruoasta tippuvilta rasvoilta, suolaisilta
nesteiltä sekä marinadeilta.
Grillissä ei käytetä laavakiviä. Lämmönjakopellit
laitetaan grillausritilän alapuolella olevien polttimien
päälle. Umpiparilan alla ei käytetä lämmönjakopeltiä.
Tästä johtuen lämmönjakopeltien lukumäärä on eri
kuin grillin polttimien lukumäärä.
Grilli pitää kuumentaa ennen ruokien laittoa grilliin.
Tämä tehdään sytyttämällä grilli ja käyttämällä sitä
Max-teholla noin 3-5 minuuttia kansi alhaalla. Jos
valmistettava ruoka vaatii alhaisempaa lämpötilaa
kypsennykseen, käännä tehoa säätimistä pienem-
mälle ennen ruoan laittamista grilliin. Älä käytä grillin
kaikkia polttimia koskaan grillatessa Max-teholla
samaan aikaan, koska grilli on silloin tarpeettoman
kuuma ruoan valmistukseen, ja kulutat turhaan
kaasua. Yleensä riittää että yksi - kaksi poltinta on
samaan aikaan päällä, ja nekin pienellä teholla.
Grillauskokemuksesta on hyötyä tässä asiassa.
Tähän vaikuttaa moni asia ja grillauskokemuksesta
on hyötyä. Raaka- aineet, grillattavan ruoan koko ja
jopa säätila voivat vaikuttaa kypsennysaikaan. Koke-
mus näyttää, että kuumana päivänä, matalampi
tehoasento toimii paremmin ja kylmänä päivänä
korkeampi tehoasento voi toimia paremmin. Parhaan
tuntuman grilliin saa kokeilemalla eri ruokia, eri
tehoilla.
1. Älä käytä enempää kuin yhtä poltinta Max teholla
kun valmistat ruokaa grillissä kansi kiinni. Usein tämä
yhden polttimen teho riittää ruoan valmistukseen.
2
. Älä koskaan käytä enempää kuin kahta poltinta
täysillä samanaikaisesti. Liika kuumuus voi vaurioit-
taa grillin osia.
3. Älä koskaan jätä päällä olevaa grilliä hetkeksikään
vartioimatta.
Tuulisella säällä on mahdollista, että tuuli painaa
liekin pois polttimesta. Tällöin liekki jää palamaan
ohjauspanelin alle. Samalla kuuluu voimakas
kohiseva tai röpöttävä ääni.
Tällöin grilli on sammutettava välittömästi. Jos grilliä
ei sammuteta, voivat grillin venttiili, ohjauspaneeli ja
säätönupit vaurioitua.
Tuulen aiheuttaman liekin vetäytymisen aiheuttamat
vauriot eivät kuulu takuun piiriin.
14
1.Avaa sivukeittimen kansi ennen sytyttämistä.
2.Paina ja käännä säädin FLAME SYMBOL -
asentoon.
3.Paina piezo-sytytintä kunnes sivupoltin syttyy.
4.Jos poltin ei syty, sulje venttiili ja odota kunnes
kaasu on hälvennyt ja toista sytytystoimenpiteet.
Jos poltin ei vieläkään syty, katso ongelmanrat-
kaisutaulukko tai sytytä poltin pitkän tulitikun avulla.
HUOM! Sivukeittimen runko on suunniteltu kannattel-
emaan enintään 5 kg painoa. Älä ylitä painorajoitu-
sta.

Liekkien leimahtelu
Grillin huolto ja puhdistus
Grillin grillausritilät ja -parilat
Marinadit
Liekkien leimahtelu voi nostaa grillin sisälämpötilaa
liikaa ja lisätä rasvan tippumista grillattavista ruoista,
näin lisäten rasvapalon vaaraa. Joskin vähäinen
leimahtelu on normaalia ja suotavaa, koska se antaa
ruokaan mukavasti grillauksen makua. Liekkien
leimahtelun pitämiseksi sopivana, toimi seuraavasti:
š3RLVWDQËN\YËUDVYDOLKDVWDHQQHQJULOODDPLVWD
š.\SV\WËNDQDQMDSRVVXQOLKDSLHQHPPËOOËWHKROOD
š9DUPLVWDHWWËUDVYDQSRLVWRDXNNRJULOOLQSRKMDVVD
on auki ja ettei rasvapelti ole täynnä. Tyhjennä ja pese
rasvapelti säännöllisesti.
š*ULOODDPDKGROOLVXXNVLHQPXNDDQDLQDNDQVLDOKDDOOD
ja käytä alinta tehokasta tehonsäätöasetusta.
Pitämällä grillatessa kannen alhaalla, pysyy grillissä
lämpötila tasaisena ja grilli kuluttaa vähemmän
kaasua. Myös ruoka ei kuivu kannen ollessa alhaalla,
johtuen nestekaasuliekin vapauttamasta vesihöyrystä
ja lämmöstä, joka grillissä kiertää.
Jotta grilli pysyy hyvässä kunnossa ja siitä saisi
parhaan hyödyn useiksi vuosiksi, täytyy grilliä ja sen
osia myös puhdistaa ja huoltaa. Tee vähintään
seuraavasti aina jokaisen käyttökerran jälkeen heti
kun grilli on jäähtynyt.
Jos grillin grillausritilöihin ja -pariloihin on jäänyt
grillattavaa ruokaa kiinni, toimi seuraavassa järjestyk-
sessä:
- Pyyhi talouspaperilla ylimääräinen rasva ja marina-
dit ritilöistä pois. Pyyhi tarkkaan, rasvaa ja marinadeja
ei saa jäädä grilliin koska ne voivat syttyä palaamaan.
- Sytytä grillin polttimet ohjeiden mukaisesti. Säädä
polttimet suurimmalle teholle. Laske grillin kansi alas.
- Anna polttimien polttaa kiinni jäänyt ruoka, rasva ja
marinadi karrelle ritilässä ja parilassa. Käytä polttimia
täydellä teholla tyhjässä grillissä korkeintaan 5
minuuttia, muuten grillin osat voivat kuumentua
liikaa.
- Sulje polttimet, avaa grillin kansi ja anna osien
jäähtyä ainakin 15 minuuttia kosketuslämpöiseksi.
- Harjaa karrelle palanut ruoka ritilästä ja parilasta
harjalla jossa on messinkiharjakset. Harja pitää olla
ehdottomasti grillinpuhdistukseen tarkoitettu
grilliharja. Tavallisen teräsharjan harjakset ovat liian
kovat ja ne rikkovat grillin osien pinnat. Teräsharjan
käytön jäljet eivät kuulu takuun piiriin.
- Lopuksi kun ritilät ovat harjattu puhtaaksi, sivele
niihin ruokaöljyä, niin grilli on heti käyttövalmis
seuraavaa kertaa varten.
Grillausritilän ja – parilan käytöstä aiheutuva
kuluminen tai huollon laiminlyönnistä ja väärästä
varastoinnista aiheutuva ruostuminen ei kuulu takuun
piiriin.
Marinadien tehtävä on maustaa grillattavat tuotteet.
Grillin sisällä marinadit aiheuttavat tuotteiden kiinni-
palamista grillausritilään tai – parilaan, voivat valua
grillin alle tai ne voivat syttyä palamaan.
Kun marinointi on suoritettu:
š(QQHQJULOOLLQODLWWDPLVWDSRLVWD\OLPËËUËLVHWPDUL-
nadit pyyhkimällä ne paperilla.
š gOË NRVNDDQ NDDGD PDULQDGLD JULOOLVVË ROHYLHQ
grillattavien tuotteiden päälle.
š gOË NRVNDDQ SHQVODD JULOODXVVXGLOOD PDULQDGLD
grillattavien tai grillatuiden tuotteiden päälle, jossa
liha, broileri tai kala on ollut raakana. Raa’an lihan
bakteerit päätyvät muuten valmiiseen tuotteeseen.
š-RVKDOXWDDQOLVËWËPDNXDWDLNLLOWËYËËSLQWDDJULOODW-
tuihin tuotteisiin, voi grillauksen loppuvaiheessa
penslata maustekastikkeita tuotteisiin. Valmista ne
aina erikseen.
GRILLIN HUOLTO, PUHDISTUS JA
VARASTOINTI
15

Grillin polttimet
Grillin muut osat
Grillin teräsosat tulee puhdistaa seuraavasti:
- Kaikki grillin teräsosat tulee säännöllisesti puhdistaa
saippuavesiseoksella ja kostealla puhdistusliinalla
pyyhkimällä.
- Kuivaa puhdistetut pinnat huolellisesti.
- Ohjauspaneelin painettuja tekstejä ja kuvioita ei saa
puhdistaa millään muulla kuin kostealla liinalla. Älä
hankaa tai käytä puhdistusaineita. Puhdistusaineet
voivat irrottaa ohjauspaneelin tekstit ja muut merkin-
nät.
- Kaikki teräsosat kuten grillin kansipelti ja ohjauspa-
neeli täytyy käsitellä yleisesti kaupoissa myytävillä
teräksen puhdistus- ja hoitoaineilla vähintään 2-3
kertaa vuodessa, esimerkiksi CRC 5-56 monitoimis-
prayllä. Tällä ehkäistään lian pinttyminen ja ruost-
epilkkujen esiintyminen teräs pinnoilla. Käytä
hoitoaineita niiden omien ohjeiden mukaan, kuitenkin
ensin kokeillen aineen soveltuvuus grillin teräspin-
nalle. Puhdistus- ja hoitoaineita on hyvä kokeilla
johonkin grillin teräsosaan joka ei ole suoraan näky-
vissä esim. kannen takakulmaan ennen varsinaista
käyttöä. Näin varmistutaan aineen soveltuvuus grillin
teräsosille.
- Käytä puhdistus- ja hoitoaineita ainoastaan grillin
ulkopinnoille.
Grillin alla oleva rasvapelti:
- Grillin alla oleva rasvapelti tulee
tyhjentää aina kun sinne on tippunut grillistä mari-
nadeja ja rasvaa. Rasvapellille ei saa päästää muo-
dostumaan lammikoita, koska ne saattavat syttyä
palamaan.
- Puhdista rasvapelti pesemällä se tiskialtaassa.
Rasvapellin puhdistusta voi helpottaa laittamalla sille
leivinpaperin, jonka päälle aluminifolion. Muutama
kivi pitämään näitä paikoillaan. Kun rasvapellillä on
rasvaa ja marinadeja otetaan folio ja leivinpaperi pois
ja laitetaan roskikseen. Älä laita hiekkaa rasvapellille.
Grillin lämmönjakopellit tulee puhdistaa seuraavasti:
- Kun ritilä ja parila on puhdistettu ohjeen mukaisesti,
nosta ne pois paikoiltaan.
- Puhdista lämmönjakopellit grillin puhdistusharjalla
harjaamalla.
- V aihtoehtoisesti voit pestä lämmönjakopellit tiskial-
taassa. Älä laita lämmönjakopeltejä astianpesu-
koneeseen.
- Puhdistuksen jälkeen laita lämmönjakopellit takaisin
paikoilleen.
- Laita ritilä ja parila takaisin paikoilleen.
Lämmönjakopellin käytöstä aiheutuva kuluminen tai
huollon laiminlyönnistä ja väärästä varastoinnista
aiheutuva ruostuminen ei kuulu takuun piiriin.
Huomio! Rasvapellillä oleva rasva ja marinadi voivat
syttyä palamaan. Rasvapalosta aiheutuneet grillin
vauriot eivät kuulu takuun piiriin.
Grillin polttimien sekä venttiilien kunto ja toiminta on
tarkistettava säännöllisesti. Vähintään kahdesti
vuodessa on grillin polttimet otettava irti ja tarkistet-
tava niiden kunto. Polttimien kaikki reiät tulee
tarkastaa ja puhdistaa niistä mahdolliset tukokset.
Samalla tulee tarkistaa että venttiilin suutin on
puhdas.
Kuljetuksen, grillauskertojen välillä tai varastoinnin
aikana, on mahdollista, että pienet hyönteiset kuten
hämähäkit voivat päästä kaasunsyöttöputkiin, pesiä
siellä tai tehdä verkkojaan.
16

Grillin varastointi
Grillin sisätiloissa säilytettävät osat
Tämä voi estää kaasun tulon syöttöputkeen,
aiheuttaen savuavan kellertävän liekin polttimessa tai
estää polttimen syttymisen kokonaan. Se voi jopa
aiheuttaa kaasun palamisen syöttöputken
ulkopuolella, mikä voi vakavasti vahingoittaa grilliä.
Jos näin tapahtuu, sulje kaasun tulo ja odota että grilli
jäähtyy. Kun grilli on jäähtynyt, irrota poltin ohjeiden
mukaisesti ja puhdista kaasunsyöttöputket harjalla tai
piipunpuhdistimella. Asenna poltin takaisin ohjeiden
mukaisesti ja varmistu, että kaasunsyöttöputket on
asennettu kaasuventtiilien suuttimien päälle.
Jos kaasu on päässyt syttymään syöttöputken
ulkopuolella, tarkista grillin kaikkien osien kunto
ennen grillin sytyttämistä uudelleen. Jos osia on
vaurioitunut, älä käytä grilliä. Ota yhteys maahantuo-
jaan.
Kaasunsyöttöputkien puhdistus tulee tehdä säännöl-
lisesti, erityisesti käyttökauden alussa.
Grillille myönnetty takuu ei kata tukkeutuneista kaas-
unsyöttöputkista tai tukkeutuneesta venttiilin suut-
timesta aiheutunutta vahinkoa.
Polttimien puhdistus tapahtuu seuraavasti.
- Poista grillausritilä ja parila sekä
lämmönjakopelti.
- Irrota poltin grillin tulilaatikosta
avaamalla kiinnike, jolla poltin on kiinni. kiinnike on
polttimen takapäässä.
- Käytä ohutta rautalankaa polttimen reikien puhdis-
tamiseen. Jos polttimet ovat vahingoittuneet tai ovat
pahasti ruosteessa, vaihda viallinen poltin uuteen
mahdollisimman pian.
- Tarkista samalla, että venttiilin suutin on puhdas.
Jos polttimet ovat hyvässä kunnossa, asenna ne
takaisin paikoilleen oikeaan asentoon.
- V armista, että poltinta grilliin takaisin asennet-
taessa venttiilin suutin menee polttimen kaasunsyöt-
töaukon sisään.
- Kiinnitä poltin grillin tulilaatikkoon kiinnikkeellä.
- Laita lämmönjakopelti sekä ritilä ja parila takaisin
paikoilleen.
Kun grillauskausi on ohi ja varastoit grillin talven
ajaksi, tee vähintään seuraavat asiat:
- Puhdista grilli perusteellisesti. Pese grillin osat
astianpesuharjalla sekä saippuavesiseoksella. Pese
grillin tulilaatikko sekä kansi myös sisäpuolelta.
- Laita grilli takaisin päälle ja pidä grilliä päällä noin
20 minuuttia, jotta grilli on kuivunut perusteellisesti.
- Anna grillin jäähtyä.
- Harjaa grillin puhdistusharjalla grillausritilä ja –
parila puhtaaksi. - Öljyä ritilä ja parila ruokaöljyllä.
- Irrota polttimet ohjeen mukaisesti.
- Kääri polttimet, ritilä ja parila, lämmitysritilä sekä
lämmönjakopellit ilmavasti sanomalehtipaperiin ja
säilytä ne kuivassa lämpöisessä paikassa sisätiloissa.
- Irrota paineensäädin kaasupullosta.
Jos säilytät grillin ulkona, hanki grillille kunnon suoja-
peite, joita myydään lisävarusteena. Kunnon suoja-
peite suojaa grillin alas saakka ja pysyy paikoillaan
kovallakin tuulella. Huolehdi, että ilma pääsee
kiertämään suojapeitteen alla. Grilli on säilytettävä
aina vähintään katoksen alla, niin ettei se koskaan ole
suoraan vesi- tai lumisateessa. Huolehdi, ettei katolta
tippuva lumi pääse vaurioittamaan grilliä.
Katolta tippuneen lumen tai tuulen kaataman grillin
vauriot eivät kuulu takuun piiriin.
Polttimien käytöstä aiheutunut kuluminen tai niiden
ruostuminen ei kuulu takuun piiriin.
Seuraavat grillin osat tulee säilyttää kuivassa sisätil-
assa talven yli:
- Valurautaritilä ja – parila.
- Lämmitysritilä
- Polttimet
- Lämmönjakopellit
- Rasvapelti ja -kuppi
17

Kaasupullon varastointi
Takuu
Takuuasioiden käsittely
Tällä grillillä ja sen osilla on kahden vuoden valm-
istus- ja materiaalitakuu. Säästä ostokuitti, ota siitä
kopio ja liitä se näihin käyttöohjeisiin takuutodistuk-
sena. Takuuasioissa on ostopaikka ja
ostopäivämäärä kyettävä osoittamaan luotettavasti
toteen.
Takuu ei kata osien normaalia kulumista, osien tai
pintojen ruostumista, ruostumisesta johtuvia vikoja,
laitteen väärinkäytöstä tai huollon laiminlyönnistä
johtuvia vikoja ja jälkiä.
Teräspintojen värimuutos, pilkuttuminen ja tummen-
eminen on normaalia käytössä ja ajan kuluessa.
Teräspinnoilla saattaa varsinkin kosteassa ja suolai-
sessa ympäristössä esiintyä korroosiopilkkuja, joten
teräksen hoitoaineiden käyttö ohjeiden mukaan on
ehdottoman tärkeää. Nämä mahdolliset korroosiopil-
kut eivät estä laitteen käyttöä ja ne ovat aivan
normaali ilmiö teräspinnoilla, joten niiden mahdoll-
inen esiintyminen osien pinnoilla ei kuulu takuun
piiriin.
Jos tuotteessa tai tuotteen osassa ilmenee vika
takuuaikana, ole yhteydessä suoraan grillin ostopaik-
kaan Myyjä hoitaa kaikki takuukäsittelyt. Viallisen tai
puuttuvan osan tilalle myyjä tai hänen edustaja
lähettää uuden osan, mutta ei vastaa viallisen tai
puuttuvan osan vaihdosta grilliin. Itse koottavissa
grilleissä asiakas vastaa aina itse osan vaihtamisesta
grilliin ohjeiden mukaan. Näiden ohjeiden noudatta-
matta jättämisen takia takuu raukeaa eikä käyttö
vastaa tuotetodistusta.
Takuu ei ole voimassa, mikäli tuotetta käytetään
kaupallisessa valmistus-, myynti- tai vuokraustar-
koituksessa. Takuu ei
Kun grilli ei ole käytössä, kaasupullosta täytyy kaasun
virtaus grilliin olla suljettu. Kaasupullo vaatii säilytystä
ulkosalla, hyvin tuulettuvassa tilassa. Älä varastoi
kaasupulloa autotallissa, kellarissa, vintillä tai
lämmityslaitteen vieressä.
heikennä millään tavalla Suomessa voimassa olevaa
kuluttajansuojalakia.
Seuraavat grillin osat kuluvat käytössä, joten niiden
käytöstä johtuva kuluminen tai ruostuminen ei kuulu
takuun piiriin.
- V alurauta- tai rosteriputkipolttimet
- Grillausritilät ja -parilat
- Lämmitysritilä
- Rasvapellit ja -kupit
Tiedustele tarvitsemaasi uutta osaa grillin ostopai-
kasta. Uusia osia grilleihin on saatavilla rajoitetusti.
Jos tuotteessa tai tuotteen osassa ilmenee vikaa
takuuaikana tai osia puuttuu grilliä kasattaessa, ole
yhteydessä suoraan grillin ostopaikkaan. Myyjä
hoitaa kaikki takuukäsittelyt.
Ennen takuuvaatimusten esittämistä lue käyttöohje
huolella läpi ja tarkista, että takuuvaatimus ei johdu
käyttöohjeiden vastaisesta käytöstä tai huollon
laiminlyönnistä.
Takuuasioissa seuraavat tiedot on toimitettava maah-
antuojalle:
- Grillin merkki ja mallinimi
- Reklamaation syy
- Viallisen osan osanumero
osaluettelon mukaisesti
- Kopio ostokuitista tai selvitys
ostopaikasta sekä ostopäivämäärä
- Kuluttajan nimi, puhelinnumero,
katuosoite, postinumero
Yllämainitut tiedot tulee toimittaa reklamaation tai
takuuvaatimuksen yhteydessä. Usein myös valokuvat
asiasta auttavat reklamaation ja takuu-asian nope-
assa hoitamisessa. Ota reklamoidusta tuotteesta tai
sen osasta/viasta 1-3 valokuvaa ja näytä niitä
ostopaikassa reklamaation tekemisen yhteydessä.
TAKUU JA TAKUUASIOIDEN KÄSITTELY
18

Ongelma Mahdolliset syyt Korjaustoimenpide
Poltin ei syty tulitikulla tai
sytyttimellä
Polttimet eivät tuota
tarpeeksi lämpöä
Poltin syttyy tulitikull
mutta ei sytyttimellä
Liiaksi kuumuutta
ylenmääräinen
leimahtelu
VIANHAKUOPAS
šPolttimen reiät ovat tukossa
Liekki savuavan
keltainen
Liekki sammuilee
Liekkejä
tehonsäätökonsolin alla
Paineensäädin surisee
Epätäydellinen liekki
Liekki liian iso
šPuhdista tukokset
šAvaa kaasupullon venttiili
šPuhdista tai vaihda poltin
šVaihda kaasupullo täyteen
š Oikaise kaasuletku
š Puhdista tukokset
šPuhdista polttimet
šVarmista, että poltin ja sytytin on
asennettu oikein
šVaihda sytytin
šSiirrä grilli tuulensuojaan
šVaihda kaasupullo
šPoista rasvaisia kohtia ja pienennä
polttimen tehoa
šPuhdista rasvankeräin ja polttimet
šSijoita kypsennettävä tuote oikein
šSulje kaasupullon hana välittömästi,
anna grillin jäähtyä ja puhdista polttimet
šOhimenevä tilanne johtuu korkeasta
ulkoilman lämpötilasta ja täydestä
kaasupullosta
šPuhdista tai vaihda grillin poltin ja
tarkista tukokset polttimissa
šVaihda 29-30 mbar paineensäädin
šTarkista, että liitokset ovat tiukalla
šTarkista paineensäätimen kiinnitys
kaasupulloon
šVarmista grillin polttimien kiinnitys
venttiileihin
šKaasupullon venttiili on kiinni
šPolttimen ilmanotto on tukossa
šKaasua on liian vähän tai se on
lopussa
šKaasun tulo on estynyt
šPolttimen ilmanottoaukot tukossa
šHuono johtimen kontakti
šVoimakas tuuli
šRunsasrasvainen ruoka
šTukoksia polttimissa
šTämä ei ole vika tai vaaratilanne
šLiekki palaa voimakkaan keltaisena
šKäytössä on väärä paineensäädin
šKova tuuli
šRasvanpoisto grillistä on estynyt
šKypsennettävä tuote ei ole oikeassa
kohdassa
šKaasu on vähissä
šRikkinäinen sytytin tai elektrodi
šEpäkuntoinen sytytin
šHuono maadoitus
šPaljon suolaa tai marinadia
polttimien pinnalla
š Paineensäädin ei ole kunnolla kiinni
kaasupullossa
šPolttimet eivät ole kunnolla kiinni
grillin venttiileissä
19

SE
ALLMÄN RÅD
GRILLENS VARNING OCH
SÄKERHETSRÅD
Läs alla anvisningar och råd innan ni börjar använda
produkten. Följ noggrant montage, tändnings, skötsel
och användnings råden. Du bör läsa och förstå speci-
ellt alla säkerhets samt varningsråd före gasgrillen
tas i bruk. Behandla alla metalldelar försiktigt så att
du inte skadar dig. Följ råden steg för steg.
1. Grillen är endast för utomhusbruk.
2. Stäng alltid gasflaskans ventil då grillen inte är i
bruk.
3. Följ monteringsanvisningar, försummelse kan
orsaka problem.
4. Grillen är het under användning, låt inte barn eller
djur vistas i närheten av grillen.
5. Om ni känner gaslukt, stäng av gastillförseln ome-
delbart. Släck alla öppna lågor. Öppna grillhuven och
kontrollera möjliga läckage. Gör läckagetest enligt
instruktioner. Spänn.
TEKNISK INFORMATION
DENNA GRILL ÄR ENDAST FÖR UTOMHUSBRUK.
PÅ GRUND AV GRILLENS ÖPPNA KONSTRUKTION
KAN DET RINNA ELLER STÄNKA FETT
UTANFÖR GRILLEN, ANVÄND INTE GRILLEN
NÄRA ELLER PÅ KÄNSLIGA YTOR.
DET KAN RINNA FETT ELLER MARINAD UNDER
GRILLEN, PÅ NEDRE HYLLAN ELLER I SKÅPET,
FETT KAN OCKSÅ STÄNKA RUNT GRILLEN.
FETTRINNING OCH STÄNK ÄR NORMALT OCH DE
HÖR INTE TILL GARANTIN.
GRILLEN ÄR CE-MÄRKT OCH DEN ÄR GILTIG
ENLIGT I KRAFT VARANDE FÖRFATTNING.
MINSTA OMÄNDRING AV GRILLENS KONSTRUK-
TION ÄR FÖRBJUDET. UNDER UPPMONTERING
AV GRILLEN FÅR INTE NÅGON DEL LÄMNAS
BORT INTE HELLER LÄGGAS TILL.
alla kopplingar när läckagetesten utförs. Om du inte hittar
fel, kontakta auktoriserad service eller importören.
6. Flytta aldrig grillen då den är i användning eller när den
är het.
7. Håll alltid det närliggande området runt grillen rent och
fritt från lättantändligt material så som bensin eller andra
lättantändliga vätskor, papper eller oljetrasor.
8. Använd aldrig tändstickor eller öppen låga när ni gör
läckagetesten.
9.
Använd inte grillen om där finns fel.
10. Lossa aldrig bort regulatorn när grillen är i bruk.
11. Lämna aldrig grillen oövervakad när den är i bruk.
12. Låt inte barn använda grillen.
13. Grillen måste rengöras regelbundet. Skada inte brän-
narens öppningar eller reglagens munstycken.
14. Kom ihåg att denna grill är lämpad endast för utom-
husbruk och får inte användas på båtar eller i husvagnar.
Minimiavstånd 1 m, helst mera, till närmaste närliggande
del bakom och vid sidan av grillen.
15. Vi rekommenderar underhåll och rengöring av grillen
minst en gång per år. Om du inte är säker hur man gör
det, kontakta auktoriserad service.
16. Endast auktoriserad service får justera grillens ventiler
och munstycken.
17. Gör läckagetesten alltid när du tar grillen i bruk efter
lång förvarning t.ex. på våren, eller när du har bytt
gasflaskan.
18. Grillens lock måste alltid vara öppet när du tänder
den.
19. Använd alltid skyddshandskar vid hantering av grillens
varma delar och långskaftade grillnings tillbehör.
20. Förbered för möjlig olycka så att du vet var försthjälp-
medel och släckare är och att du vet hur man använder
dem.
20
2531-19
PINID. KOD:2531CU-0080
Model: Cello Ready 4i (A410)
Eekt, huvudbrännare: 17,2 kW
Eekt, sidobrännare: 14 kW
Gasförbruk: 1252 g/h
Brukstryck: 30 mbar
Bränsle: Flytgas
Klass: I3B/P
Munstycke, huvudbrännare: 0,93 mm
Munstycke, sidobrännare: 0,89 mm
Sivu latautuu ...
Sivu latautuu ...
Sivu latautuu ...
Sivu latautuu ...
Sivu latautuu ...
Sivu latautuu ...
Sivu latautuu ...
Sivu latautuu ...
Sivu latautuu ...
Sivu latautuu ...
Sivu latautuu ...
Sivu latautuu ...
Sivu latautuu ...
Sivu latautuu ...
Sivu latautuu ...
Sivu latautuu ...
Sivu latautuu ...
Sivu latautuu ...
Sivu latautuu ...
Sivu latautuu ...
Sivu latautuu ...
Sivu latautuu ...
Sivu latautuu ...
Sivu latautuu ...
Sivu latautuu ...
Sivu latautuu ...
Sivu latautuu ...
Sivu latautuu ...
Sivu latautuu ...
Sivu latautuu ...
Sivu latautuu ...
Sivu latautuu ...
Sivu latautuu ...
Sivu latautuu ...
-
 1
1
-
 2
2
-
 3
3
-
 4
4
-
 5
5
-
 6
6
-
 7
7
-
 8
8
-
 9
9
-
 10
10
-
 11
11
-
 12
12
-
 13
13
-
 14
14
-
 15
15
-
 16
16
-
 17
17
-
 18
18
-
 19
19
-
 20
20
-
 21
21
-
 22
22
-
 23
23
-
 24
24
-
 25
25
-
 26
26
-
 27
27
-
 28
28
-
 29
29
-
 30
30
-
 31
31
-
 32
32
-
 33
33
-
 34
34
-
 35
35
-
 36
36
-
 37
37
-
 38
38
-
 39
39
-
 40
40
-
 41
41
-
 42
42
-
 43
43
-
 44
44
-
 45
45
-
 46
46
-
 47
47
-
 48
48
-
 49
49
-
 50
50
-
 51
51
-
 52
52
-
 53
53
-
 54
54


Cello Classic 3i Ohjekirja
- Tyyppi
- Ohjekirja
muilla kielillä
- English: Cello Classic 3i User manual
- eesti: Cello Classic 3i Kasutusjuhend
- svenska: Cello Classic 3i Användarmanual
Liittyvät paperit
Muut asiakirjat
-
Grandhall Xenon 3FD1S Assembly Instruction Manual
-
Patton PATRON 740-0549 Omistajan opas
-
-
Rusta SAREK Ohjekirja
-
Grandhall Elite-GTI4RSB-S Operating Instructions Manual
-
Grand Hall Elite-GTI4RSB-S Käyttö ohjeet
-
Barbecook Stella 3221 Omistajan opas
-
-
GCE RESUS REG Käyttö ohjeet
-
 Itm ITMG12 Ohjekirja
